Welcome to the World of Homemade Bread Bowls!
If you’re looking to elevate your dining experience, homemade bread bowls are a fabulous choice! Ideal for serving everything from creamy soups to hearty stews, these edible bowls combine flavor and fun, making any meal feel special. But why make them from scratch, you ask? For starters, they are fresher, fluffier, and can be personalized to suit your taste, all while being surprisingly easy to whip up.
The Art of Making Homemade Bread Bowls
Creating your own bread bowls might sound intimidating, but I promise it’s simpler than you think. Plus, there’s something immensely satisfying about pulling a warm, golden bowl from the oven, ready to be filled with your favorite dish.
Here’s a Quick Overview:
-
Ingredients you’ll need:
-
4 cups all-purpose flour
-
1 tablespoon sugar
-
1 tablespoon salt
-
2 teaspoons instant yeast
-
1 ½ cups warm water (110°F)
-
2 tablespoons olive oil
-
Basic Steps:
- Mix: Combine the flour, sugar, salt, and yeast in a large bowl. Slowly add warm water and olive oil.
- Knead: Turn onto a floured surface and knead for about 10 minutes until smooth.
- Rise: Let your dough rise until doubled in size, about 1 hour.
- Shape: Divide the dough into equal portions and shape them into bowls.
- Bake: Place them in the oven at 375°F for 20–25 minutes until golden brown.
For detailed instructions, you can check out resources like King Arthur Baking for tips on perfecting your dough.
Why You’ll Love Homemade Bread Bowls
Not only do they taste divine, but they also add an innovative twist to your favorite dishes. Imagine a luscious chicken and wild rice soup steaming in a fluffy bread bowl. It’s comfort food at its finest! And what’s more, you can customize the flavors by adding herbs, spices, or even cheese to the dough.
So, what’s stopping you? Grab your apron, invite a friend over, and make it an enjoyable night of baking. You’ll not only impress your palate but create a delightful culinary experience that’s perfect for upcoming gatherings or a cozy night in.
Ready to tackle this delicious project? Let’s get baking!
Ingredients for Homemade Bread Bowls
Essential Ingredients for Your Bread Bowls
Creating homemade bread bowls is an exciting culinary adventure! To start, you’ll need a few key ingredients:
- Flour: About 4 cups of all-purpose flour will provide the structure.
- Yeast: Active dry yeast (2 ¼ teaspoons) is essential for that perfect rise.
- Water: Warm water (around 110°F) helps activate the yeast for optimal fermentation.
- Salt: 1 tablespoon adds flavor and regulates yeast activity.
- Sugar: A tablespoon of sugar acts as food for the yeast, promoting a lovely rise.
- Olive Oil: A couple of tablespoons for moisture and richness.
With these ingredients in hand, you’re ready to embark on your baking journey.
Special Equipment Needed
To make your homemade bread bowls come to life, a few essentials will make the process smoother:
- Mixing Bowl: A large bowl for combining ingredients.
- Oven: A conventional oven will give you the best crust.
- Baking Sheet: To shape and bake your bread bowls.
- Kitchen Towel: For covering dough while it rises, retaining moisture.
Once you gather these tools, you’ll be well on your way to enjoying your delicious creations! Interested in other baking tips? Check out King Arthur Baking for extensive resources.
Step-by-Step Preparation of Homemade Bread Bowls
There’s something truly special about enjoying a warm soup or stew served in a homemade bread bowl. Not only is it visually appealing, but the flavor of freshly baked bread enhances any dish it holds. Let’s turn that loaf into a welcoming embrace for your favorite fare with this step-by-step guide.
Activate the yeast
The magic begins with yeast. Activating it is essential for rising and texture.
- In a small bowl, warm 1 cup of water to about 110°F (43°C) — think warm bath, not boiling.
- Sprinkle 2 teaspoons of sugar and stir.
- Add 2 ½ teaspoons of active dry yeast and let the mixture sit for about 5-10 minutes until it’s frothy. This indicates your yeast is alive and ready to work its wonders. If it doesn’t foam, it’s likely that your yeast is expired—better to check than to end up with flat bread bowls!
Mix the wet and dry ingredients
Now that the yeast is activated, it’s time to bring everything together.
- In a large mixing bowl, combine 3 cups of all-purpose flour, 2 teaspoons of salt, and any seasonings you might like (garlic powder and Italian herbs work beautifully).
- Create a well in the center and pour in your yeast mixture, followed by 2 tablespoons of melted butter and 1 cup of milk. Mix until it forms a shaggy dough. It’s okay if everything isn’t perfectly blended just yet; we’ll fix that next!
Knead the dough to perfection
Kneading is where the real magic happens.
- Turn the dough out onto a floured surface and knead for about 8-10 minutes. You want it to be smooth and elastic—don’t be afraid to put in some elbow grease!
- If it’s too sticky, sprinkle a little more flour as needed. The dough is ready when it springs back after a gentle poke. You could consider kneading to be a mini workout—just think of the tasty results!
Let the dough rise
Now, it’s time for our dough to take a nap and rise.
- Place your kneaded dough in a greased bowl, cover it with a clean kitchen towel or plastic wrap, and let it rise in a warm place for about 1 hour or until it doubles in size.
- If you’re unsure about finding the ideal rise spot, try preheating your oven to 200°F for just a minute, then turn it off and place the bowl inside—bingo!
Divide and shape the dough balls
Time to transform the dough into individual bowls.
- After the dough has risen, punch it down gently to release the air. Then, divide it into 4-6 equal pieces, depending on your desired bowl size.
- Shape each piece into a smooth ball by tucking the edges underneath. This helps create a nice surface on top.
Make the X incision and brush the egg wash
This step gives your homemade bread bowls character and helps them bake evenly.
- Using a sharp knife or kitchen blade, make a shallow X incision on the top of each ball. This allows steam to escape while baking.
- Whisk an egg with a splash of water to create an egg wash, then brush this mixture over the dough balls. This will give your bread bowls a beautiful golden crust.
Final rise before baking
Let’s give those dough balls a little more time to puff up.
- Cover them with the towel again and let them rise for an additional 30 minutes on a baking sheet lined with parchment paper.
Bake and cool the bread bowls
Finally, the grand finale!
- Preheat your oven to 375°F (190°C). Bake the dough for 20-25 minutes, or until they are golden brown and hollow-sounding when tapped on the bottom.
- Allow them to cool slightly before serving. You can gently pull out some insides to create a deeper “bowl” to hold your soup perfectly.
Homemade bread bowls are not just containers; they elevate your meal to something extraordinary. So, gather your ingredients, follow these steps, and enjoy the flavors of your culinary creation! Fresh bread bowls can hold delicious contents such as creamy tomato soup or cheesy broccoli chowder, offering a comforting, filling experience.
Ready to dig in? You deserve it!
Variations on Homemade Bread Bowls
When it comes to homemade bread bowls, the possibilities are nearly endless. Here are a few delightful variations that cater to different tastes and dietary preferences, ensuring everyone can enjoy this comforting treat.
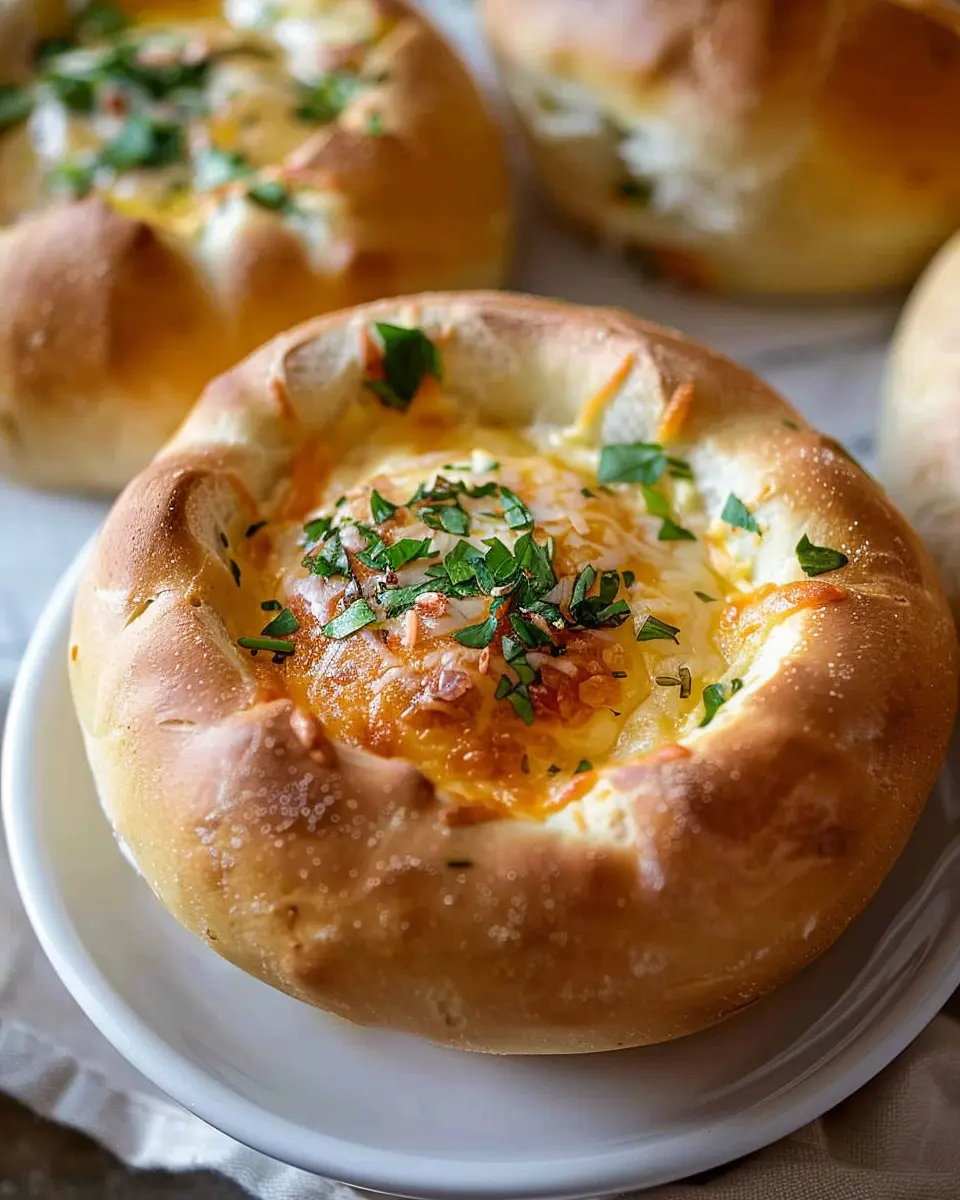
Cheesy Herb Bread Bowls
Imagine sinking your spoon into a warm, cheesy herb bread bowl filled with creamy soup—heavenly, right? To whip up this version, simply fold in a blend of your favorite shredded cheeses (think mozzarella and cheddar) and a mix of dried herbs like thyme and rosemary into your dough. The result? A savory bowl that adds a decadent twist to your favorite soups. This recipe from The Kitchn offers some fantastic tips on infusing flavors.
Whole Wheat Bread Bowls
For a heartier alternative, try whole wheat bread bowls. Made from whole grain flour, these bowls not only provide more fiber but also a nutty taste that complements various fillings. Simply substitute half or all of the all-purpose flour with whole wheat flour. To keep the dough light, consider adding a touch of vital wheat gluten, which can enhance the texture and fluffiness. This option is not only healthier but also a great way to sneak in some whole grains.
Gluten-Free Bread Bowls
If you’re accommodating gluten sensitivities, don’t worry! Homemade bread bowls can still be part of your culinary repertoire. Use a gluten-free flour blend, which typically includes a mix of rice flour, tapioca starch, and potato flour. Just like any bread-making venture, keep an eye on your dough as gluten-free flours often behave differently. Adding ingredients like Xanthan gum can mimic the elasticity that gluten offers. The Ellie Krieger blog details some fantastic gluten-free alternatives that keep flavor at the forefront.
By experimenting with these variations, you can cater to a wide range of dietary preferences while still enjoying the beloved comfort of homemade bread bowls. Whether it’s a cozy night in or a gathering with friends, these bowls are a guaranteed hit!
Tips and Notes for Perfect Homemade Bread Bowls
Creating delightful homemade bread bowls can elevate your dining experience, and a few simple tips can make all the difference.
Choose the Right Flour
Using high-quality bread flour enhances the texture and structure of your bowls. It has a higher protein content than all-purpose flour, resulting in a chewier, more airy product. For a great resource on flour types, check out King Arthur Baking.
Knead with Care
Kneading your dough is crucial! Aim for about 10 minutes to develop gluten, making sure it becomes smooth and elastic. This step helps achieve that perfect, chewy crust.
Experiment with Temperature
The temperature of your water can affect yeast activation. Aim for warm water (about 110°F). If it’s too hot, it may kill the yeast; too cool, and it won’t activate enough.
Don’t Rush the Rise
Be patient with proofing. Allow your dough to double in size – it usually takes about an hour. A warm, draft-free environment is ideal; consider using your oven (turned off) with the light on for warmth.
Fill to Savor
When it’s time to serve, don’t skimp on the fillings! Savory soups, creamy chowders, or even a hearty chili pair perfectly with your homemade bread bowls. Explore different flavors and textures in your fillings—it’s all about personal taste!
Enjoy the Process
Remember, baking is as much about joy as it is about precision. Don’t stress if your first attempt isn’t perfect; think of it as a delicious experiment!
By following these tips, you’re well on your way to mastering the art of homemade bread bowls, and your friends and family will definitely appreciate your culinary efforts. Happy baking!

Serving Suggestions for Homemade Bread Bowls
Ideal Dishes to Pair with Bread Bowls
There’s something truly comforting about homemade bread bowls. They’re incredibly versatile and can be paired with various hearty dishes that make your meals memorable. Consider serving your bread bowls with:
- Creamy soups: Classics like tomato basil or chowders are perfect for filling up those cozy bread bowls.
- Chili: A spicy chili not only fills your bread bowl but also warms you up on chilly nights.
- Stews: Beef stew or vegetable stew can be a wholesome and satisfying choice.
Sometimes, it’s just nice to keep it simple and fill those bowls with creamy dip and fresh veggies. It adds a fresh twist to a casual gathering, as you can find more ideas on delicious dips here from Food Network.
Creative Filling Ideas
While soups and stews are fantastic, don’t hesitate to think outside the box! Here are some creative filling options for your homemade bread bowls:
- Turkey Bacon and Eggs: Perfect for breakfast or brunch, mix scrambled eggs with crispy turkey bacon and cheese.
- Chicken Ham Salad: Combine shredded chicken ham with a creamy dressing, lettuce, and other veggies for a fresh lunch option.
- Veggie Medley: Load up on roasted seasonal veggies and a sprinkle of feta for a delightful vegetarian option.
Using bread bowls adds whimsy to your meals, making any gathering fun and comforting. Why not try them for your next dinner party?
Time Breakdown for Homemade Bread Bowls
When you’re set to make homemade bread bowls, it’s essential to plan your time effectively. Here’s a quick breakdown to help you navigate the process seamlessly.
Preparation Time
Getting started takes about 15-20 minutes. This includes measuring and mixing your ingredients. Make sure to gather everything in advance for a smooth experience.
Rising Time
The dough needs to rise for 1 hour. This is the magic time where it becomes fluffy and airy. You can use this time to prep your favorite soup or filling!
Baking Time
Bake your homemade bread bowls for 25-30 minutes until they are golden brown and deliciously fragrant. Keep an eye on them; the aroma alone will make you want to dig in early!
Total Time
All in all, your venture into homemade bread bowls will take about 2 hours. It’s well worth it for that fresh-baked taste! Enjoy the process and the delightful results.
For more tips on mastering bread recipes, check out King Arthur Baking. Your bread-making journey starts here!
Nutritional Facts for Homemade Bread Bowls
When you indulge in homemade bread bowls, it’s good to know what you’re enjoying. Here’s a quick look at their nutritional profile:
Calories per serving
A typical serving of homemade bread bowls contains around 200–250 calories. This makes them a satisfying yet manageable choice for lunch or dinner, especially when filled with your favorite soup or salad.
Carbohydrates and protein content
These delightful bowls pack about 40 grams of carbohydrates, providing a great energy source. They also contain around 6–8 grams of protein, making them a balanced option when paired with protein-rich fillings like turkey bacon or chicken ham.
Key nutrients
Homemade bread bowls also contribute significant nutrients, including dietary fiber, iron, and B vitamins. Fiber is vital for digestive health, while iron supports overall energy levels. For more in-depth information about bread’s nutritional benefits, you can check out resources from the Whole Grains Council.
Enjoying homemade bread bowls can be a tasty way to fuel your day while customizing them to fit your health goals!
FAQs About Homemade Bread Bowls
Can I make bread bowls in advance?
Absolutely! You can prepare your homemade bread bowls ahead of time. Once baked, let them cool completely, then store them in an airtight container at room temperature for up to two days. Alternatively, you can freeze the bowls. Wrap them tightly in plastic wrap and then place them in a freezer bag. They can be frozen for up to three months! Just remember to thaw them thoroughly before using.
How do I store leftover bread bowls?
If you find yourself with leftover homemade bread bowls, don’t worry—they can easily be kept fresh. Store them in an airtight container at room temperature for up to two days. For longer storage, opt for the freezer method mentioned earlier. To refresh them, pop them in the oven for a few minutes to restore that lovely crust.
What can I fill my bread bowls with?
The options are practically endless when it comes to filling your homemade bread bowls! Here are some delicious ideas:
- Soups: Think classic tomato, creamy potato, or hearty chili.
- Salads: A refreshing Greek salad would be a hit!
- Dips: Try guacamole or a savory spinach dip.
- Casseroles: Mix cooked chicken ham or turkey bacon with veggies and cheese for a hearty meal.
Are homemade bread bowls healthy?
Making homemade bread bowls can be a delightful healthy option, especially when you choose wholesome ingredients. By controlling what goes in, you can make them with whole wheat flour or even gluten-free flour alternatives, making them a better fit for your dietary preferences. Plus, the fillings you choose can lean healthy—opt for fresh veggies, lean proteins, and avoid heavy cheeses to keep things light.
For more ideas, check out Healthline’s nutrition section on balanced meals. Making homemade bread bowls not only impresses at gatherings but also tickles your taste buds!
Conclusion on Homemade Bread Bowls
In summary, homemade bread bowls are not just a delightful way to serve your favorite soups and stews; they’re also a fun and creative culinary project. Imagine the aroma filling your home as you bake these golden, crispy delights. Whether you’re using them for a warm chowder or a hearty chili accompanied by Turkey Bacon or Chicken Ham, they add an extra layer of comfort to any meal.
Making these bread bowls can be a bonding experience with friends or family, fostering a sense of togetherness in the kitchen. Overall, they’re versatile, delicious, and worth every moment spent crafting them. Plus, leftovers are fab for lunch the next day! If you’re curious about baking techniques, check out this helpful guide from King Arthur Baking for more inspiration!
Print
Homemade Bread Bowls: Easy, Delicious Comfort Food for All
Enjoy the delightful experience of serving soup in a warm, freshly baked bread bowl.
- Total Time: 1 hour 45 minutes
- Yield: 6 bread bowls 1x
Ingredients
- 4 cups all-purpose flour
- 1 tablespoon sugar
- 2 teaspoons salt
- 2 1/4 teaspoons active dry yeast
- 1 1/2 cups warm water
- 2 tablespoons olive oil
Instructions
- In a large bowl, mix warm water with yeast and sugar. Let stand for 5 minutes.
- Add olive oil, salt, and gradually mix in flour until a dough forms.
- Knead the dough on a floured surface for about 10 minutes until smooth.
- Place the dough in a greased bowl, cover, and let rise until doubled in size, about 1 hour.
- Punch down the dough and divide into smaller portions.
- Shape each portion into a bowl shape and let rise for another 30 minutes.
- Bake in a preheated oven at 375°F (190°C) for 25-30 minutes or until golden brown.
Notes
- For a crustier bread, place a pan of water in the oven while baking.
- Prep Time: 15 minutes
- Cook Time: 30 minutes
- Category: Bread
- Method: Baking
- Cuisine: American
- Diet: Vegetarian
Nutrition
- Serving Size: 1 bread bowl
- Calories: 320
- Sugar: 1g
- Sodium: 400mg
- Fat: 5g
- Saturated Fat: 0.5g
- Unsaturated Fat: 3g
- Trans Fat: 0g
- Carbohydrates: 63g
- Fiber: 2g
- Protein: 10g
- Cholesterol: 0mg
Keywords: Homemade Bread Bowls