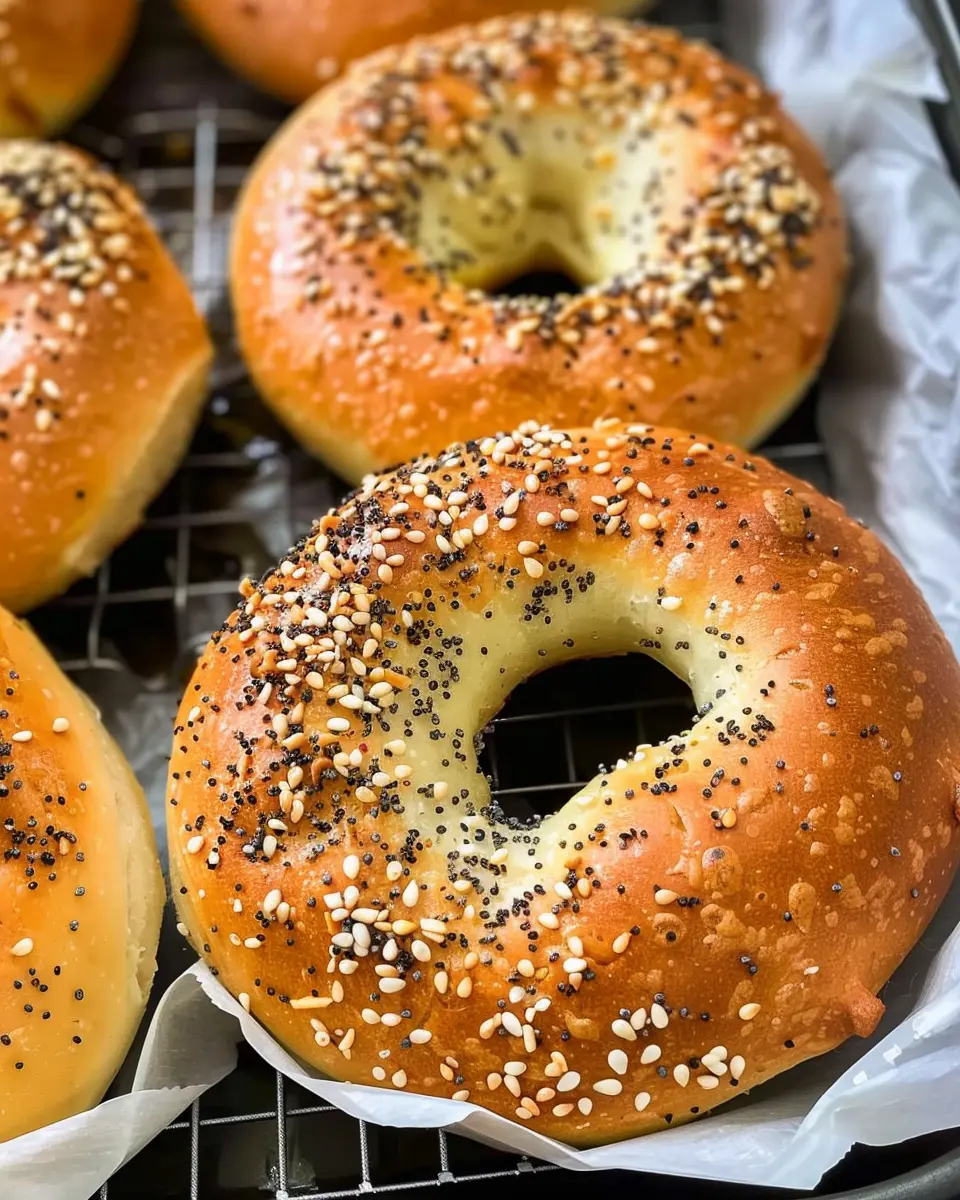
Introduction to the World’s Easiest Yeast Bread
When it comes to homemade bread, many people feel it’s too time-consuming, especially for those of us balancing a busy career and a packed schedule. Fortunately, the world’s easiest yeast bread recipe proves that you don’t have to be a skilled baker to create delicious, fresh bread at home. Imagine the aroma of warm, freshly baked bread greeting you after a long day—there’s something undeniably comforting about that!
Why Homemade Bread is a Game Changer for Busy Professionals
Let’s face it: in the midst of meetings, deadlines, and social commitments, finding time to cook can be a real challenge. But deciding to make your own bread? That can be a game changer for your entire week! Here are some reasons why:
-
Freshness at Your Fingertips: There’s nothing like biting into a slice of bread that’s still warm from the oven. By making your own, you control the freshness, ensuring it tastes infinitely better than store-bought alternatives.
-
Healthy Ingredients: You get to choose what goes into your bread. Ditch the preservatives often found in commercial options. You can make a wholesome loaf using organic flour and minimal, simple ingredients. Health experts often highlight the benefits of reducing processed foods in our diets; making bread at home can help you achieve that.
-
Cost-Effectiveness: Baking bread at home can save you money. A single homemade loaf can often use less than what you would spend on an artisanal loaf from a bakery. Plus, it gives you the satisfaction of creating something from scratch.
-
Stress Relief: There’s something incredibly therapeutic about kneading dough and watching it rise. This simple process can provide a much-needed break from the daily grind.
If you’re curious about more benefits of baking and how it promotes mental health, check out this insightful article from the American Psychological Association.
Ultimately, the world’s easiest yeast bread recipe equips you with a simple yet rewarding way to make your home life a little sweeter, even on the busiest of days. By incorporating fresh bread into your meals, you’ll not only impress your taste buds, but you might even bring your loved ones around the kitchen table more often—because nothing brings people together quite like freshly baked bread!
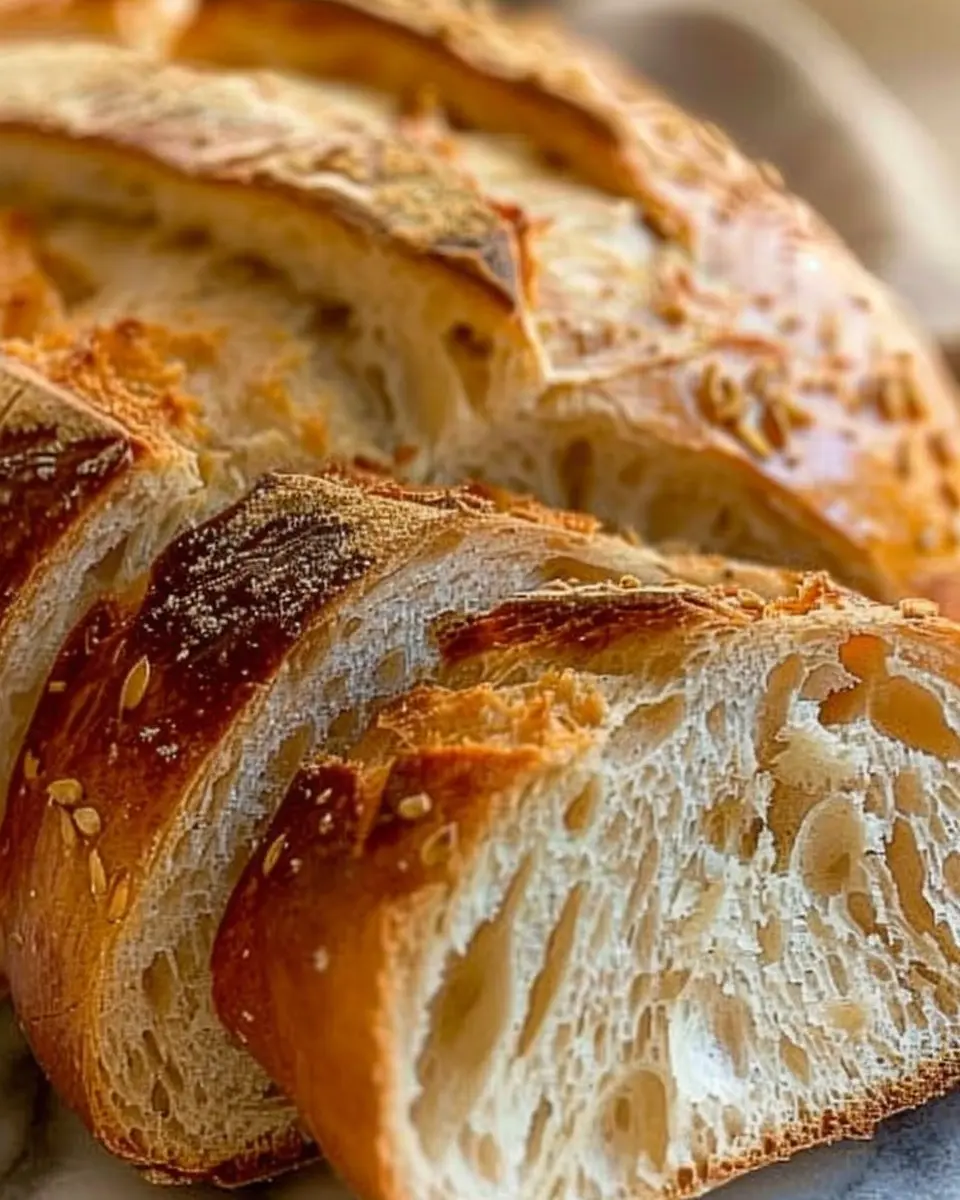
Ingredients for the World’s Easiest Yeast Bread
When it comes to baking, simplicity is key. This world’s easiest yeast bread requires just a handful of essential ingredients. Here’s what you’ll need to get started:
Essential ingredients for perfect yeast bread
- All-purpose flour: The backbone of your bread; it provides structure and elasticity.
- Warm water: About 110°F (43°C) is ideal to activate the yeast without killing it.
- Instant yeast: This is your secret weapon for effortless rising and dough development.
- Salt: Essential for flavor and helps regulate yeast activity.
- Sugar: A little sweetness fuels the yeast and adds a subtle flavor.
These ingredients come together to create a dough that’s easy to handle and full of flavor!
Optional ingredients for flavor enhancements
Looking to elevate your world’s easiest yeast bread? Consider adding:
- Olive oil: For a richer texture and flavor.
- Herbs and spices: Think rosemary, garlic powder, or even chili flakes for a kick.
- Cheese: A handful of shredded cheese can turn your loaf into a savory delight.
Baking can be as simple or as creative as you want it to be, and these optional ingredients are a great way to personalize your bread. Want to explore more about baking with yeast? Check out this informative guide on baking yeast bread. Happy baking!
Preparing the World’s Easiest Yeast Bread
When it comes to baking, there’s something incredibly satisfying about making your own bread at home. It’s not only healthier but fills your kitchen with the most delightful aroma. If you’ve ever thought about trying your hand at bread-making but felt daunted by the process, worry no more! In this guide, we’ll break down how to prepare the world’s easiest yeast bread into five simple steps that even novice bakers can follow with ease.
Mixing the Dough
Start by gathering your ingredients: 4 cups of all-purpose flour, 1 packet of instant yeast (about 2 ¼ teaspoons), 1 ½ teaspoons of salt, and 2 cups of warm water (around 110°F). In a large mixing bowl, combine the dry ingredients—flour, yeast, and salt. Stir these together until evenly mixed.
Then, slowly pour in the warm water while mixing with a wooden spoon or spatula. You want to create a sticky, shaggy dough that comes together. Don’t worry about perfecting it here; this dough is meant to be a little messy. After a few minutes, cover the bowl with a damp kitchen towel or plastic wrap to lock in moisture.
Pro Tip:
If you want to dive deeper into yeast and how it works in baking, check out The Science of Yeast.
Letting the Dough Rise
This step is all about patience, but it’s also where the magic happens. Allow the dough to rise in a warm, draft-free spot for about 1 to 2 hours, or until it doubles in size. This process is crucial, as it develops flavor and creates that airy texture that’s so characteristic of good bread.
While you wait, think about the toppings you might want. For those who enjoy savory flavors, how about some turkey bacon or chicken ham? You can even prep some garlic and herbs to knead into the dough later!
Shaping the Dough
After your dough has risen, it’s time to shape it. Turn the dough out onto a floured surface—don’t be afraid to use some flour; it helps prevent sticking. Lightly punch down the dough to release the air. With floured hands, shape it into a round or oval loaf; it’s all about your personal preference here! Once shaped, place it on a greased or parchment-lined baking sheet and give it another 30-minutes to rise.
Personal Note:
I remember the first time I shaped dough—my hands felt like they were in a workout! It wasn’t perfect, but who cares? The beauty of homemade bread is that each loaf has its own character.
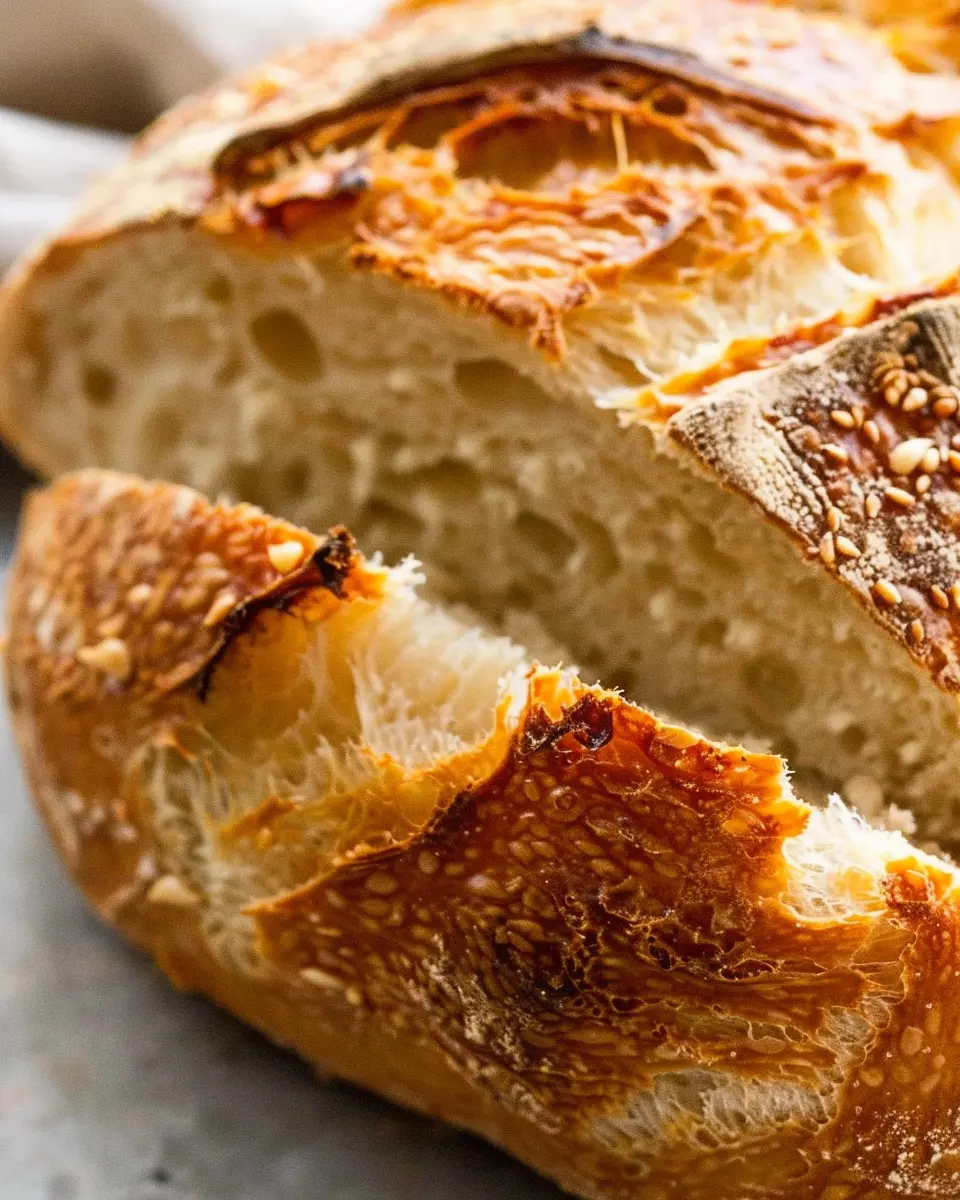
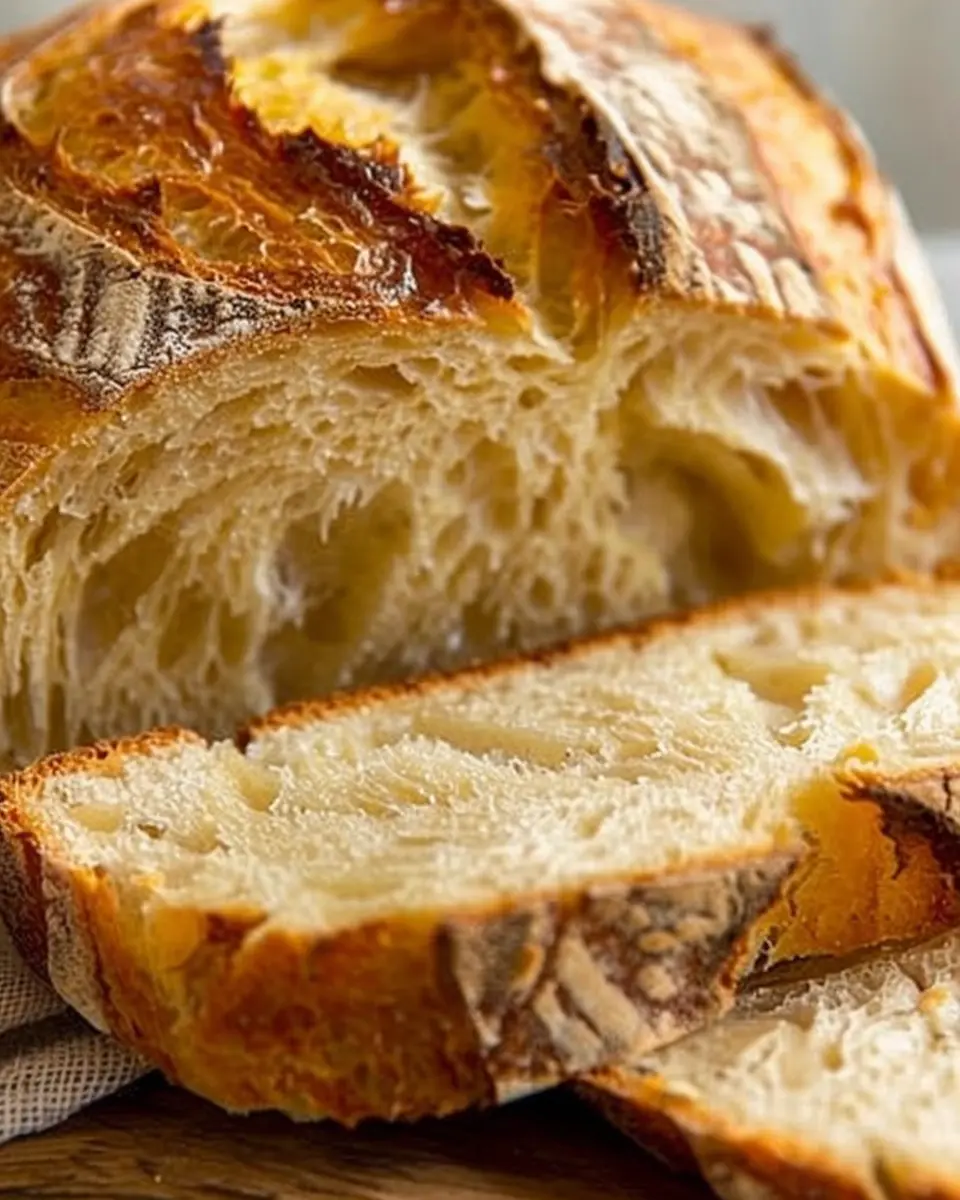
Preheating and Preparing for Baking
While your dough is doing its second rise, it’s time to preheat your oven to 450°F. Place a Dutch oven or baking stone inside to heat up as well. This step helps create a crusty exterior, mimicking traditional baking methods.
Consider also preparing a small bowl of water to create steam when you place the bread in the oven. This can be easily done by pouring water into a separate oven-safe dish while the bread bakes.
Baking the Bread
Once your dough has risen again, carefully cut a few slashes in the top with a sharp knife—this allows the loaf to expand while baking. Now, gently place the dough in your preheated Dutch oven (or onto the baking stone). If you’ve set up the steam, quickly pour that water into the hot dish in the oven.
Bake for about 30-35 minutes, or until the crust is golden-brown and gives a hollow sound when tapped. Your world’s easiest yeast bread is now complete!
After baking, let it cool on a wire rack. Slice, slather with butter, or top with your favorite spreads—enjoy the fruits of your labor! With just a few simple steps, you’ve created something truly special that will not only impress your friends but also elevate your culinary skills to new heights!
Ready to get started? Grab your ingredients and let’s bake some bread!
Variations on the World’s Easiest Yeast Bread
Cheese Bread Variation
If you’re a cheese lover like me, you’re going to adore this variation! Elevating the world’s easiest yeast bread into a cheesy delight is a breeze. Just mix in about one cup of your favorite shredded cheese—think mozzarella, cheddar, or even a sharp gouda—right into the dough. For added flavor, sprinkle in some garlic powder and dried herbs like oregano or basil. Bake it until golden brown, and you’ll have a cheesy, aromatic treat that pairs perfectly with soups or as a tasty snack on its own.
Wholemeal Option for a Nutty Flavor
Looking for a healthier twist? Try a wholemeal variation of the world’s easiest yeast bread. Substituting part of the all-purpose flour with wholemeal flour not only gives your bread a nutty flavor but also raises its nutritional profile. Aim for a 50/50 ratio to keep that delightful rise while enjoying the benefits of whole grains. This version is fantastic for sandwiches or as a side for salads. Remember, the key is to keep that yeast active, so make sure your water is warm but not scalding!
For even more inspiration, check out these great recipes showcasing unique flavors and ingredients that can elevate your baking game. Experimenting in the kitchen can lead to some fantastic discoveries, so don’t hesitate to get creative with your additions! Whether you’re hosting friends or just treating yourself, these variations will make your world’s easiest yeast bread a delightful centerpiece.
Cooking tips and notes for the World’s Easiest Yeast Bread
Tips for achieving the best crust
For that coveted crispy crust on your world’s easiest yeast bread, consider these helpful techniques:
- Preheat your oven: This is crucial! Starting with a hot oven helps create steam, enhancing crust formation. Ideally, preheat to 450°F (232°C).
- Use a baking vessel: If you have a Dutch oven, use it! The enclosed space traps steam, resulting in a beautifully crisp exterior.
- Brush with water: Right before baking, a light brush of water on the dough can help achieve that golden crust as it bakes.
Notes on yeast and hydration levels
Understanding yeast and hydration is key to your bread’s texture and flavor. Always check the expiration date on your yeast to ensure freshness. For a softer loaf, aim for a hydration level of around 70% – that means for every 100g of flour, you’ll want about 70g of water.
For more detailed insights on yeast and baking tips, check out the King Arthur Baking Company. Their resources are invaluable! Remember, baking is both art and science, so don’t hesitate to experiment with flour or water ratios to find your ideal loaf.
Serving suggestions for the World’s Easiest Yeast Bread
Pairing ideas for your fresh bread
When you pull that golden loaf of world’s easiest yeast bread from the oven, you want to serve it up right! Here are some delightful pairing ideas to enhance your bread experience:
-
Soups and stews: A warm bowl of tomato basil soup or a hearty vegetable stew makes for a comforting meal. Imagine dipping a slice of your fresh bread into the robust flavors—heavenly!
-
Salads: A fresh garden salad drizzled with a light vinaigrette pairs beautifully, adding a crisp contrast to the fluffy bread texture.
-
Breakfast classics: Serve slices with scrambled eggs and turkey bacon for a lovely brunch spread that’s nutritious and satisfying.
Tips for serving with various spreads
The world’s easiest yeast bread is a fantastic canvas for your favorite spreads. Here are some ideas:
-
Homemade jams: Spread strawberry or blueberry jam for a sweet breakfast treat.
-
Savory delights: Cream cheese topped with chives or garlic butter can elevate your lunch sandwich.
-
Healthy options: Consider avocado with a sprinkle of salt and pepper for a trendy, nutritious topping.
No matter how you choose to serve, your freshly baked bread is sure to be the star of the table! For more bread ideas, check out King Arthur Baking for inspiration.
Time Breakdown for the World’s Easiest Yeast Bread
When you’re ready to whip up the world’s easiest yeast bread, you’ll appreciate how quickly it can come together. Here’s a quick guide to timing, so you know what to expect.
Preparation Time
Expect to spend about 10–15 minutes mixing your ingredients. This process is straightforward: just combine the flour, salt, yeast, and water until you achieve a sticky consistency. Minimal effort leads to maximum flavor!
Rising Time
Let your dough rise for approximately 1–2 hours, depending on your kitchen’s warmth. This is the moment when magic happens, allowing the dough to double in size. A great tip is to place it in a warm spot (like near the oven) for optimal rising.
Baking Time
Once risen, bake your bread for about 30 minutes. You’ll know it’s done when you hear that satisfying hollow sound when tapping the crust.
Total Time
In total, from prep to serving, you’ll need about 1.5–2.5 hours. With just a little patience, you’ll end up with an amazing loaf that’s perfect for any occasion!
Ready to bake? For more tips on perfecting your bread-making skills, check out resources from experts at The Kitchn and Serious Eats for additional inspiration!
Nutritional Facts for the World’s Easiest Yeast Bread
Calories per slice
Have you ever wondered how many calories you’re consuming with each slice of world’s easiest yeast bread? A single slice typically contains around 100-120 calories. This can make it a great option for breakfast or a light snack, especially when topped with your favorite spreads or accompaniments like avocado or turkey bacon.
Overview of macronutrients
When it comes to macronutrients, this delectable bread offers a balanced profile. Each slice contains approximately:
- Carbohydrates: 20-22 grams – a primary source of energy.
- Protein: 3-4 grams – ideal for muscle repair and growth.
- Fat: 1.5-3 grams – depending on the ingredients used, a low-fat option if you skip excess oils.
Considering these values, you can feel great about including this world’s easiest yeast bread in your diet. For more insights on bread nutrition, check out resources from the American Heart Association or Harvard Health. Enjoy the indulgence without guilt!
FAQs about the World’s Easiest Yeast Bread
Can I refrigerate the dough?
Absolutely! If life gets busy or you want to plan ahead, refrigerating the dough is a great option. Just wrap it tightly in plastic wrap or place it in an airtight container. The cold temperature will slow down the fermentation process, allowing you to use it within a week. Simply bring it back to room temperature for about 30 minutes before baking, and you’ll be set to enjoy a fresh loaf of the world’s easiest yeast bread.
What’s the best way to store leftover bread?
To keep your delicious bread fresh, store it at room temperature in a paper bag or wrapped in a clean kitchen towel. Avoid plastic bags, as they can trap moisture and make the crust soggy. If you have more bread than you can eat within a few days, consider slicing it and freezing the pieces. This way, you can toast or reheat it whenever the bread craving strikes! For optimal freezing, wrap each slice in foil or parchment, then place them in a freezer bag—this can extend its life for up to three months.
Can I use whole wheat flour?
Yes, you can definitely experiment with whole wheat flour! However, keep in mind that using 100% whole wheat flour may result in a denser loaf. If you prefer a lighter texture, try substituting half of the all-purpose flour with whole wheat flour. This will give you that lovely nutty flavor while still allowing the bread to maintain its soft texture. For more tips on flour substitutions, check out resources from reputable culinary sites like King Arthur Baking or America’s Test Kitchen.
With these FAQs, you’re now better equipped to savor your experience with the world’s easiest yeast bread, whether you’re a novice or a seasoned pro! Happy baking!
Conclusion on the World’s Easiest Yeast Bread
Homemade bread is more than just a culinary achievement; it’s a source of warmth and comfort that fills the kitchen with delightful aromas. This world’s easiest yeast bread recipe invites you into the magical world of bread-making, where a few simple ingredients transform into golden loaves. Imagine slicing into a freshly baked loaf, the steam rising, and the crust crackling beneath your fingers—pure bliss! Whether you’re surprising friends with your newfound baking prowess or just enjoying a cozy night in, this bread will elevate any moment. So grab your apron and embrace the joy of creating something truly special. For more inspiration, check out resources like King Arthur Baking or The Bread Lab to explore endless possibilities in home baking.
Print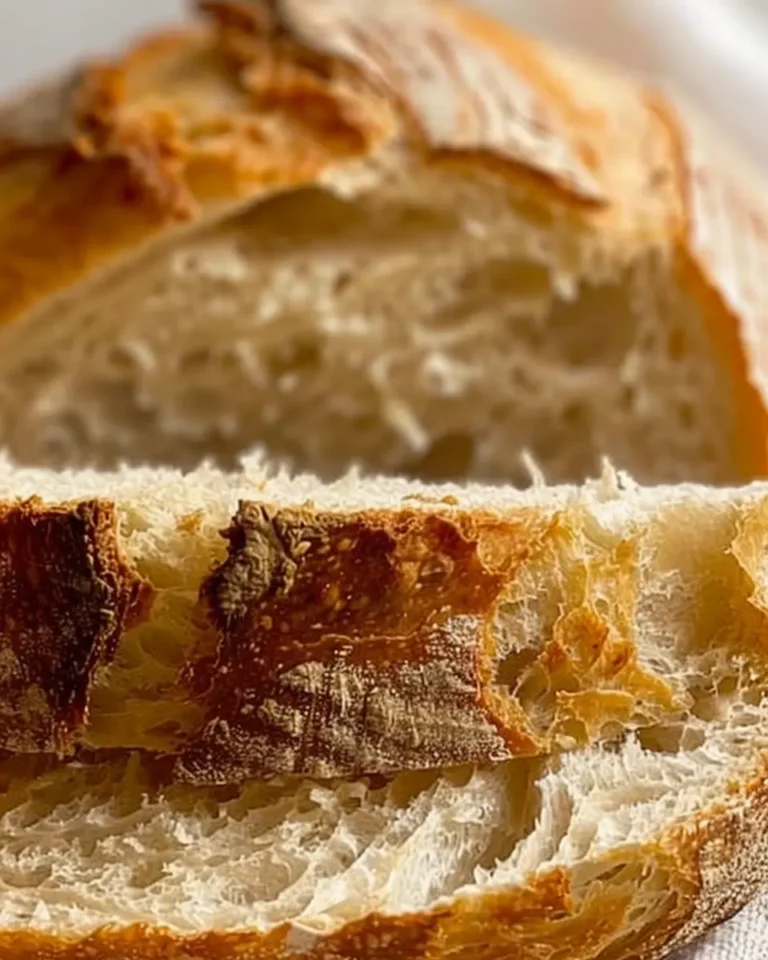
World’s Easiest Yeast Bread Recipe for Homemade Happiness
This recipe will guide you to create the easiest yeast bread at home, ensuring happiness with every loaf.
- Total Time: 1 hour 45 minutes
- Yield: 1 loaf 1x
Ingredients
- 3 cups all-purpose flour
- 1 tablespoon instant yeast
- 1 tablespoon sugar
- 1 teaspoon salt
- 1.5 cups warm water
Instructions
- In a large bowl, mix the flour, yeast, sugar, and salt.
- Add the warm water and stir until combined.
- Cover the bowl and let the dough rise for 1 hour.
- Preheat the oven to 375°F (190°C).
- Shape the dough into a loaf and place it in a greased loaf pan.
- Bake for 30-35 minutes until golden brown.
- Cool the bread on a wire rack before slicing.
Notes
- This bread can be flavored with herbs or cheese for added taste.
- Adjust the baking time for your oven’s performance.
- Prep Time: 10 minutes
- Cook Time: 35 minutes
- Category: Bread
- Method: Baking
- Cuisine: Homemade
- Diet: Vegetarian
Nutrition
- Serving Size: 1 slice
- Calories: 120
- Sugar: 1g
- Sodium: 180mg
- Fat: 1g
- Saturated Fat: 0g
- Unsaturated Fat: 1g
- Trans Fat: 0g
- Carbohydrates: 24g
- Fiber: 1g
- Protein: 4g
- Cholesterol: 0mg
Keywords: World’s Easiest Yeast Bread recipe