Introduction to Protein Cheesecake
When it comes to satisfying your sweet tooth without compromising your health goals, protein cheesecake emerges as a stellar option. Picture this: after a long day at the office, you find yourself craving a slice of something rich and indulgent. Enter protein cheesecake—a guilt-free dessert that is both delicious and nutritious.
Why Protein Cheesecake is a Game Changer for Young Professionals
As a young professional juggling work deadlines, social obligations, and the occasional Netflix binge, your time for meal prep may be limited. This is where protein cheesecake shines. Made with high-protein ingredients like Greek yogurt and protein powder, it not only satisfies your cravings but also helps you meet your daily protein intake goals—essential for muscle recovery and overall health.
According to a study from the American Journal of Clinical Nutrition, incorporating sufficient protein into your diet can enhance satiety and promote better weight management. So why not indulge in a dessert that tickles your taste buds while keeping you aligned with your health goals?
Another significant advantage of protein cheesecake is its versatility. You can customize the flavors based on your preferences. Love chocolate? Add cocoa powder. Prefer a fruity twist? Toss in some berries or a splash of lemon zest. The options are limitless!
For busy professionals, meal planning can sometimes fall by the wayside. Baking a protein cheesecake in advance means you can slice a piece or two for a quick snack or even breakfast on those hectic mornings. It’s a delicious treat that also doubles as a smart nutritional choice. Plus, it lasts for several days in the fridge, making it a great make-ahead option.
Not convinced yet? A well-balanced diet enriched with protein can improve focus and cognitive function—key factors for success in your career. So, the next time you find yourself reaching for that sugary snack, consider grabbing a slice of this delightful cheesecake instead. Not only will your body thank you, but you’ll also be treating yourself to something truly special.
Ready to whip up your own protein cheesecake and elevate your dessert game? Let’s get started!
Ingredients for Protein Cheesecake
Essential ingredients for a protein-packed delight
Crafting a protein cheesecake can be a fun and satisfying endeavor! Here are the essential ingredients you’ll need to bring this indulgent yet health-conscious dessert to life:
- Cream cheese: The cornerstone of any cheesecake, opt for a lower-fat version for extra creaminess without the guilt.
- Protein powder: This is where the magic happens! Choose your favorite flavor—vanilla or chocolate blends wonderfully.
- Greek yogurt: Adds creaminess and increases the protein content significantly.
- Sweetener: Whether you go for honey, maple syrup, or a sugar substitute, this step is crucial for achieving the perfect sweetness.
- Eggs: They act as the binding agent, adding fluffiness to your cheesecake.
- Vanilla extract: A splash brings warmth and depth to the flavor.
Optional ingredients for customization
Want to make your protein cheesecake uniquely yours? Consider these optional ingredients:
- Crust: Use crushed nuts, oats, or a gluten-free alternative for a healthier twist.
- Add-ins: Incorporate chocolate chips, fruit, or spices like cinnamon for an extra flavor punch.
- Toppings: Fresh berries, a dollop of Greek yogurt, or a drizzle of nut butter can elevate your dessert.
With these ingredients at your fingertips, you can easily create a delicious protein-packed treat that’s perfect for any occasion! For more tips on ingredient swaps and nutritional benefits, check out this article on healthy baking.
Preparing Protein Cheesecake
Creating a delicious, healthy protein cheesecake is a fantastic way to indulge your sweet tooth while remaining committed to your fitness goals. The process can be incredibly satisfying, and I’m here to walk you through each step, making it a breeze!
Set the scene by gathering your ingredients
Before you dive into recipe-making, it’s crucial to gather all your ingredients. Here’s what you’ll need for a delightful protein cheesecake:
-
For the crust:
-
1 cup almond flour (or your favorite nut flour)
-
2 tablespoons coconut oil or melted butter
-
2 tablespoons honey or sweetener of choice
-
A pinch of salt
-
For the filling:
-
16 ounces cream cheese, softened (you can use low-fat for a healthier twist)
-
1 cup Greek yogurt
-
½ cup protein powder (vanilla or chocolate flavored work beautifully)
-
½ cup honey or a sugar substitute
-
3 large eggs
-
1 teaspoon vanilla extract
-
Zest of one lemon (optional for a zestier taste)
Having everything ready makes the cooking process smoother and keeps you focused. Trust me, there’s nothing worse than interrupting your flow to hunt for that eggshell or bottle of coconut oil!
Prepare your crust—what works best?
Now that you’ve gathered your ingredients, let’s move on to the crust. A solid crust is essential for the perfect protein cheesecake. Here’s how to achieve that crunchy goodness:
- Preheat your oven to 350°F (175°C).
- In a mixing bowl, combine the almond flour, melted butter (or coconut oil), honey, and a pinch of salt.
- Mix until you get a crumbly texture that holds together when pressed. If it’s too dry, add a touch more melted butter or coconut oil.
- Press this mixture firmly into the bottom of a springform pan to create an even layer.
- Bake for about 10-12 minutes until it’s lightly golden brown. Allow it to cool while you prepare the filling.
Beat the filling ingredients to creamy perfection
With the crust cooling, it’s time to focus on the filling, which forms the heart of your protein cheesecake.
- In a large mixing bowl, beat the softened cream cheese until it’s smooth and creamy. Using an electric mixer at medium speed can make this process easier and faster.
- Gradually add Greek yogurt and protein powder, mixing until well combined. The goal here is a silky texture without any lumps.
- Add honey (or your preferred sweetener), eggs, vanilla extract, and lemon zest (if you’re using it). Beat again until everything is blended perfectly.
Expert tip: For an extra smooth filling, consider running the mixture through a fine mesh sieve. It might seem excessive, but it can make a significant difference!
Assemble your cheesecake in the springform pan
With the crust and the filling ready, it’s time to put them together!
- Pour the creamy filling onto your pre-baked crust. Use a spatula to ensure an even distribution.
- Tap the pan gently on the counter to release any air bubbles trapped in the filling.
This step is key for achieving that beautiful final product — nobody wants a protein cheesecake with unsightly cracks!
Bake and cool—ensuring no cracks!
Now, we’ll bake the cheesecake to exquisite perfection:
- Bake for about 50-60 minutes, or until the edges look set while the center still has a slight jiggle.
- Turn off the oven, crack the door open slightly, and let the cheesecake cool in the oven for about an hour. This gradual cooling process helps prevent cracks, keeping your cheesecake looking beautiful.
- Once cooled to room temperature, refrigerate for at least four hours — overnight is best for letting those flavors meld together.
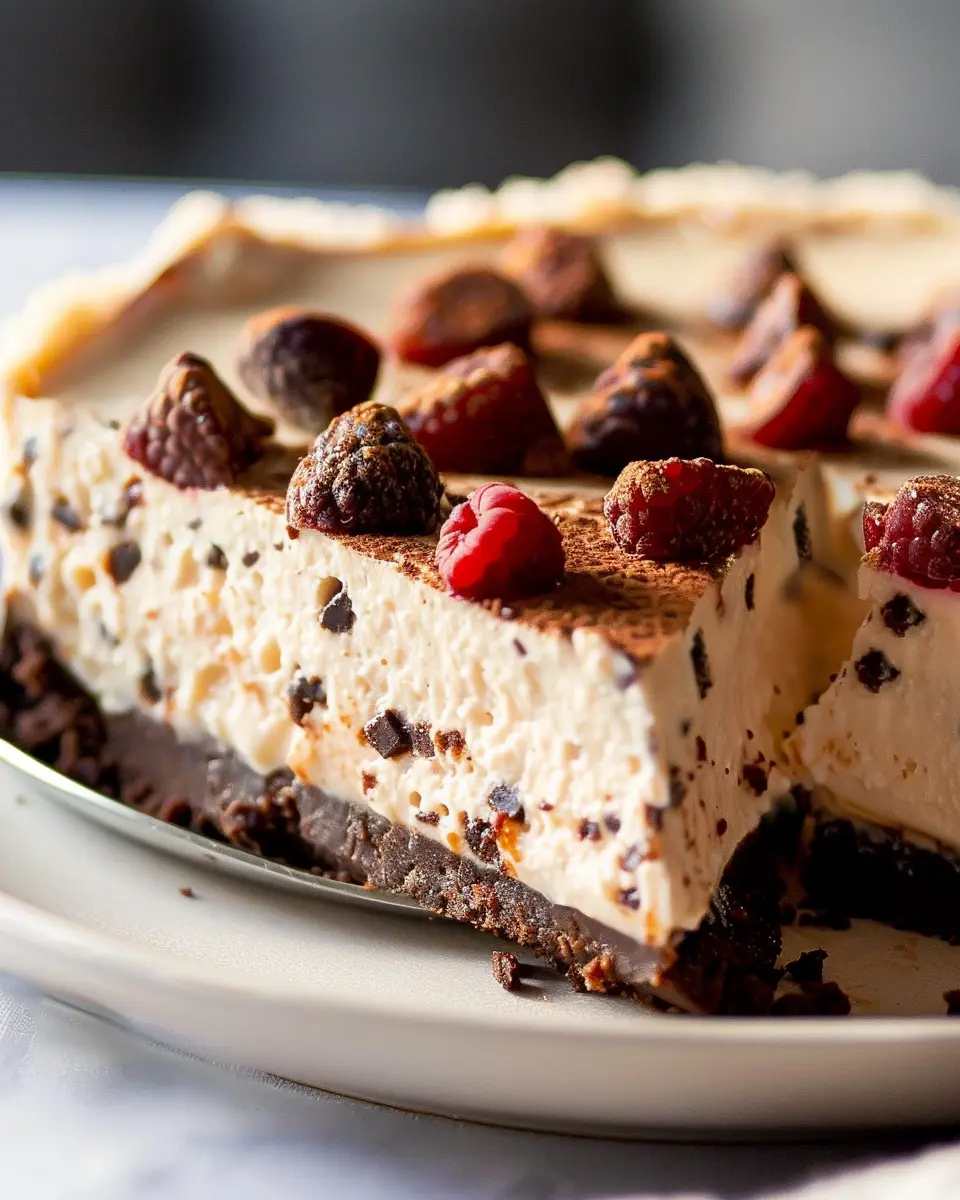
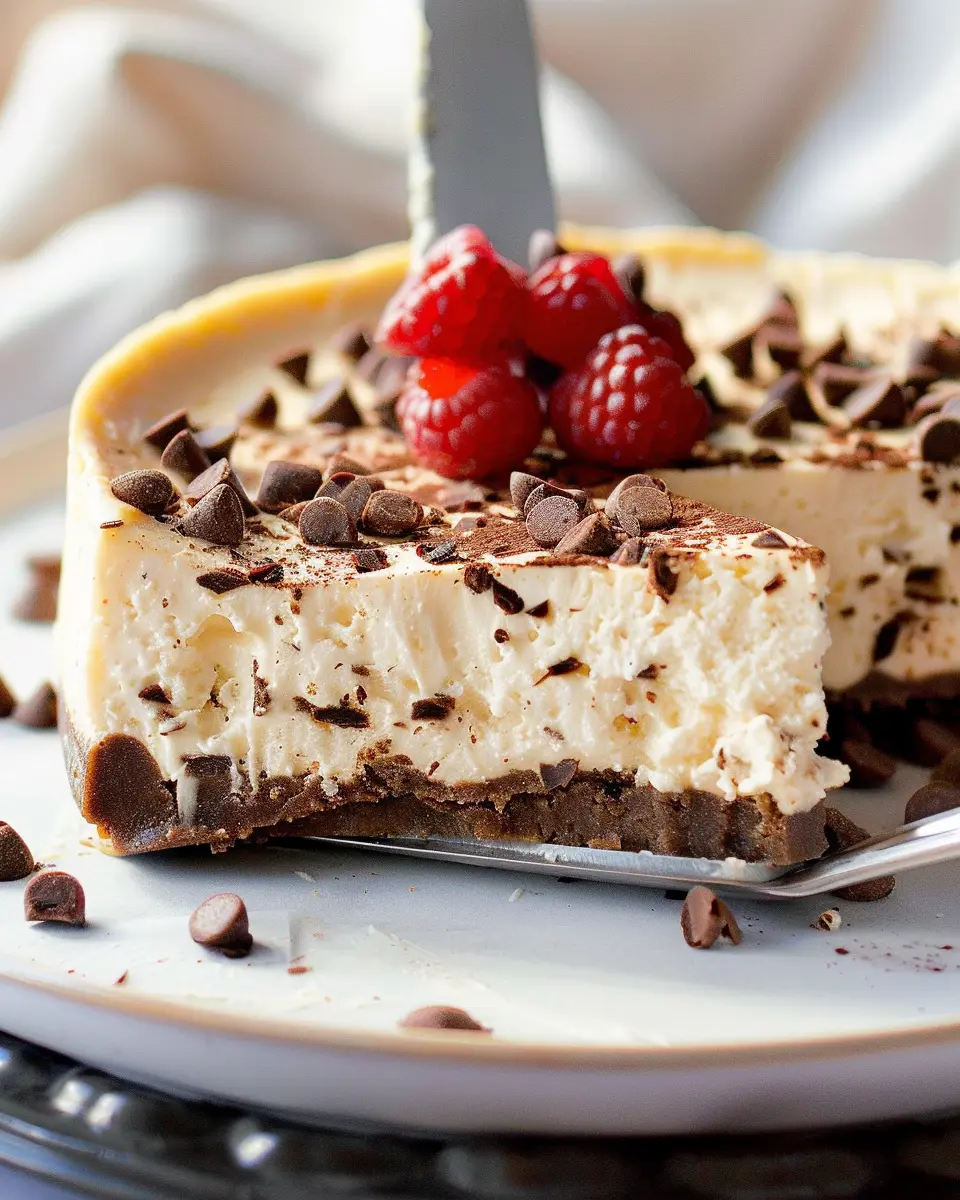
When you’re finally ready to serve your protein cheesecake, consider topping it with fresh berries or a drizzle of nut butter for a little extra flair. Enjoy this guilt-free treat knowing you made a nutritious dessert that packs a protein punch!
Variations on Protein Cheesecake
Who doesn’t love a delicious protein cheesecake? The great thing about this dessert is its versatility! Here are a few creative twists to make it even more delightful.
Chocolate Protein Cheesecake Twist
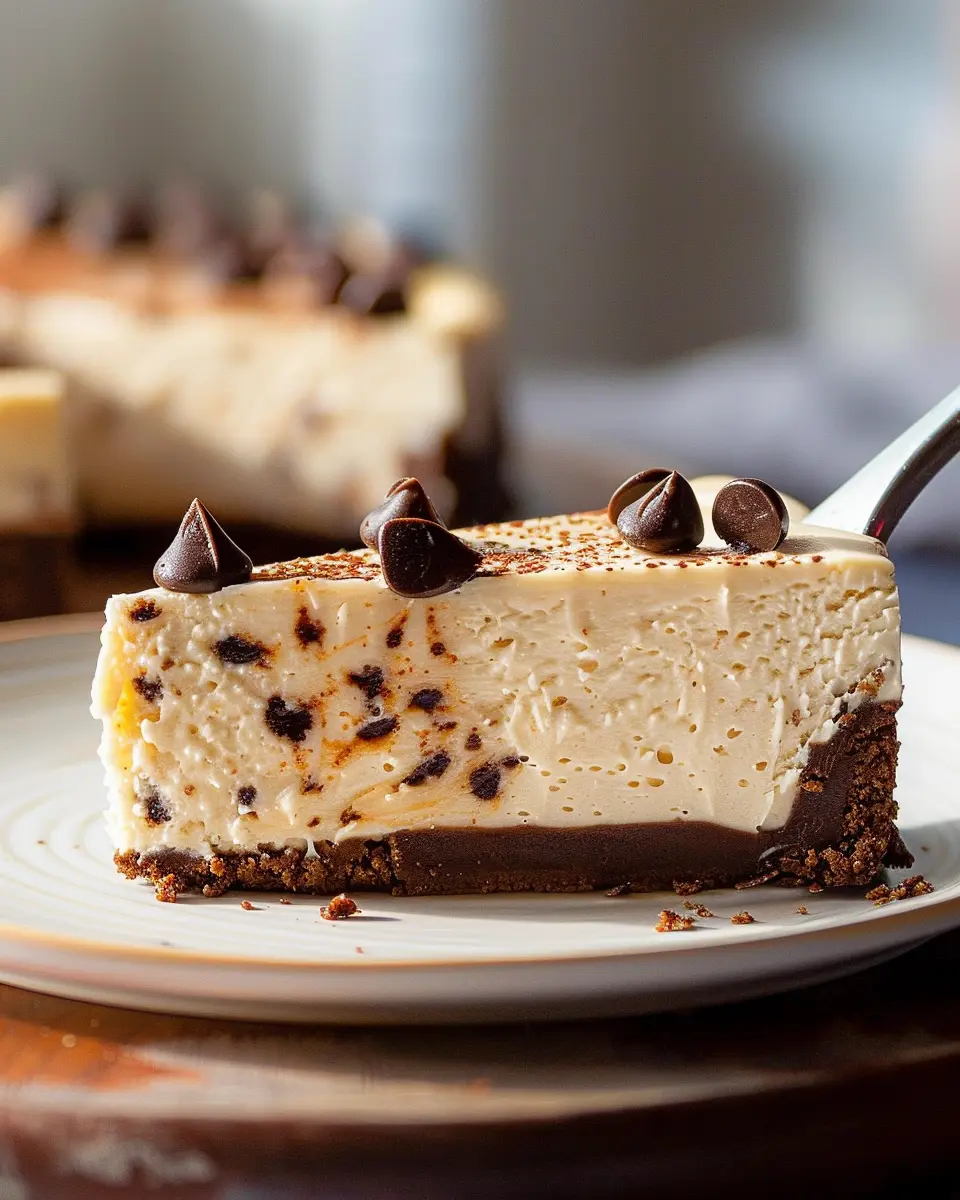
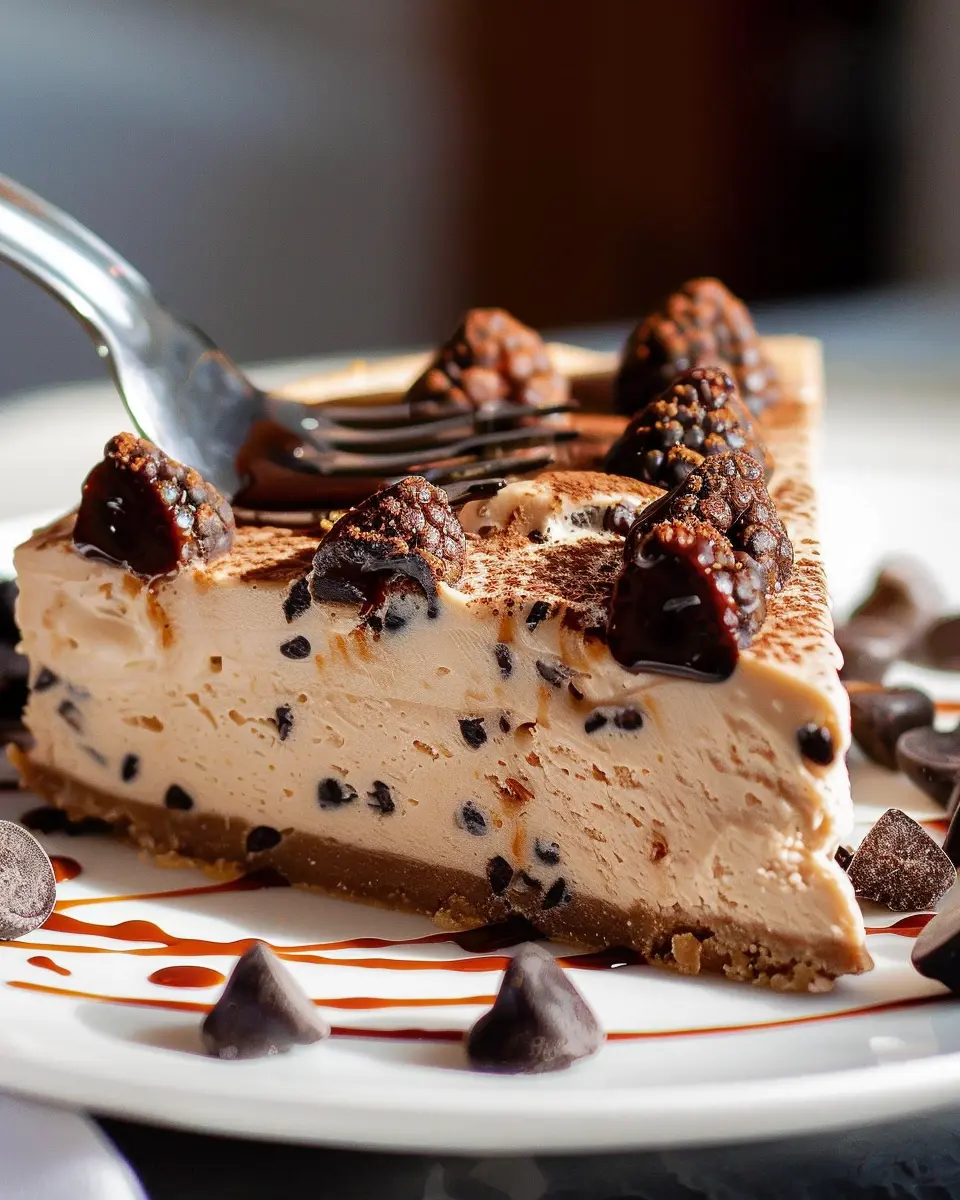
If you’re a chocolate lover, this variation will ignite your taste buds! Simply add cocoa powder or melted dark chocolate to your protein cheesecake batter. The rich flavor not only enhances the taste but also packs an extra protein punch. Top it with a drizzle of sugar-free chocolate syrup or even some crushed nuts for added texture. You can explore more chocolate-infused treats at Chocolate Lover’s Corner.
Seasonal Fruit Protein Cheesecake
Take advantage of seasonal fruits like strawberries, blueberries, or peaches to add a fresh burst of flavor to your protein cheesecake. Mashing or pureeing the fruit and swirling it into the batter creates a beautiful marbled effect. Don’t forget to sprinkle a few pieces on top for that visual appeal! You can check out seasonal fruit benefits at Healthline.
Vegan Protein Cheesecake Option
For those who prefer a plant-based diet, making a vegan protein cheesecake is not only possible but also delightful! Swap out the traditional cream cheese for a blend of cashews and coconut cream. Use a plant-based protein powder to keep it nutritious. You can sweeten it with maple syrup or agave for a deliciously creamy dessert that everyone will love.
With these variations, you surely won’t get bored of protein cheesecake. Enjoy experimenting, and who knows, you might just discover your new favorite dessert!
Cooking Tips and Notes for Protein Cheesecake
Best Practices for Avoiding Cracks
Cracks can be a common frustration when making a protein cheesecake, but a few simple practices can help you achieve that flawless finish. First, make sure to mix your batter gently; overmixing can introduce too much air. Baking at a lower temperature, around 325°F, can also help prevent cracks. Consider using a water bath to create a humid environment while baking, which helps keep the cheesecake moist. Lastly, avoid opening the oven door frequently, as sudden temperature changes can lead to cracking.
Storage Tips to Maintain Freshness
To keep your delicious protein cheesecake fresh for longer, it’s essential to store it properly. First, let it cool completely before refrigerating to avoid moisture buildup. Cover the cheesecake tightly with plastic wrap or aluminum foil. For best results, consume it within a week, but if you want to extend its life, consider freezing individual slices. Wrap each slice in plastic wrap and then in foil before placing them in an airtight container. When you’re ready to enjoy, simply thaw in the fridge overnight.
For more tips on cheesecake making, check out this informative article on Food Network.
Serving suggestions for Protein Cheesecake
Garnishing Ideas for Presentation
Elevate your protein cheesecake experience with some delightful garnishes. Think fresh berries – blueberries, raspberries, or strawberries can add a burst of color and a hint of natural sweetness. A drizzle of homemade fruit coulis or a sprinkle of crushed nuts can provide texture and elegance. Consider using a dollop of Greek yogurt or whipped coconut cream on top for added creaminess. You could even finely shred some dark chocolate or use mint leaves as a finishing touch. These simple additions will make your cheesecake not only delicious but visually appealing too.
Pairing with Healthy Sides or Drinks
To complement your protein cheesecake, consider serving it with healthy sides or drinks. A refreshing green smoothie or herbal tea can enhance the flavors and add a nutritious element to your dessert. Want something more substantial? A fresh fruit salad or a yogurt parfait with granola can make for a balanced meal. These pairings not only elevate the dessert but also maintain a healthy lifestyle.
For more inspiration on healthy combinations, check out sources like Healthline for tips on nutritious side dishes. Your taste buds and body will thank you!
Time Breakdown for Protein Cheesecake
Preparation Time
Making your delicious protein cheesecake starts with about 15 minutes of prep, where you’ll gather your ingredients and blend them to perfection. It’s a quick process, but make sure to measure out everything properly!
Cooking Time
Once your batter is mixed, it’s time to bake! The cooking time is typically around 25 to 35 minutes. This is where the magic happens as your cheesecake transforms in texture and flavor.
Total Time Breakdown
In total, you’re looking at approximately 50 minutes from start to finish. However, consider letting your cheesecake chill for a few hours or overnight for the best flavor development. Remember, good things come to those who wait!
Curious to learn more about the health benefits of incorporating protein in your diet? Check out the Protein Institute for insightful articles and studies that can guide your culinary adventures!
Nutritional Facts for Protein Cheesecake
Calories per slice
When indulging in a slice of protein cheesecake, you’ll be pleased to know it generally contains around 150-200 calories. This makes it a guilt-free dessert option that can fit seamlessly into your daily calorie goals.
Protein content per serving
What sets the protein cheesecake apart from regular cheesecake is its impressive protein content. Each slice typically boasts around 15-20 grams of protein, thanks to ingredients like Greek yogurt or protein powder. It’s a delicious way to meet your protein needs while satisfying your sweet tooth!
Variations in nutrition based on ingredients
The nutritional value of your protein cheesecake can fluctuate quite a bit depending on what you use. For example:
- Base: A crust made with almond flour instead of traditional graham crackers can lower carbs while providing healthy fats.
- Sweeteners: Using natural sweeteners like honey or maple syrup may enhance flavor but can add calories compared to stevia or erythritol.
- Toppings: Adding fresh fruit or nuts can boost vitamins and minerals but will increase the calorie count.
For more insights on customizing your desserts while keeping them nutritious, check out Healthline’s guide to maintaining healthy eating habits.
This friendly nutritional overview underscores why protein cheesecake can be a delightful addition to a balanced diet, perfect for enjoying on those busy weeknights or lazy weekends!
FAQs about Protein Cheesecake
Can I use a different sweetener without changing the taste?
Absolutely! If you’re looking to swap out sweeteners in your protein cheesecake recipe, you have plenty of options. Many people prefer stevia or monk fruit as natural alternatives. These can often provide a similar sweetness without those extra calories. Just keep in mind that the sweetness level can vary between different sweeteners. So, if you switch, start with half the recommended amount and adjust until it’s to your liking. For a more in-depth look at sweetener options, check out this guide on healthline.com.
How do I know when the cheesecake is done?
Great question! Determining when your protein cheesecake is perfectly baked can be tricky. Ideally, you want the edges to be set while the center slightly jiggles when you tap the pan. It’s like magic! An inserted toothpick should come out clean or with just a few crumbs attached. If it’s too wet, it needs a bit longer in the oven. Not to mention, letting it cool and refrigerating it for a few hours allows the flavors to meld beautifully.
Is it okay to freeze protein cheesecake?
Yes, freezing your protein cheesecake is a fantastic idea! If you find you have made more than you can eat within a week, wrap individual slices tightly in plastic wrap and then place them in an airtight container. They can last for up to three months in the freezer. When you’re ready to enjoy, just let it thaw in the refrigerator overnight. This way, you can savor that creamy goodness any time you like!
Conclusion on Protein Cheesecake
Recap of Benefits and Encouragement to Try the Recipe
In this fast-paced world, finding healthy yet delicious dessert options is essential. This protein cheesecake not only satisfies your sweet tooth but also provides a boost of essential nutrients. Packed with protein, it can keep you feeling fuller for longer, making it a fantastic option for on-the-go professionals. The blend of creamy textures and rich flavors ensures you won’t miss traditional cheesecakes.
I encourage you to whip up this delightful treat. Not only will your taste buds celebrate, but your body will thank you too. For a satisfying afternoon snack or a dessert after dinner, this recipe checks all the boxes. Dive into the world of healthier desserts today!
Print
Protein cheesecake: The best guilt-free dessert you’ll love
A delicious and guilt-free protein cheesecake that satisfies your sweet tooth without the extra calories.
- Total Time: 45 minutes
- Yield: 8 servings 1x
Ingredients
- 1 cup cottage cheese
- 1/2 cup Greek yogurt
- 2 scoops protein powder
- 1/4 cup honey or maple syrup
- 1 teaspoon vanilla extract
- 1/4 cup almond flour
- 2 eggs
Instructions
- Preheat the oven to 350°F (175°C).
- In a blender, combine cottage cheese, Greek yogurt, protein powder, honey, vanilla extract, almond flour, and eggs. Blend until smooth.
- Pour the mixture into a greased baking dish.
- Bake for 25-30 minutes or until set.
- Allow to cool before serving. Enjoy!
Notes
- Best stored in the refrigerator.
- Can be topped with fresh fruit or a drizzle of chocolate.
- Prep Time: 15 minutes
- Cook Time: 30 minutes
- Category: Dessert
- Method: Baking
- Cuisine: American
- Diet: High Protein
Nutrition
- Serving Size: 1 slice
- Calories: 200
- Sugar: 10g
- Sodium: 200mg
- Fat: 5g
- Saturated Fat: 2g
- Unsaturated Fat: 3g
- Trans Fat: 0g
- Carbohydrates: 25g
- Fiber: 2g
- Protein: 15g
- Cholesterol: 50mg
Keywords: Protein Cheesecake, guilt-free dessert, healthy dessert