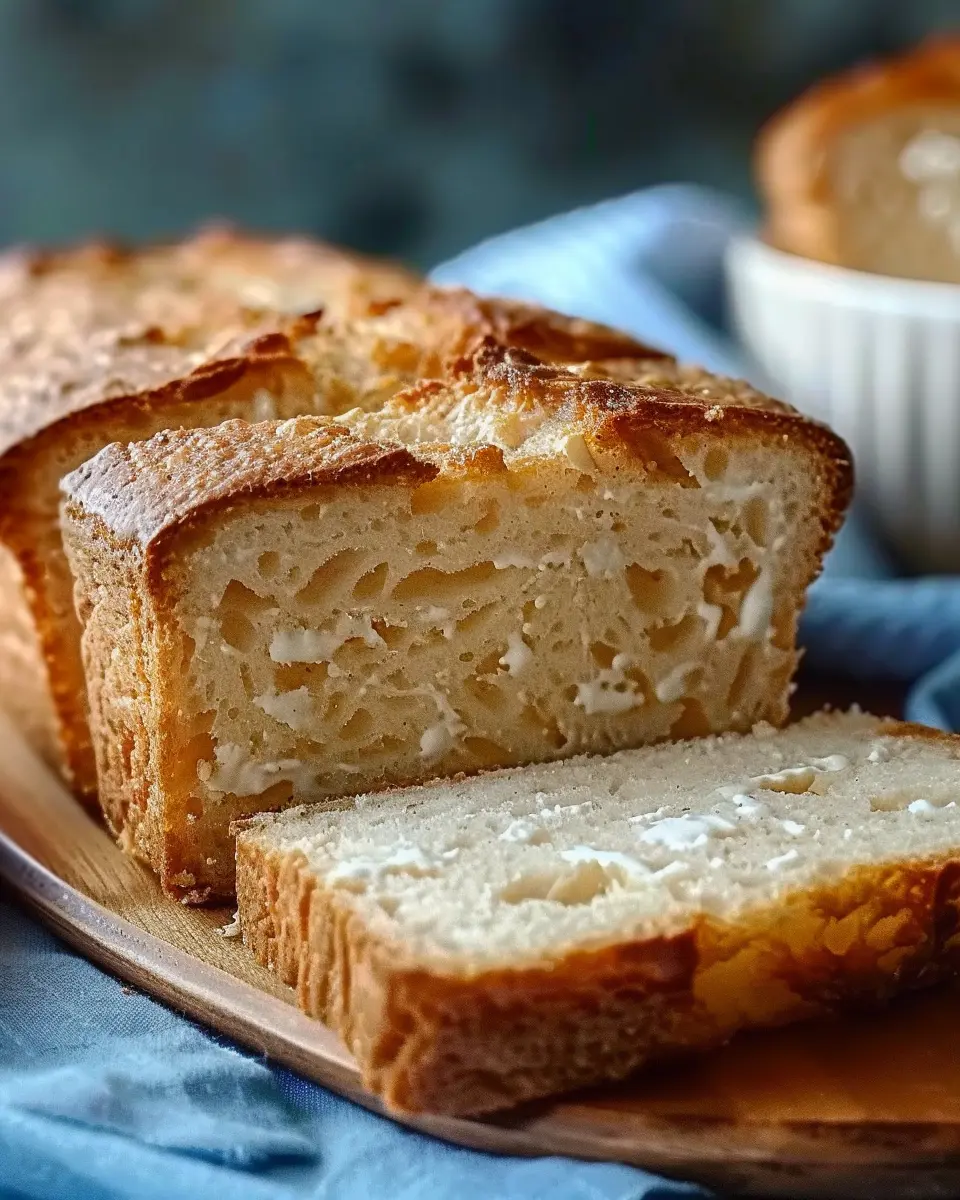
Introduction to No-Oven Turkish Bread
Have you ever felt the urge to bake bread but were deterred by the thought of turning on the oven, especially after a long day at work? If you’re a young professional juggling a busy schedule, no-oven Turkish bread is here to change the game. This delightful alternative allows you to enjoy the comforting taste of freshly baked bread without the hassle of traditional oven baking.
Why No-Oven Bread is a Game Changer for Young Professionals
In today’s fast-paced world, convenience is king. Many young professionals are seeking quick yet fulfilling culinary experiences that fit seamlessly into their busy lives. No-oven bread appeals to this desire by delivering a simple, quick, and satisfying cooking method. Using basic ingredients, you can whip up a delicious loaf in under 30 minutes—all on the stovetop!
Consider the benefits of making no-oven Turkish bread:
- Time Efficiency: No need to preheat the oven or wait for long rising times. The entire process is streamlined for your convenience.
- Versatility: This bread can easily absorb flavors, making it a fantastic companion for any meal. Whether you’re pairing it with a refreshing yogurt dip or enjoying it alongside your favorite stew, it adapts to your culinary needs.
- Fun & Creative: Experimenting with different toppings or fillings can turn a basic recipe into a personal masterpiece. It’s a fun way to unwind after a hectic week!
Moreover, this cooking method promotes mindfulness, as you focus on each step without the distractions of a busy oven. As food writer and chef Anthony Bourdain once noted, the act of cooking is often therapeutic. Making no-oven Turkish bread might just provide you that moment of zen you didn’t know you needed.
If you’re interested in learning more about the importance of cooking skills in personal development, check out this article by The Culinary Institute of America.
So, are you ready to step into your kitchen and impress your friends with this easy, no-oven delight? Let’s dive into the recipe and bring the warm, enticing smells of freshly baked bread into your home!

Ingredients for No-Oven Turkish Bread
Creating no-oven Turkish bread is all about simplicity and quality ingredients. Let’s break down what you’ll need to make this delicious, fluffy bazlama that’ll impress your friends and family!
Essential ingredients for the perfect bazlama
- Flour: Start with all-purpose flour; it provides the best texture.
- Yeast: Use active dry yeast for that perfect rise.
- Salt: Enhances flavor and supports yeast activity.
- Sugar: Just a pinch to help activate the yeast.
- Water: Warm water is essential for activating the yeast.
- Olive Oil: Adds richness and contributes to a softened crumb.
These ingredients come together effortlessly, making your no-oven Turkish bread an easy yet rewarding baking experience.
Optional toppings to elevate your bread
While the bread is fantastic on its own, you can add delightful toppings to customize your creation. Consider:
- Herbs: Fresh rosemary or thyme for an aromatic finish.
- Cheese: Feta or mozzarella will give it extra creaminess.
- Seeds: Sesame seeds or poppy seeds for a bit of crunch.
- Garlic: Minced garlic mixed with olive oil to brush over before cooking for a flavorful kick.
Feel free to experiment with toppings to find your perfect match! For more inspiration, check out this guide to baking with yeast. Your no-oven Turkish bread will surely be the star of your next meal!
Step-by-Step Preparation of No-Oven Turkish Bread
Creating a delectable loaf of no-oven Turkish bread right in your kitchen is a gratifying experience. Whether you’re planning a brunch, enjoying a cozy dinner, or simply feel like experimenting with bread-making, this guide will help you through every step. Grab your ingredients, and let’s get started!
Gather your ingredients and tools
Start by assembling everything you need. Here’s what to gather:
-
Ingredients:
-
2 cups all-purpose flour
-
1 teaspoon active dry yeast
-
1 teaspoon sugar
-
1 teaspoon salt
-
3/4 cup warm water (around 110°F or 43°C)
-
1 tablespoon olive oil (for the dough)
-
Extra olive oil (for cooking)
-
Tools:
-
a mixing bowl
-
a whisk or spoon for mixing
-
a clean kitchen towel
-
a non-stick skillet or frying pan
-
a spatula
-
measuring cups and spoons
Having everything prepped can make the process much smoother, allowing you to focus on the fun of bread-making!
Mix the wet ingredients
In a mixing bowl, start by activating your yeast. Combine the warm water, sugar, and active dry yeast. Let it sit for about 5-10 minutes until it bubbles up, indicating the yeast is alive and kicking. This step is crucial; it’s the foundation for the fluffy texture of your no-oven Turkish bread.
Once that’s done, add the olive oil to the mixture. This not only adds flavor but also enriches the dough’s texture, making it delightfully chewy.
Combine and knead the dough
In another bowl, mix the flour and salt. Gradually add the yeast mixture into the flour bowl, stirring until it forms a shaggy dough.
Now comes the fun part—kneading! Lightly flour your work surface, and knead the dough for about 8-10 minutes until it becomes smooth and elastic. You can use the heel of your hands to push the dough away from you, then fold it back over itself. This process helps develop the gluten, which is essential for that perfect bread texture.
Allow the dough to rise
After kneading, shape the dough into a ball and place it in a greased bowl, turning to coat. Cover it with a clean kitchen towel or plastic wrap and let it rise in a warm place for about an hour or until it doubles in size. This step is where the magic happens! The yeast will work its wonders, producing delightful air pockets that will give your bread its fluff.
Shape the bread rounds
Once your dough has risen, punch it down gently to release the air. Divide the dough into equal portions; typically, 4 to 6 pieces work well. Roll these into balls, then flatten them into disks about 1/2 inch thick, keeping them slightly thicker than traditional flatbreads. This thickness will ensure they cook evenly in the pan. If you want to create unique designs or patterns, feel free to get artistic with a fork!
Preheat the pan and cook the bread
Heat a non-stick skillet over medium heat and add a splash of olive oil to prevent sticking. Place your first disk of dough in the skillet. Cook each side for about 3-4 minutes until golden brown and puffy. Keep an eye on them, and don’t be afraid to adjust the heat as needed—the key to no-oven Turkish bread is to achieve that lovely golden crust without burning it!
Finish and store
Once all your rounds are cooked, let them cool slightly on a wire rack. These delicious, fluffy breads can be served immediately with dips, salads, or as a side to any meal. If you have leftovers, store them in an airtight container at room temperature for up to two days. For longer storage, consider freezing them—you’ll have convenient bread ready anytime!
Making no-oven Turkish bread is not only simple but also incredibly rewarding. Enjoy this delightful bread fresh from your stovetop, and don’t hesitate to experiment with toppings or dips. Share your creations and experiences with friends or explore more ethnic bread recipes to fuel your culinary journey!

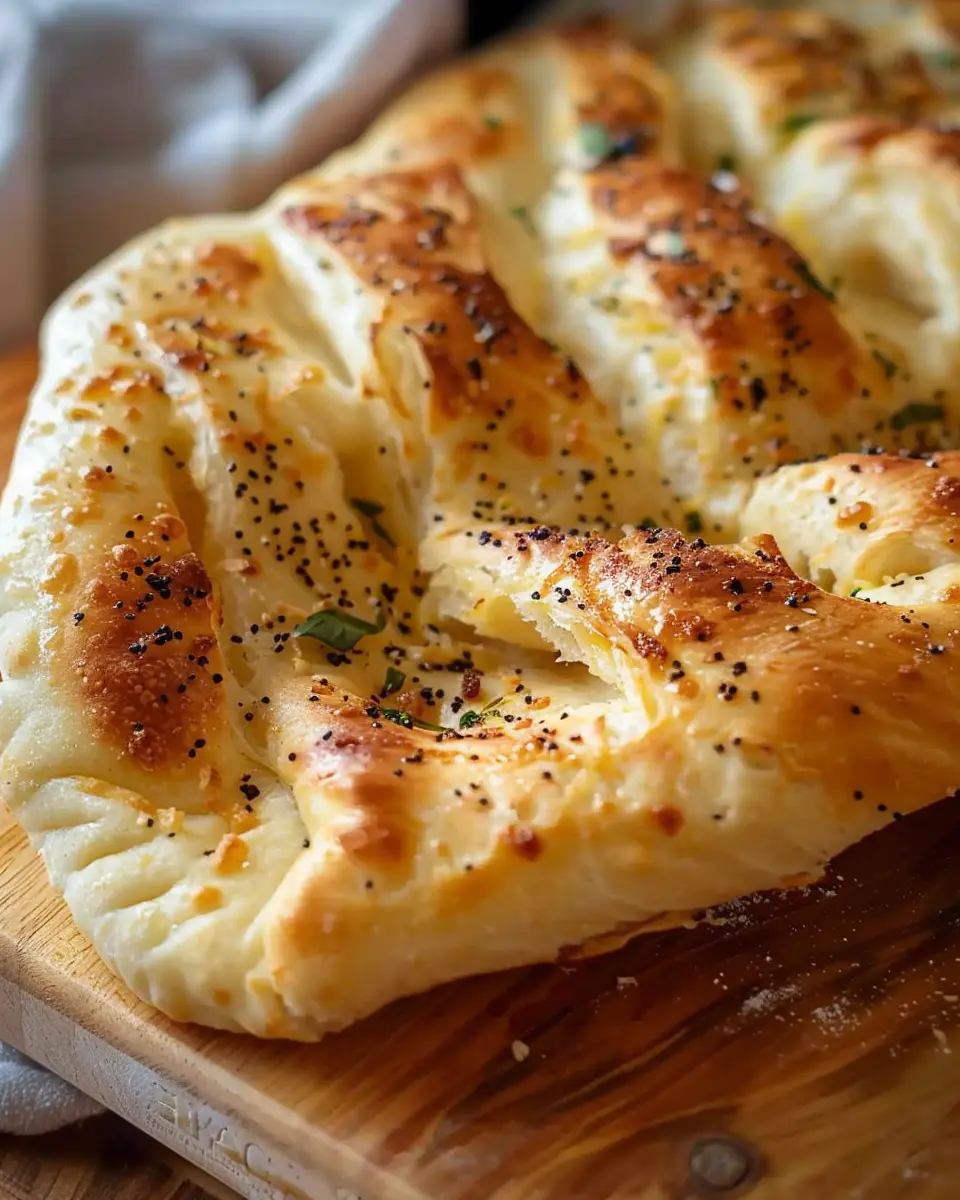
Variations on No-Oven Turkish Bread
Herb-infused bazlama
If you’re craving a twist on traditional no-oven Turkish bread, why not try making herb-infused bazlama? This delightful variation adds a burst of flavor and fragrance that’s perfect for summer picnics or casual dinners. Just mix in finely chopped herbs like rosemary, thyme, or dill into your dough. Not only do these herbs elevate the taste, but they also create a stunning visual appeal.
- Tip: For an extra dimension of flavor, consider adding crushed garlic to the mix. You can find more on balancing flavors with herbs on this culinary site.
Whole grain version of Turkish bread
Looking for a healthier alternative? A whole grain version of your no-oven Turkish bread is a fabulous option! By substituting half or all of the white flour for whole wheat flour, you add fiber, protein, and a deeper nutty flavor to your bread. This variation is ideal if you’re trying to incorporate more whole grains into your diet.
- Instructions:
- Start by mixing whole wheat flour with a spoonful of vital wheat gluten for better texture.
- Keep an eye on the hydration; you might need a touch more water since whole-grain flour absorbs more moisture.
Have you ever thought about the benefits of whole grains? They not only keep you full longer but also lower the risk of heart disease, as noted by the Harvard School of Public Health.
Feel free to experiment with these variations, and don’t hesitate to share your favorite twists with friends. After all, cooking is all about creativity!
Cooking Tips and Notes for No-Oven Turkish Bread
Choosing the Right Pan for Cooking
When making your no-oven Turkish bread, the type of pan you use can significantly impact the texture and flavor. A heavy skillet or cast-iron pan distributes heat more evenly, producing a beautifully browned crust. If you don’t have one, any non-stick pan will do; just be sure to keep an eye on the heat to prevent burning. A lid is also helpful — it traps steam, ensuring that your bread cooks through without drying out.
Common Troubleshooting for Dough Issues
Even seasoned bakers face challenges! If your dough feels too sticky, a light dusting of flour can help; just be careful not to overdo it or you’ll compromise the texture. Conversely, if it’s too dry, adding a teaspoon of water at a time can remedy that. Remember, dough consistency is crucial in achieving the perfect no-oven Turkish bread! If you’re curious about the science of bread-making, King Arthur Baking has excellent resources on the topic.
So, roll up your sleeves and let’s get baking!

Serving Suggestions for No-Oven Turkish Bread
Pairing with Dips and Spreads
One of the best ways to enjoy no-oven Turkish bread is by pairing it with delightful dips and spreads. Think about serving it alongside:
- Hummus: This creamy blend of chickpeas and tahini creates a perfect contrast to the fluffy texture of the bread.
- Tzatziki: The cool, yogurt-based sauce with cucumber and garlic complements the warmth of the bread beautifully.
- Muhammara: A nutty and spicy red pepper dip that will elevate your Turkish bread experience.
These dips not only boost flavor but also add a nutritious touch to your meal. For inspiration on dips, check out this Hummus recipe.
Using Turkish Bread in Meal Prep
No-oven Turkish bread is a versatile component in meal prep. Slice it into pockets for quick sandwiches. Fill them with fillings like turkey bacon, chicken ham, or roasted veggies for tasty, on-the-go options. You can also cube the bread and toss it into salads for added texture. And if you have leftovers, just store them in an airtight container; they’ll stay fresh and ready for your next meal!
Incorporating this simple, yet delicious bread into your meal planning can not only save you time but also help you enjoy the process of preparing meals. So, why not get creative? Check out more tips on meal prepping here!
Time Breakdown for No-Oven Turkish Bread
When you’re craving freshly baked bread but don’t have access to an oven, this no-oven Turkish bread recipe is your go-to! Let’s break down the time you’ll need to whip up this delicious treat.
Preparation Time
You’ll need about 15-20 minutes to gather your ingredients, mix the dough, and prepare your cooking surface. It’s a simple process, perfect for a relaxed afternoon or a quick weeknight treat.
Cooking Time
The cooking takes approximately 10-15 minutes per batch. Just cook them on a stovetop for that lovely golden brown finish and puffiness that makes this bread irresistible.
Total Time
In total, you’re looking at around 30-35 minutes from start to finish. How easy is that? Enjoy your no-oven Turkish bread warm, perhaps paired with some turkey bacon or chicken ham for a delightful meal!
For more insights, check out resources like BBC Good Food for additional bread-making tips and tricks!
Nutritional Facts for No-Oven Turkish Bread
Calories per serving
When enjoying no-oven Turkish bread, you can expect about 120 calories per serving. This makes it an excellent choice for a light snack or a satisfying accompaniment to your meals without tipping the scale. It’s perfect for young professionals looking for quick, flavorful options!
Key nutrients in Turkish bread
This delightful bread is not just tasty; it also packs a nutritious punch. Here’s what you gain from indulging in no-oven Turkish bread:
- Carbohydrates: Around 25 grams, providing the energy you need for your busy day.
- Protein: Approximately 4 grams, perfect for muscle repair and growth.
- Fiber: A good source of dietary fiber, aiding in digestion and keeping you full longer.
- Vitamins and Minerals: Includes B vitamins for energy and iron for better oxygen transport in your body.
Consider augmenting your meal with healthy toppings like avocado or a spread made from Turkey Bacon or Chicken Ham for an added nutritional boost. For more on the benefits of whole grains, check out this Harvard article on Whole Grains.
Incorporating no-oven Turkish bread into your diet allows you to enjoy not only the flavors of the Mediterranean but also the health benefits they offer. What are you waiting for? It’s time to savor every bite!
FAQs about No-Oven Turkish Bread
Can I prepare the dough in advance?
Absolutely! Preparing the dough for your no-oven Turkish bread in advance is a smart move, especially if you’re juggling a busy schedule. Mix the dough, shape it into balls, and then place them in an airtight container. You can refrigerate it for up to 24 hours. Just remember to let the dough sit at room temperature for about 30 minutes before cooking to ensure it rises nicely.
How do I store leftover Turkish bread?
Storing your no-oven Turkish bread doesn’t have to be complicated. Here’s how to keep it fresh:
- Room Temperature: If you plan to eat it within a day or two, wrap it in a clean kitchen towel and store it at room temperature. This helps retain its soft texture.
- Refrigeration: For longer storage, place the bread in an airtight container or a resealable bag. It can stay fresh for about a week in the fridge.
- Freezing: If you have lots of leftovers, consider freezing them. Wrap each piece tightly in plastic wrap and then place them in a freezer bag. They can last for up to three months!
What’s the best way to reheat bazlama?
Reheating your no-oven Turkish bread (or bazlama, as it’s known) is simple and makes it almost as good as fresh. Here are two effective methods:
- Stovetop: Heat a skillet over medium heat. Add a small amount of butter or oil and place the slice of bazlama in. Cook for about 1-2 minutes on each side until warmed through.
- Microwave: If you’re in a rush, wrap the bread in a damp paper towel and microwave for about 10-15 seconds. Just be careful not to overdo it, as it can turn chewy!
Embracing these tips will not only enhance your bread-eating experience, but they’ll also add to the warm, inviting feelings that surround this delightful dish. For more in-depth storage tips, check out resources like The Kitchn.
Conclusion on No-Oven Turkish Bread
Emphasizing the joy of homemade bread in everyday life
There’s a certain satisfaction that comes from creating your own food, especially something as comforting as no-oven Turkish bread. Whether you’re impressing friends at a weekend gathering or simply treating yourself to a cozy meal, the process of making this bread has its own charm.
Remember, baking at home doesn’t always require a traditional oven; it’s about enjoying the process and savoring the result. No-oven Turkish bread is a fantastic way to add a personal touch to your meals. So why not try your hand at this recipe? You might find that baking becomes a cherished routine in your everyday life. For more delightful recipes, check out resources like The Kitchn or BBC Good Food.
Print
No-Oven Turkish Bread: Easy, Fresh, and Irresistibly Delicious
Learn how to make soft and fluffy No-Oven Turkish Bread easily at home without the need for an oven.
- Total Time: 1 hour 35 minutes
- Yield: 12 pieces 1x
Ingredients
- 4 cups all-purpose flour
- 1 tablespoon sugar
- 1 tablespoon salt
- 1 tablespoon instant yeast
- 1 and 1/2 cups warm water
- 2 tablespoons olive oil
Instructions
- In a large bowl, mix together the flour, sugar, salt, and instant yeast.
- Gradually add the warm water and olive oil, stirring until a dough forms.
- Knead the dough on a floured surface for about 10 minutes until smooth.
- Cover the dough and let it rise in a warm place for about 1 hour, or until doubled in size.
- Divide the dough into equal pieces, shape them into balls, and let them rest for 15 minutes.
- Heat a non-stick skillet over medium heat. Roll out each ball into a flat circle and cook in the skillet for 3-4 minutes on each side until golden brown.
- Serve warm and enjoy!
Notes
- Try adding herbs or spices to the dough for extra flavor.
- This bread is best served fresh but can be stored in an airtight container for a few days.
- Prep Time: 15 minutes
- Cook Time: 20 minutes
- Category: Bread
- Method: Stovetop
- Cuisine: Turkish
- Diet: Vegetarian
Nutrition
- Serving Size: 1 piece
- Calories: 120
- Sugar: 0g
- Sodium: 200mg
- Fat: 2g
- Saturated Fat: 0g
- Unsaturated Fat: 1g
- Trans Fat: 0g
- Carbohydrates: 24g
- Fiber: 1g
- Protein: 4g
- Cholesterol: 0mg
Keywords: No-Oven Turkish Bread