Introduction to Oreo Balls
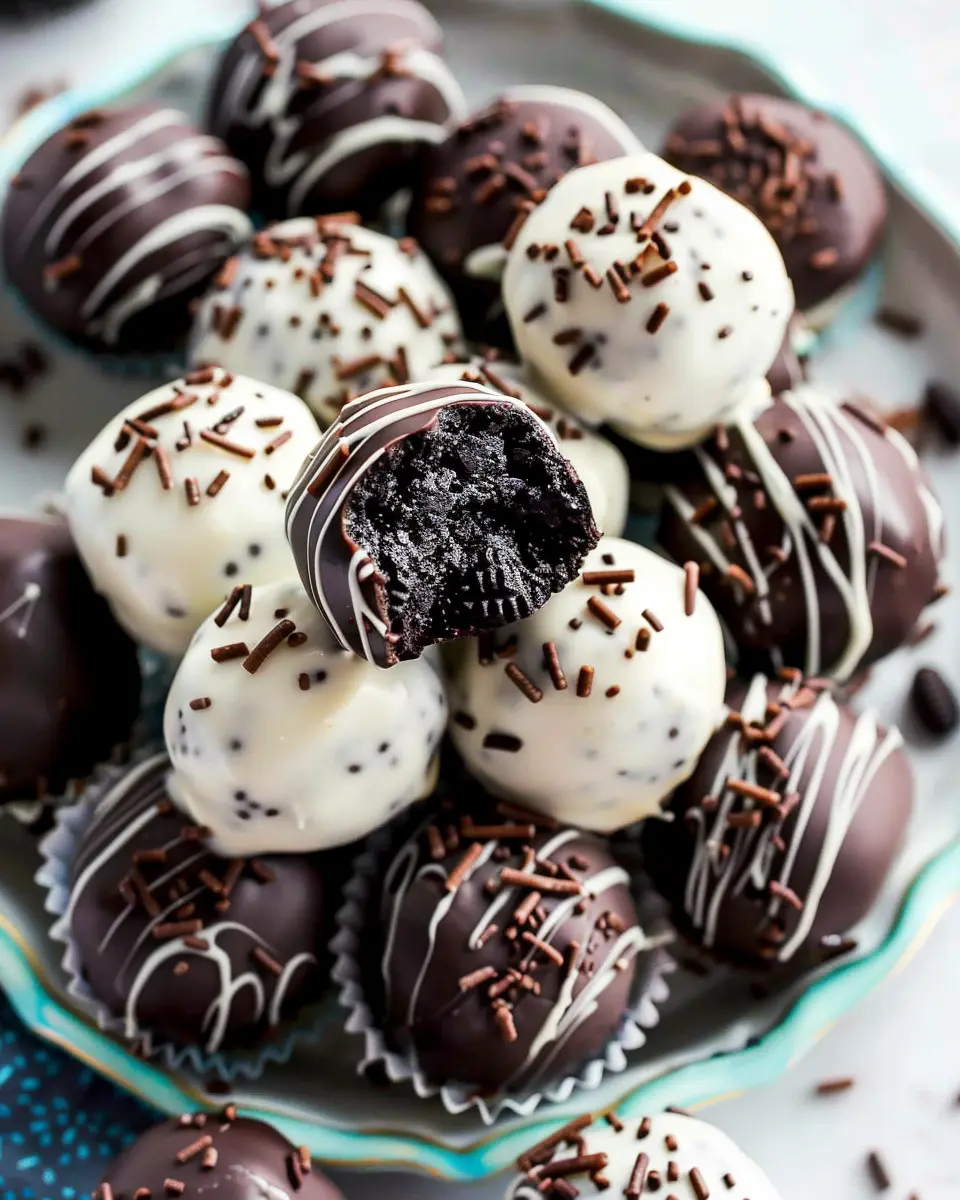
If you’re on the lookout for a quick and delicious dessert that packs a punch, then you’ve stumbled upon the perfect recipe. Oreo balls are not just a treat; they’re a delightful little indulgence that combines the iconic flavor of Oreos with rich cream cheese and decadent chocolate. Let’s explore why these little bites are a fun treat that can elevate any occasion!
Why are Oreo Balls a fun treat?
For starters, Oreo balls are incredibly easy to make, which is a huge win for busy young professionals! With just three main ingredients—crushed Oreos, cream cheese, and chocolate—you can whip up a batch in no time. The beauty of this recipe lies in its simplicity: mix, roll, and chill. You don’t need any fancy baking skills or intricate techniques, making it an ideal project for both novice and experienced bakers alike.
These bites are perfect for any occasion, whether it’s a cozy night in, a gathering with friends, or a party. Their bite-sized format means they’re easy to share, and who doesn’t love something that’s as delicious as it is cute? Plus, you can customize them with different types of chocolate or toppings. Want to learn how to make Oreo balls with a twist? Consider rolling them in crushed nuts or sprinkling some festive sprinkles for special occasions!
Another reason these treats are fantastic is their appeal across various age groups. From kids to adults, everyone seems to have a soft spot for Oreos. With their rich flavors and creamy texture, these Oreo balls charm everyone who tries them. You can even check out the history of Oreos to see how this beloved cookie has captured hearts worldwide!
And let’s be honest, it’s hard to resist their deliciousness. The combination of the crunchy chocolate cookie, creamy filling, and smooth chocolate coating creates a mouthwatering experience that is nothing short of indulgent. Whether you’re enjoying them after dinner or serving them at your next gathering, Oreo balls are sure to be a hit.
So, are you ready to dive into the world of delightful treats? Let’s explore how to make these little bites of joy that will leave everyone asking for more!

Ingredients for Oreo Balls
What you’ll need to create these delicious truffles
Are you ready to impress your friends and family with a delightful treat? Making Oreo Balls is easier than you think, and you only need a handful of ingredients to get started. Here’s a simple list to gather before you embark on this delicious adventure:
- Oreo Cookies: About 36 cookies should do the trick. You can use classic Oreos or try different flavors for a fun twist!
- Cream Cheese: One 8-ounce package, softened. This is the magic ingredient that binds the cookies and adds a rich creaminess.
- Chocolate Coating: You’ll need 16 ounces of either semi-sweet or white chocolate. The chocolate coating is where your creative side can shine—feel free to mix and match!
- Optional Toppings: Consider sprinkles, crushed nuts, or even a drizzle of contrasting chocolate for added flair.
To learn how to make Oreo Balls, just combine these ingredients, and you’ll be well on your way to creating a perfect no-bake dessert! By the way, if you’re curious about the nutritional benefits of these ingredients, check out this resource on the health benefits of chocolate for some sweet encouragement. Enjoy your baking!
Preparing Oreo Balls
Making Oreo balls is a delightful experience that transcends the boundaries of just a simple treat; it becomes an art form in your kitchen. Whether you’re having a cozy night in or planning a party, these little delights are a sure way to impress. Let’s dive into the step-by-step preparation of these tasty snacks!
Gather and Prepare Your Ingredients
Before you jump into the fun of mixing, it’s crucial to gather and organize your ingredients. For Oreo balls, you’ll need:
- 1 package of Oreos (about 15 ounces)
- 8 ounces of cream cheese, softened (you can use full-fat for richness or a lighter version if you prefer)
- 1-2 cups of chocolate chips (semi-sweet or milk chocolate, depending on your taste)
- Optional: sprinkles, crushed nuts, or extra Oreo crumbs for garnishing
Having everything laid out makes the process smoother. Plus, it prevents you from scrambling at the last minute. You can’t go wrong with having fun in the kitchen, so feel free to check out some resources from The Kitchn for tips on ingredient selection and preparation.
Crush the Oreos into Fine Crumbs
The next step in learning how to make Oreo balls is to crush those Oreos! You can use a food processor for this task, which makes it quick and easy.
- Tip: If you don’t have a food processor, putting the Oreos in a ziplock bag and using a rolling pin to crush them works just as well!
Aim for a fine crumb consistency; larger chunks can make it harder to form your balls later on. Once crushed, transfer them to a mixing bowl.
Combine Oreo Crumbs with Cream Cheese
Now comes the fun part! Mix the crushed Oreos with the softened cream cheese.
- Tip: Use your hands or a sturdy spatula to get everything combined.
You’re looking for a dough-like consistency here, so it’s okay if it feels a bit sticky. This is what binds the Oreo goodness together!
Form the Mixture into Balls
With your mixture ready, it’s time to get hands-on. Take a spoonful of the mixture and roll it between your hands to form small balls, about 1 inch in diameter.
- Tip: If the mixture is too sticky, you can refrigerate it for about 10-15 minutes to make rolling easier.
Placing them on a parchment-lined baking sheet will save you cleanup hassle later.
Chill the Balls for the Best Texture
This step isn’t just about patience; it’s crucial for achieving that perfect texture. Place your formed Oreo balls in the refrigerator for at least 30 minutes.
- Chilling allows them to firm up, making the chocolate coating process much easier.
Melt Your Chocolate Coating
While your balls are chilling, it’s time to melt your chocolate. You can do this in a microwave-safe bowl in 30-second intervals, stirring in between until smooth, or use a double boiler for a more controlled melting process.
- Tip: Add a little bit of coconut oil or shortening to your chocolate to thin it out for an easier dipping experience!
Dip the Oreo Balls in Chocolate
Now for the crowning glory—dipping!
- Use a fork or a toothpick to dip each chilled ball into the melted chocolate.
Let the excess chocolate drip off before placing it back on the parchment paper.
Add Optional Garnishes
Elevate your Oreo balls by adding some garnishes while the chocolate is still wet. Think about using crushed Oreos, colorful sprinkles, or chopped nuts for an extra crunch.
- Tip: You can even drizzle some white chocolate on top for a professional touch!
These playful little details not only make your Oreo balls eye-catching but add texture and flavor as well.
Now that you’re equipped with all the steps necessary to prepare delicious Oreo balls, it’s time to roll up your sleeves and get started! Enjoy, and don’t forget to share with friends and family—they’re sure to be a hit!

Variations on Oreo Balls
Oreo balls are not just an indulgent treat; they can be endlessly customized to suit your palate. Let’s explore some delicious variations that might just become your new favorites!
Peanut Butter Oreo Balls
Imagine biting into a creamy peanut butter delight wrapped in a rich chocolate coating. To make peanut butter Oreo balls, simply substitute half the cream cheese in the original recipe with creamy or crunchy peanut butter. This nutty twist adds a delicious richness that’s hard to resist. It’s the perfect treat for those who love the classic combo of chocolate and peanut butter.
Mint Oreo Balls
If you’re a mint fanatic, you’ll adore these mint Oreo balls. Replace regular Oreos with Mint Oreo cookies for that refreshing flavor. You can also add a few drops of peppermint extract to the mixture for an extra minty kick. Coat these beauties in dark chocolate for a nice contrast, and you’ve got a festive treat perfect for the holidays.
Golden Oreo Balls
For a lighter flavor, consider making golden Oreo balls. Substitute Golden Oreos for traditional ones and follow the same process. The result is a sweet, vanilla-flavored ball that has a lovely brightness. These are great for summer picnics or any occasion that calls for a lighter dessert option.
Seasonal Variations
The beauty of how to make Oreo balls is that you can adjust flavors based on the season. Think pumpkin spice in fall or gingerbread cookies around Christmas. Adding corresponding flavors to your Oreo mixture and using themed sprinkles can make these treats festive.
Don’t hesitate to get creative! Explore more baking ideas and tips from sites like Food Network and Bon Appétit. Each variation not only brings its own twist but also makes this simple recipe versatile enough for any occasion. Happy baking!
Cooking Tips and Notes for Oreo Balls
Best Practices for Melting Chocolate
When you’re figuring out how to make Oreo balls, the chocolate coating is crucial. To melt chocolate smoothly, try these tips:
- Use a double boiler: If you have one, it’s the gentlest way to melt chocolate. Just place a heatproof bowl over simmering water, stirring occasionally until melted.
- Microwave in short bursts: If you opt for the microwave, melt the chocolate in 30-second intervals, stirring in between. This prevents overheating, which can lead to that dreaded grainy texture.
- Add some oil: Mixing in a teaspoon of vegetable oil can help achieve a smoother consistency.
How to Store Oreo Balls Properly
Storing your heavenly Oreo balls correctly ensures their flavor and texture remain intact. Follow these easy guidelines:
- Chill Them: After coating, refrigerate the Oreo balls for at least one hour. This sets the chocolate and firm up the filling.
- Use an airtight container: For best freshness, store them in an airtight container in the fridge. They can last up to a week, but good luck keeping them around that long!
- Freezing: Want to enjoy them later? You can freeze Oreo balls for up to three months. Just layer them between parchment paper to prevent sticking.
By following these tips, you’ll have delicious Oreo balls ready for any occasion. For more sweet ideas, check out this source on creative dessert recipes!

Serving suggestions for Oreo Balls
Perfect pairings for your Oreo treats
When you’re wondering how to make Oreo balls a hit at your next gathering, think about pairing them with delightful accompaniments. Here are some suggestions:
- Milk: The classic choice! Serve your Oreo balls with a chilled glass of milk for that nostalgic feel—it complements the sweetness beautifully.
- Coffee: For a more adult twist, pair them with a rich cup of coffee or even a fragrant tea. The bitterness of coffee contrasts perfectly with the sweetness, making each bite a delightful surprise.
- Fresh Fruits: Sliced strawberries or raspberries can bring a refreshing touch, cutting through the indulgence of the Oreo balls.
Presentation tips for parties
When presenting your tasty treats, a little creativity goes a long way:
- Platter Arrangement: Use a decorative platter and arrange them in layers or in a circle, showcasing their appealing looks.
- Cupcake Liners: Dress them up in colorful cupcake liners for a fun, festive display.
- Garnishes: Drizzle some melted chocolate over the top or sprinkle crushed Oreos for added visual appeal.
With these simple serving suggestions, you’ll elevate your Oreo balls into an unforgettable treat! Check out Bakerella’s blog for more dessert inspiration.
Time Breakdown for Oreo Balls
When diving into the delicious world of Oreo Balls, having a clear idea of your time commitment can make the process smoother and more enjoyable.
Preparation Time
Getting started is quick and easy! You’ll need about 15 minutes to crush the Oreos, mix them with cream cheese, and shape the balls. And did I mention it’s super fun?
Chilling Time
Patience is key here. Let your Oreo Balls chill in the refrigerator for 30 minutes. This step is essential for firming them up, ensuring they hold their shape when dipped in chocolate.
Total Time
In total, you’re looking at roughly 45 minutes from start to finish! This makes them a perfect treat to whip up for last-minute gatherings. For an extra touch, consider indulging in some additional fun ingredients like sprinkles or flavored coatings. Curious about more detailed steps? Check out sources like Food Network or BBC Good Food for inspiration!
Nutritional facts for Oreo Balls
When you’re diving into the delicious world of Oreo balls, it’s helpful to know what you’re indulging in. Here’s a quick overview of their nutritional content.
Calories per truffle
Each truffle packs about 150 calories. So, while they’re a delightful treat, it’s easy to lose track of how many you’re enjoying. Moderation is key!
Sugar content
Oreo balls are certainly sweet! Each truffle contains roughly 10 grams of sugar. If you’re watching your sugar intake, this might be something to keep in mind. Consider pairing them with a warm beverage for balance.
Protein content
Surprisingly, there’s a bit of protein here, too—around 2 grams per truffle. While it’s not a protein powerhouse, those tiny amounts can still contribute to your daily intake, especially if you’re enjoying them as a snack.
For more nutritional guidance, you might want to check reliable sources like the USDA’s FoodData Central or consult nutritionists for personalized advice. Enjoy your treats!
FAQs about Oreo Balls
Can I make these without cream cheese?
Absolutely! If you’re not a fan of cream cheese or happen to be lactose intolerant, you can still make delicious Oreo balls. Instead of cream cheese, you can use softened coconut oil or nut butters like almond or peanut butter. These alternatives not only hold everything together but also add unique flavors. Just ensure you adjust the quantity—you may need slightly less than what the cream cheese recipe calls for.
How can I make vegan Oreo balls?
Making vegan Oreo balls is easier than you might think! Look for vegan Oreos, as most varieties are dairy-free. For the filling, swap in vegan cream cheese or your favorite nut butter, and for the coating, choose vegan chocolate or candy melts. Melt them down to dip your balls in, and voilà! You have a delightful treat that your vegan friends will love. Check out this vegan baking guide for more tips!
What are the best chocolate types to use?
When it comes to chocolate for your Oreo balls, you have options! You can go classic with semi-sweet chocolate, or try dark chocolate for a more robust flavor. If you prefer something sweeter, white chocolate is a crowd-pleaser. Remember, you can also experiment with flavored chocolates, such as mint or orange. Just make sure to use quality chocolate for the best tasting experience. Quality makes all the difference!
So now that you have your burning questions answered, you’re ready to tackle how to make Oreo balls like a pro!
Conclusion on Oreo Balls
Why You’ll Love Making These at Home
There’s something magical about homemade treats, and knowing how to make Oreo balls is a game changer for any dessert lover. Not only are they effortless to whip up, but they also require minimal ingredients and time—perfect for busy young professionals! Plus, customizing them with different toppings adds that personal touch that store-bought alternatives just can’t compete with.
Making these sweet bites in your own kitchen offers a delightful blend of nostalgia and creativity. It’s a fantastic way to impress friends at gatherings or simply treat yourself. So why wait? Start creating your own delicious Oreo balls today! For more inspiration, check out Food Network’s dessert ideas.
Print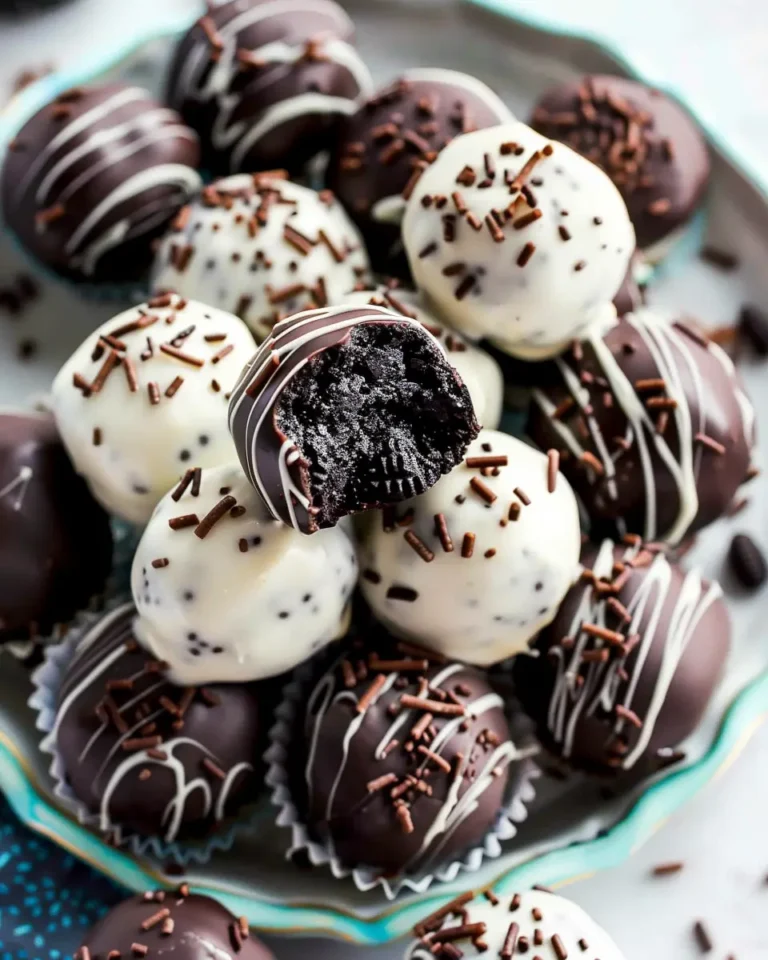
How to Make Oreo Balls: Easy Indulgence for Every Occasion
Learn how to make delicious and easy Oreo balls for any occasion. This simple recipe is perfect for satisfying your sweet tooth!
- Total Time: 1 hour
- Yield: 24 balls 1x
Ingredients
- 1 package Oreo cookies
- 8 oz cream cheese, softened
- 1 package chocolate bark or candy melts
- 1 cup crushed Oreos, for topping
Instructions
- Crush the Oreo cookies in a food processor until fine.
- In a mixing bowl, combine crushed Oreos and cream cheese until well blended.
- Roll the mixture into balls and place them on a baking sheet.
- Melt the chocolate bark or candy melts according to package instructions.
- Dip each Oreo ball into the melted chocolate, allowing excess to drip off.
- Sprinkle crushed Oreos on top before the chocolate sets.
- Chill in the refrigerator until firm.
Notes
- For variations, try adding different flavored extracts to the cream cheese mixture.
- You can also use white chocolate for dipping.
- Prep Time: 20 minutes
- Cook Time: 0 minutes
- Category: Dessert
- Method: No-bake
- Cuisine: American
- Diet: Vegetarian
Nutrition
- Serving Size: 1 ball
- Calories: 150
- Sugar: 10g
- Sodium: 50mg
- Fat: 7g
- Saturated Fat: 4g
- Unsaturated Fat: 2g
- Trans Fat: 0g
- Carbohydrates: 20g
- Fiber: 1g
- Protein: 2g
- Cholesterol: 15mg
Keywords: Oreo balls, dessert, easy recipes, no-bake