Introduction to Cheese Bunny
What is a Cheese Bunny and why you’ll love it?
If you haven’t heard of a Cheese Bunny, you’re in for a delightful treat! Originating from the culinary scene, this dish combines gooey melted cheese and fluffy bread into an adorable bunny shape that is not only fun to look at but absolutely delicious. It’s like your childhood memories of food and joy combined into one tasty bite!
A Cheese Bunny typically consists of soft, pillowy dough shaped into a bunny, filled with savory goodness like Turkey Bacon or Chicken Ham, and, of course, plenty of ooey-gooey cheese. The beauty of this dish lies in its versatility. You can customize it based on your preferences or what you have on hand. For instance, love some heat? Toss in your favorite spicy cheese! Want a meatless option? Feel free to load it up with veggies for a fresh twist.
Beyond its charming appearance, the Cheese Bunny delivers on flavor and comfort. Imagine pulling apart the soft bread to reveal melty cheese stretching and oozing with every bite! It’s perfect for gatherings, lunchboxes, or even a cozy evening in. And who can resist the charming sight of a bunny-shaped snack? It’s bound to spark joy and ignite conversations around the dinner table.
You might be wondering: why all the fuss? Research shows that engaging with food can significantly enhance our dining experience (source: American Psychological Association). Food that brings a smile, like a Cheese Bunny, encourages positive emotions and creates lasting memories, especially when shared with friends or family.
Want to make your own? It’s quite simple and fun to do! Plus, making your creation can be a great bonding activity for couples or friends. So, gather your ingredients, put on your apron, and let’s hop into the kitchen! You’re about to impress everyone with your culinary skills while indulging in a warm, cheesy delight that will truly make your taste buds dance.
Ingredients for Cheese Bunny
Essential ingredients for a perfect Cheese Bunny
Creating an irresistible Cheese Bunny starts with quality ingredients that deliver rich flavor and delightful texture. Here’s what you’ll need:
- Bread: Choose soft, fresh bread, such as white or sourdough. It forms the perfect indulgent base.
- Cheese: Opt for a blend of creamy cheeses like mozzarella and cheddar for that gooey melt and robust taste.
- Turkey Bacon or Chicken Ham: These savory elements add a wonderful umami depth. Feel free to select your favorite cured meat!
- Butter: A light smear enhances the crust’s golden-brown perfection, giving a slight crunch.
These essentials make a solid foundation for any Cheese Bunny!
Optional add-ins to elevate your Cheese Bunny
Want to take your Cheese Bunny to the next level? Consider these delicious add-ins:
- Fresh Herbs: A sprinkle of basil or chives can brighten the flavor profile.
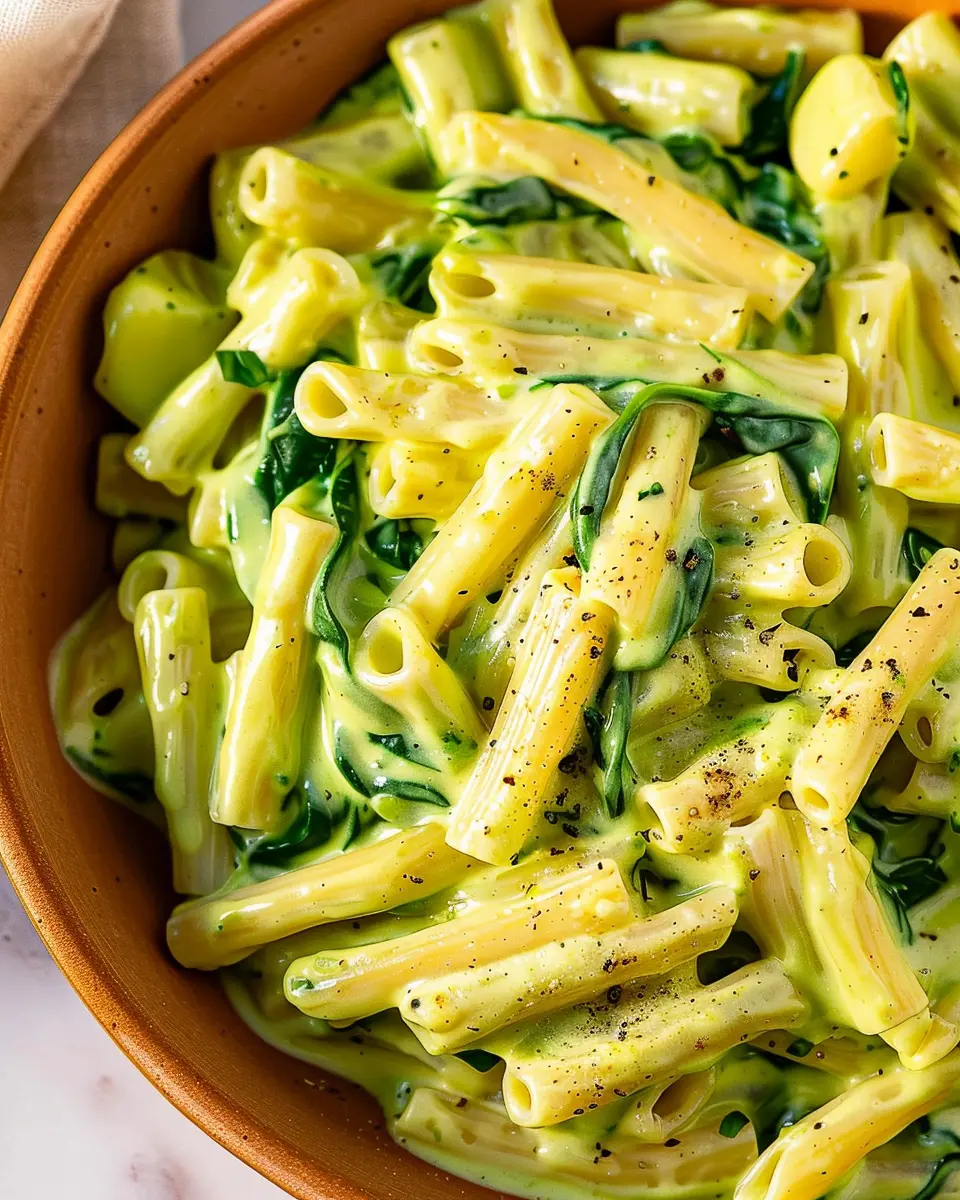
- Veggies: Adding finely chopped spinach or jalapeños offers added nutrition and a spicy kick.
- Spices: A dash of garlic powder or paprika can enhance the overall flavor.
Experiment with these options and find the perfect combination that excites your taste buds! For more innovative ideas, check out resources from Bon Appétit and Serious Eats.
Preparing Cheese Bunny
Creating a Cheese Bunny isn’t just about whipping up a dish; it’s about experiencing a playful culinary adventure. This delightful pastry is perfect for a cozy night in or when you want to impress guests. So, let’s roll up our sleeves and get started!
Gather All Your Ingredients
Before you dive into preparation, make sure you have everything you need at hand. Nothing halts the cooking momentum like realizing you’re missing an ingredient. Here’s what you’ll need:
-
For the dough:
-
2 cups all-purpose flour
-
1 teaspoon baking powder
-
½ teaspoon salt
-
½ cup butter, softened
-
1 egg
-
4 tablespoons cold water
-
For the cheese filling:
-
1 cup shredded cheese (a blend of mozzarella and cheddar works wonders)
-
2 ounces cream cheese, softened
-
3 ounces turkey bacon, cooked and chopped
-
½ cup chicken ham, diced
-
Salt and pepper to taste
-
Optional spices (like garlic powder or paprika for an extra kick)
Having all your ingredients ready means you can focus on the fun of creating your Cheese Bunny. If some of these ingredients aren’t in your pantry, consider visiting local markets or checking out online grocery options for freshness.
Make the Cheese Filling
Now that you have your ingredients sorted, let’s make that irresistible filling. In a medium bowl, combine the shredded cheese and soft cream cheese. The cream cheese adds a delightful creaminess that balances the texture. Then, stir in the chopped turkey bacon and diced chicken ham.
Don’t forget to season with a pinch of salt and pepper—taste testers often miss this step. If you want to add more vibrancy, you could slip in some finely chopped herbs, like chives or parsley, adding a burst of flavor.
Prepare the Dough
With your filling ready, it’s time to get your hands doughy. In a large mixing bowl, combine the all-purpose flour, baking powder, and salt. Mix them well to ensure an even distribution. Next, cut in the softened butter until the mixture resembles coarse crumbs.
Here’s a helpful tip: Use chilled butter for a flakier crust! After that, stir in the egg and add cold water little by little until a dough forms. Knead for just a minute to bring it all together—no overworking here.
Assemble the Cheese Bunny
Time for the fun part! Preheat your oven to 375°F (190°C). On a floured surface, roll out the dough to about ¼-inch thickness. Cut out bunny shapes using a cookie cutter or simply your hands for a more rustic look.
Place a generous spoonful of your cheese filling in the center of each bunny. Fold over the dough to encapsulate the filling, pinching the edges firmly to seal. Dusting the edges with a bit of flour can help them stick together better. Try to make each bunny uniquely cute—no two should look the same!
Bake Your Cheese Bunny to Golden Perfection
Arrange your formed Cheese Bunnies on a baking sheet lined with parchment paper for easy cleanup. An optional step is to brush the tops with a beaten egg for an extra golden finish.
Then, pop them into the preheated oven for about 20-25 minutes or until they’re beautifully golden brown. While they bake, the delightful smell of melting cheese and crispy dough will fill your kitchen, creating an aroma you won’t soon forget.
Once out of the oven, let them cool for a few minutes before digging in. Trust me, the anticipation is worth it! Your Cheese Bunnies are now ready to enjoy, whether served as an appetizer, snack, or party treat.
Enjoy your Cheese Bunny adventure, and don’t forget to share your experience or any personal twists you make along the way. Happy baking!
Variations on Cheese Bunny
When it comes to the classic Cheese Bunny, there’s no limit to the fun and flavors you can explore. Whether you’re looking to spice things up or prefer packing in some veggies, here are a couple of tasty variations.
Spicy Cheese Bunny with Jalapeños
Craving a kick? Spice up your Cheese Bunny with jalapeños! This variation transforms your delightful cheesy treat into a flavorful adventure. Just slice fresh jalapeños and mix them into your cheese filling—or go even bolder by topping your assembled bunny with them before baking.
- Tip: For a milder experience, remove the seeds from the jalapeños.
- Serving suggestion: Pair your spicy treat with a cool yogurt dip to balance the heat.
You won’t just satisfy your cravings; you’ll impress friends with your culinary creativity. Easy to make and oh-so-delicious, this version is a spicy lover’s dream!
Veggie-loaded Cheese Bunny for a Healthier Twist
Looking for a healthier Cheese Bunny? Why not pack it full of veggies?! Adding in bell peppers, spinach, or even avocado not only boosts nutrition but also enhances flavor. You can sauté these veggies beforehand to soften them up and enhance their savory notes.
- Ingredient ideas: Try adding mushrooms or even shredded carrots for extra crunch.
- Guilt-free indulgence: By using low-fat cheese or a dairy-free alternative, you can enjoy a lighter version without compromising on taste.
For more veggie ideas, check out resources from Healthline that highlight the benefits of incorporating vegetables into your meals.
Incorporating these variations into your Cheese Bunny repertoire not only keeps your meal exciting but also opens up a world of flavor and nutrition possibilities! Which one will you try first?
Cooking tips and notes for Cheese Bunny
Tips for achieving the perfect texture
Achieving the ideal texture for your Cheese Bunny is all about timing and technique. Start with fresh, quality cheese, as its moisture content can significantly impact the final product. Here are some key tips to consider:
- Use a combination of cheeses: Mixing different types, such as mozzarella for stretchiness and cheddar for flavor, creates a delightful texture.
- Don’t over-knead: While you want to develop the dough, an excessive kneading can make it tough. Aim for just enough time to combine the ingredients.
Common mistakes to avoid while making Cheese Bunny
When whipping up your Cheese Bunny, it’s easy to stumble into a few common pitfalls. Here’s what to watch out for:
- Skipping the resting time: Giving the dough time to rest allows the gluten to relax, leading to a lighter and fluffier result.
- Using cold ingredients: Room-temperature ingredients mix more evenly, so if you can, let your butter and eggs warm up before starting.
- Ignoring your measurements: Precision is key, so be sure to measure your ingredients accurately for the best results.
For more advanced cooking tips, check resources like the Food Network or Serious Eats. Happy cooking!

Serving suggestions for Cheese Bunny
Perfect pairings for your Cheese Bunny
When serving your delightful Cheese Bunny, thinking about the right pairings can elevate the experience. Consider these tasty accompaniments:
- Turkey Bacon: The savory crispiness of turkey bacon complements the creamy texture of Cheese Bunny wonderfully.
- Chicken Ham: For a leaner protein option, chicken ham works beautifully, adding a subtle, savory flavor that balances the dish.
- Fresh Fruits: Think juicy pears or sweet grapes. They bring a refreshing contrast and can cut through the richness of the cheese.
- Nuts: Almonds or walnuts add a delightful crunch, enhancing the texture and flavor profile of your meal.
Creative ways to serve Cheese Bunny at gatherings
Planning a gathering? Impress your guests by presenting Cheese Bunny in creative ways.
- Cheese Bunny Sliders: Transform the dish into mini sliders by serving on small buns alongside fresh toppings.
- DIY Cheese Bunny Board: Create a beautiful charcuterie-style board with your Cheese Bunny at the center, surrounded by seasonal veggies, dips, and crackers for a communal feel.
- Individual Portions: Serve cute, individual ramekins of Cheese Bunny for an elegant touch that’s perfect for parties.
For more serving ideas, check out resources like Food & Wine or Bon Appétit. These sites offer fantastic tips that can inspire your next meal!
Time breakdown for Cheese Bunny
Preparation time
Making your Cheese Bunny requires a little bit of prep work. Set aside around 15 minutes to gather your ingredients and get everything measured out. This includes shredding your favorite cheese and slicing your turkey bacon or chicken ham. If you’re cooking for friends, this could be a great opportunity to invite them into the kitchen—cooking is always more fun with company!
Baking time
Next up is the baking phase! For your Cheese Bunny, you’ll want to preheat your oven and bake it for about 25–30 minutes. Keep an eye on it during the last few minutes to ensure that cheesy goodness is perfectly golden and melted. You might notice the fragrant aroma filling your kitchen—talk about mouthwatering!
Total time
In total, you’re looking at approximately 40–45 minutes from start to finish. That’s pretty quick considering the deliciousness you’ll end up with! Whether it’s lunch or dinner, a homemade Cheese Bunny can easily steal the show.
For more tips on perfecting your baking skills, check out resources on sites like King Arthur Baking. Enjoy your culinary adventure!
Nutritional Facts for Cheese Bunny
When indulging in a delightful Cheese Bunny, it’s good to know what you’re savoring. Let’s break down the nutritional facts to keep your culinary adventure balanced.
Calories
A typical serving of a Cheese Bunny packs about 250-300 calories, largely depending on portion size and additional fillings. This makes it a great option for a filling snack or a hearty meal without going overboard on calories.
Protein
The inclusion of cheese provides a solid protein boost in your Cheese Bunny, delivering about 12-15 grams per serving. Protein is essential for muscle repair and growth, making this a smart choice for active individuals.
Carbohydrates
You’ll find that a Cheese Bunny contains around 25-30 grams of carbohydrates. This is primarily from the dough, giving you the energy needed for your day. Pair it with a side salad or some zesty veggies for a balanced meal.
For more in-depth insights on nutrition, check out resources from the USDA or consider visiting Healthline for scientifically backed articles. Enjoy crafting your Cheese Bunny with these nutritional considerations in mind!
FAQs about Cheese Bunny
Can I use different types of cheese for Cheese Bunny?
Absolutely! One of the best things about making Cheese Bunny is its versatility. While traditional recipes may call for cheddar or mozzarella, you can easily mix and match cheeses to suit your taste. Consider using gouda for a smoky flavor or pepper jack for a spicy kick. Have some cream cheese lying around? That can add a wonderful creaminess too! Get creative and experiment—your taste buds will thank you!
How do I store leftovers of Cheese Bunny?
If you find yourself with leftovers (though that’s a big if!), storing your Cheese Bunny properly is key to keeping it delicious. Allow it to cool completely before placing it in an airtight container. Refrigerate it for up to three days. When you’re ready to enjoy it again, reheat it in the oven for best results. This method helps maintain its delightful texture and flavor. For more tips on storing cheese-based dishes, check out The Cheese of Choice.
Can I make Cheese Bunny ahead of time?
Yes, you can prepare your Cheese Bunny in advance! Simply assemble the dish, cover it tightly, and store it in the refrigerator for up to 24 hours before baking. This is a great option if you’re planning a gathering or a busy week ahead. When you’re ready, just pop it in the oven. Remember, your friends and family will appreciate a hot, cheesy dish—even if you had to prep it the day before!
Feel free to reach out with any more questions. Enjoy cooking your Cheese Bunny!
Conclusion on Cheese Bunny
Why Making Cheese Bunny at Home is Worth it
Crafting your own Cheese Bunny at home is not just about enjoying a delicious snack; it’s also an opportunity for creativity and personalization. Imagine biting into a warm, crispy bun filled with your favorite cheese, perfectly melted to your liking.
- Control Ingredients: You can select high-quality, fresh ingredients that suit your taste, such as Turkey Bacon or Chicken Ham.
- Healthier Choices: Homemade means you can reduce preservatives and unhealthy additives found in store-bought options.
Plus, sharing your creation with friends not only sparks joy but creates lasting memories. So, why not give it a try? Your Cheese Bunny adventure awaits! For more tips on crafting your perfect snack, check out resources like The Kitchn or Serious Eats.
Print
Cheese Bunny Delight: Easy Turkey Bacon & Chicken Ham Recipe
A delightful recipe combining turkey bacon and chicken ham into a cheesy treat.
- Total Time: 35 minutes
- Yield: 4 servings 1x
Ingredients
- 1 cup shredded cheese
- 4 slices turkey bacon
- 6 slices chicken ham
- 2 eggs
- 1/2 cup milk
- 1 teaspoon black pepper
- 1 loaf of bread
Instructions
- Preheat your oven to 350°F.
- In a bowl, whisk together eggs, milk, and black pepper.
- Layer turkey bacon and chicken ham on sliced bread.
- Pour the egg mixture over the layered ingredients.
- Sprinkle shredded cheese on top.
- Bake in the oven for 20-25 minutes.
- Let cool for a few minutes before serving.
Notes
- For extra flavor, add your favorite herbs.
- Can substitute with any type of cheese you prefer.
- Prep Time: 10 minutes
- Cook Time: 25 minutes
- Category: Appetizer
- Method: Baking
- Cuisine: American
- Diet: Non-Vegetarian
Nutrition
- Serving Size: 1 slice
- Calories: 250
- Sugar: 3g
- Sodium: 600mg
- Fat: 15g
- Saturated Fat: 6g
- Unsaturated Fat: 8g
- Trans Fat: 0g
- Carbohydrates: 20g
- Fiber: 1g
- Protein: 15g
- Cholesterol: 150mg
Keywords: Cheese Bunny