Introduction to Butterfinger Balls
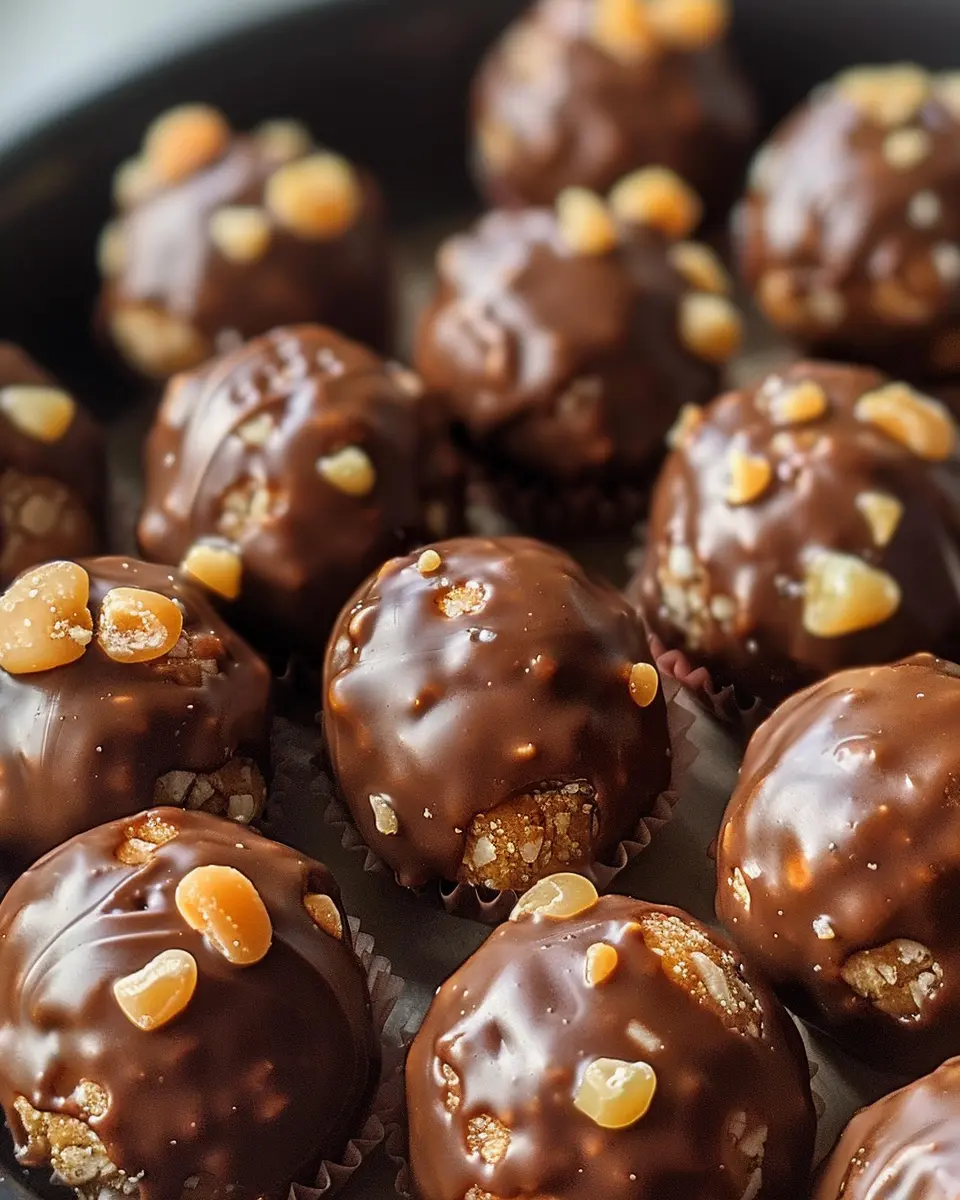
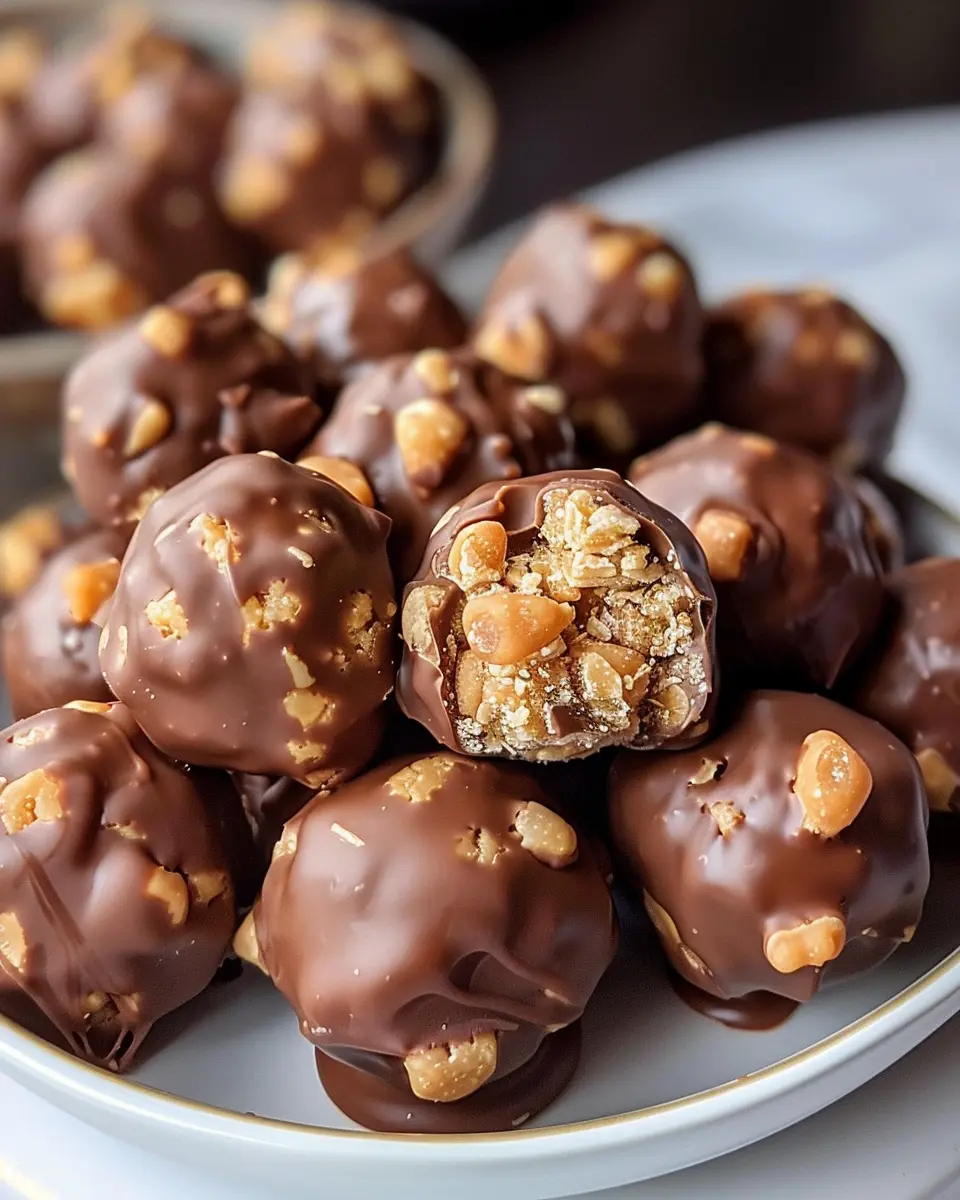
When you’re a young professional juggling work, social life, and personal errands, finding time to indulge in sweet treats can feel like a luxury. Enter Butterfinger Balls, a delightfully simple and satisfying dessert that caters perfectly to your hectic lifestyle. These no-bake sweet bites offer a rich, crunchy flavor that is reminiscent of the classic Butterfinger candy bar, yet they come together in no time at all—making them a go-to treat for your busy days.
Why Butterfinger Balls are the Perfect Treat for Young Professionals
Imagine this: you’ve just wrapped up a long workday, and you’re both tired and craving something sweet. These Butterfinger Balls are the ideal solution! They require minimal effort, and you can whip up a batch in about 15 minutes, plus some chilling time. You could even take them to your next office potluck or enjoy them while binge-watching your favorite series on a cozy evening.
At their core, Butterfinger Balls are made with just a few easy ingredients like crushed cookies, peanut butter, and chocolate. Here are a few reasons why they stand out:
- Quick to Make: No cooking means less cleanup, allowing you to spend more time enjoying your treats rather than preparing them.
- No-Bake Convenience: These bites can be stored in the fridge and enjoyed whenever the craving strikes!
- Perfect for Sharing: Whether it’s a group of friends, colleagues, or family, these small treats are easy to share and bring a touch of joy to any gathering.
And if you’re curious about the versatility of these bites, you can find plenty of variations online, like adding coconut or using different types of chocolate for coating. Websites like Food Network and AllRecipes often showcase creative takes that you can explore.
As a young professional, life can occasionally pull you in multiple directions. So why not treat yourself with something delightful and simple? Butterfinger Balls might just become your new favorite dessert, perfect for satisfying your sweet tooth and impressing your friends!
Essential Ingredients for a Tasty Dessert
Creating delicious Butterfinger Balls at home is a delightful experience, and it starts with a few essential ingredients you’ll need to gather. These simple components come together to form a treat that’s both crunchy and sweet!
- Peanut Butter: Choose creamy or crunchy, depending on your preference. This will form the base and add rich flavor.
- Confectioners’ Sugar: Essential for sweetness and gives the Butterfinger Balls their characteristic texture.
- Crushed Butterfinger Candy Bars: The star of the show! The more, the better—these will give you that iconic taste.
- Chocolate for Coating: Semi-sweet or dark chocolate works best for a rich finish. You can also use melting chocolate for easy dipping.
With these key ingredients, you’re ready to create a dessert that’s simply irresistible. Feeling adventurous? Try using organic peanut butter for a healthier twist or explore this guide on chocolate melting tips for the perfect coating!
Remember, the magic is in the mix, so make sure to combine everything thoroughly for the best results. Happy cooking!
Preparing Butterfinger Balls
Making Butterfinger Balls is not just about satisfying your sweet tooth—it’s a fun and engaging way to bond with friends or family. The delightful blend of peanut butter, chocolate, and crunchy surprises creates a treat that is undeniably delicious. Let’s walk through the simple steps to prepare these delightful little bites of heaven!
Gather your ingredients
Before diving into the process, take a moment to gather all your ingredients. Here’s what you’ll need:
- 1 cup peanut butter (smooth or crunchy, your choice)
- 2 cups powdered sugar
- 1 cup crushed Butterfinger candy bars (or a similar crunchy candy)
- 1 cup semi-sweet chocolate chips
- 1 tablespoon coconut oil (to help with melting chocolate)
- Optional: Sprinkles or extra crushed Butterfinger for garnish
Make sure you check your pantry and grab everything you need, as having everything on hand makes the preparation even smoother. If you haven’t tried Butterfinger before, you can find it at your local grocery store or even online.
Mix the peanut butter mixture
Now that you have everything ready, it’s time to create the heart of the Butterfinger Balls. In a mixing bowl, combine your peanut butter and powdered sugar using a spatula or a mixer.
- Tip: If you’re mixing by hand, it helps to warm the peanut butter slightly in the microwave so that it’s easier to blend. Just 10-15 seconds should do the trick!
Mix until you achieve a thick, dough-like consistency. This can be a bit labor-intensive, but don’t get discouraged—the results are absolutely worth it!
Add in the crunchy components
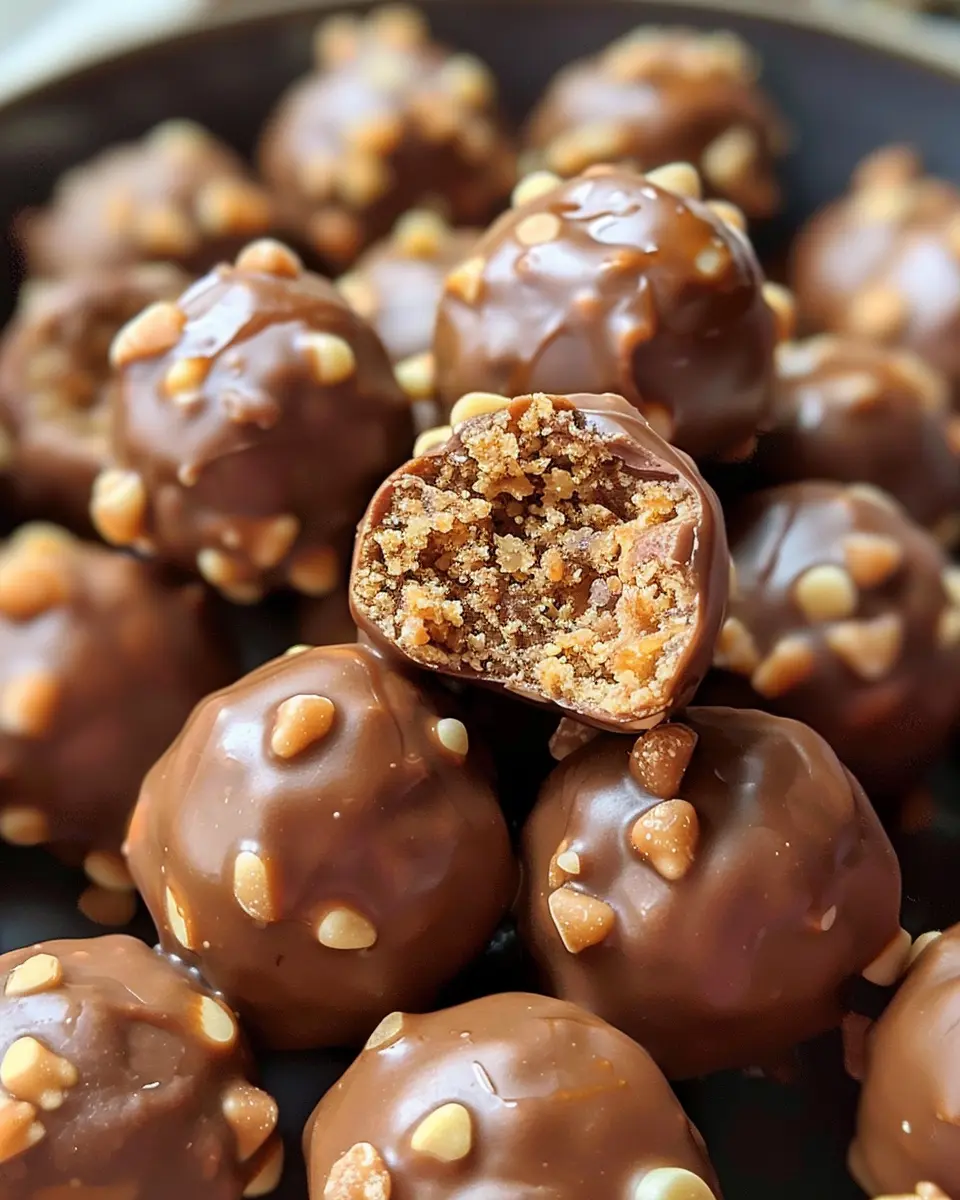
Next, it’s time to add some crunch! Gently fold in the crushed Butterfinger candy bars into your peanut butter mixture.
- Why crushed candy? The contrast of the creamy peanut butter with the crunchy textures creates an irresistible bite!
Make sure it’s combined evenly so every bite is filled with that delicious Butterfinger crunch.
Shape the balls
With the mixture ready, now’s the time to get creative. Using your hands, scoop out small portions and roll them into bite-sized balls. Aim for about 1 inch in diameter—this size is perfect for snacking!
- If your hands get too sticky, you can always wet them slightly or dust with powdered sugar to make shaping easier.
Feel free to get the whole family involved—this is a great step for kids or anyone who loves a little hands-on fun in the kitchen!
Chill before coating
Now that you’ve shaped your Butterfinger Balls, place them on a baking sheet lined with parchment paper. Pop the sheet in the refrigerator for around 30 minutes.
- Why chill? This helps the balls firm up, making them easier to coat in chocolate later. While you wait, you can enjoy a little break or even plan your next culinary adventure!
Melt the chocolate
While the Butterfinger Balls are chilling, it’s time to prepare the chocolate coating. Using a microwave or a double boiler, melt the semi-sweet chocolate chips with the coconut oil to give it a nice shine.
- Microwave method: Heat in 30-second intervals, stirring in between to prevent burning.
Once the chocolate is smooth and well-combined, it’s ready to use.
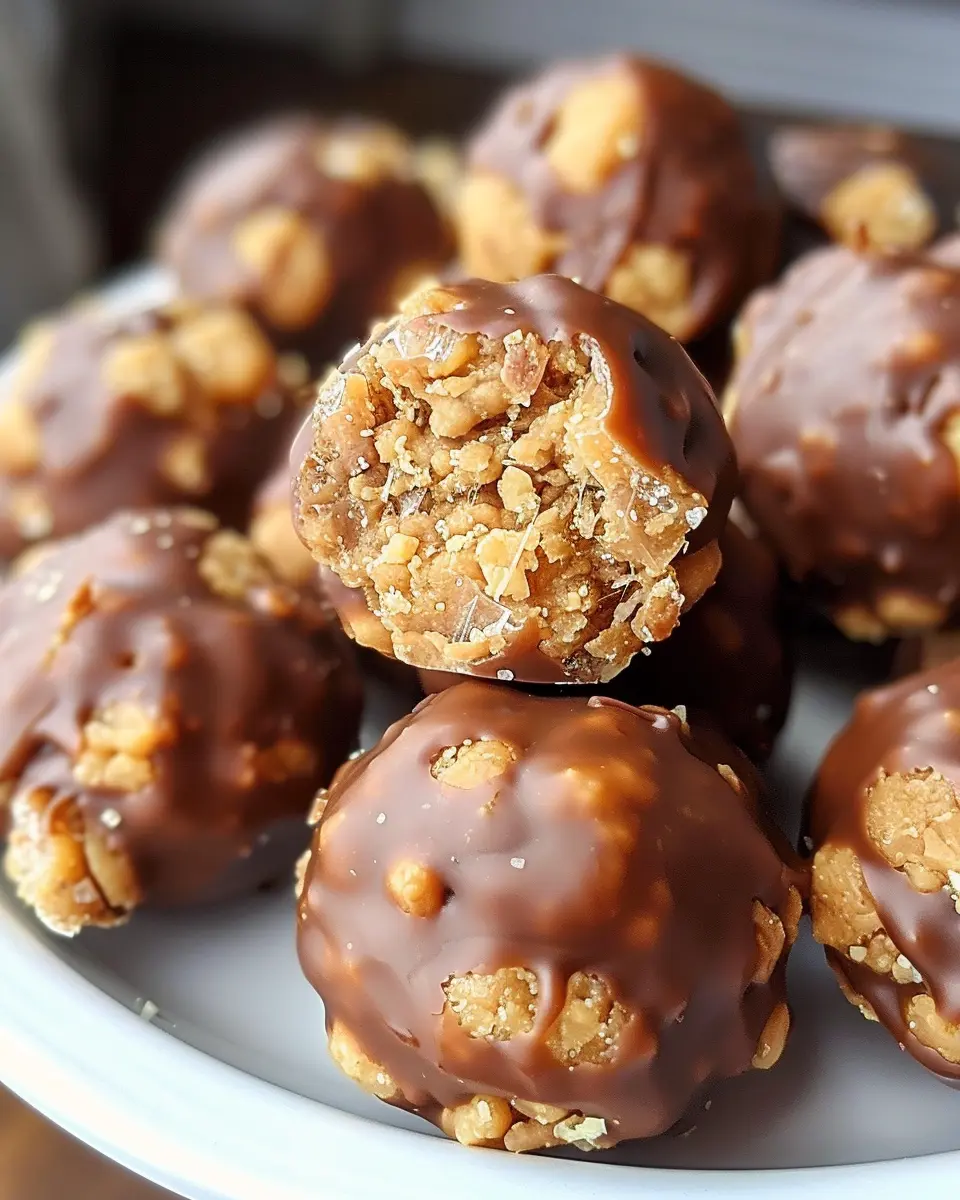
Coat the balls and add finishing touches
Finally, retrieve your chilled Butterfinger Balls from the refrigerator. Dip each ball into the melted chocolate, making sure it’s fully coated.
- Place them back on the parchment paper, and if you want, sprinkle some crushed Butterfinger or colorful sprinkles on top for an extra flair.
Let the chocolate set, and soon enough, you’ll have a delicious batch of Butterfinger Balls ready to share—or keep all to yourself!
These little treats are not only fun to make, but they’re an amazing way to impress friends at your next gathering. Now that you know how to prepare them, why not make a batch and see just how popular you become among your friends and family? Happy cooking!
Variations on Butterfinger Balls
When it comes to Butterfinger Balls, the classic recipe is just the beginning. There are so many delightful variations to explore. Let’s dive into a couple of fun ideas that will elevate your sweet treat game.
Chocolate-covered Butterfinger Balls
Why settle for just plain when you can make your Butterfinger Balls even more indulgent? Dipping them in chocolate gives a luxurious finish. Here’s how you can elevate yours:
- Dark Chocolate: For a rich and bold flavor, use dark chocolate. Melt it down and dip each ball, then refrigerate until set.
- White Chocolate Drizzle: If you’re in the mood for something sweeter, drizzle melted white chocolate on top of your chocolate-covered balls for a beautiful presentation.
- Sprinkles and Nuts: Before the chocolate sets, sprinkle crushed nuts or colorful sprinkles on top. This not only adds texture but also makes them more visually appealing!
Remember, high-quality chocolate can make all the difference. Check out Chocolate.org for some excellent options.
Nut and Fruit Added Butterfinger Balls
Mixing in some nuts and fruit can bring your Butterfinger Balls to a whole new level of flavor and nutrition. Don’t be afraid to experiment!
- Chopped Nuts: Add chopped walnuts or almonds for a crunchy contrast. Not only do they provide health benefits, but they also complement the sweetness of the Butterfinger coating.
- Dried Fruit: Consider incorporating dried cranberries or apricots. Their tartness can balance the sweetness beautifully.
Adding these elements not only enhances flavor but also adds a fun twist to your traditional treat. Why not challenge yourself to create a new favorite flavor combination?
These variations are not just small changes; they can completely transform your experience of making and enjoying Butterfinger Balls. Go ahead—explore, mix, and have fun in the kitchen!
Cooking notes for Butterfinger Balls
Tips for perfect texture and flavor
Crafting Butterfinger Balls that are the perfect blend of crunch and creaminess is easier than you think! Here are a few tips to elevate your treat.
-
Choose Quality Ingredients: Start with the best peanut butter and chocolate you can find. Natural peanut butter offers a richer flavor, while high-quality chocolate will give a smooth coating.
-
Chill for Coherence: Once you form your balls, chill them in the refrigerator for about 30 minutes. This step helps them hold their shape better when you coat them in chocolate.
-
Experiment with Coatings: While milk chocolate is classic, consider trying dark chocolate for a more sophisticated taste. Some adventurous bakers even sprinkle crushed nuts or sea salt on top for added texture!
-
Make them Ahead: Butterfinger Balls are perfect for make-ahead goodies. Store them in an airtight container in the fridge and enjoy them over a week.
For more cooking inspiration, check out sites like Serious Eats or Food Network. Enjoy your sweet adventure!
Serving suggestions for Butterfinger Balls
Ideal Occasions for Serving these Treats
Looking for the perfect moment to whip up some Butterfinger Balls? These delightful bites are incredibly versatile and a surefire hit at various gatherings. Whether it’s a cozy movie night at home or a lively game day watch party, these treats will steal the spotlight!
- Birthday Parties: Their fun, sweet flavor makes them a fantastic addition to any birthday spread, appealing to both kids and adults alike.
- Holiday Gatherings: During the festive season, Butterfinger Balls can be a unique dessert option that pairs beautifully with traditional sweets.
- Picnics or Potlucks: Easy to transport, they’re a hit for outdoor events where indulging in decadent snacks is a must.
- Coffee Breaks: Paired with a cup of coffee or tea, these bites provide a sweet pick-me-up during the workday.
No matter the occasion, you’ll find that Butterfinger Balls can elevate the atmosphere and satisfy every sweet tooth. Interested in other dessert ideas? Check out this link for additional inspiration!
Tips for Making Perfect Butterfinger Balls
Ensure Your Measurements Are Accurate
When it comes to making Butterfinger Balls, precision matters! Having the right ingredient ratios not only ensures the perfect texture but also enhances the flavor. Use a digital scale for dry ingredients like powdered sugar and a liquid measuring cup for peanut butter to achieve that creamy consistency. Ever wonder why some recipes fail even though the ingredients seem right? It’s often down to estimation. If you’re unsure about portion sizes, check out this handy measurement guide for some great tips!
Storage Tips for Lasting Freshness
So, you’ve made a batch of mouthwatering Butterfinger Balls—now what? Proper storage is key to keeping them fresh and delicious. Start by placing them in an airtight container. If you’re planning to indulge later, consider separating layers with parchment paper to avoid sticking. These tasty treats can last up to a week in the fridge, or you can even freeze them for longer storage. Once frozen, simply thaw them in the fridge an hour before serving. This time-saving tip makes it easy to have a sweet treat on hand whenever the craving strikes!
With these tips, you’ll be well on your way to creating Butterfinger Balls that are sure to impress your friends and family!
Time details for Butterfinger Balls
Preparation time
Getting started on your Butterfinger Balls is easy! You’ll need about 15 minutes to gather your ingredients and mix everything together. Don’t rush; this is the part where you can enjoy the process. Remember, making treats should be fun!
Chilling time
Once you’ve rolled your mixture into delightful balls, they’ll need to chill for about 30 minutes in the fridge. This step is crucial as it helps them firm up, ensuring a delightful bite after the chocolate coating is added.
Total time
In just under an hour, you can have your Butterfinger Balls ready to serve! With 15 minutes of prep, 30 minutes of chilling, and a bit of time for coating, these tasty snacks are well worth the wait. For a deeper dive into similar snack ideas, check out this article on no-bake treats. Happy snacking!
Nutritional information for Butterfinger Balls
When indulging in Butterfinger Balls, it’s crucial to know what you’re savoring! Let’s break down the nutritional information for these delightful treats.
Approximate calories per serving
Each Butterfinger Ball typically contains around 120–150 calories per serving. This makes them a great little snack or dessert without going overboard on calories. Of course, portion control is always a good idea—it’s easy to pop a few of these without realizing it!
Breakdown of key nutrients
These little bites of joy are packed with flavor but also come with some notable nutrients:
- Protein: Approximately 2–3 grams
- Fat: Roughly 7–9 grams, including healthy fats if you use natural peanut butter
- Carbohydrates: About 15–20 grams, depending on added sugars and chocolate used
For more detailed nutritional breakdowns, you might check reputable sources like the USDA’s FoodData Central or nutritioninfo.com for ingredient-specific insights. Balancing Butterfinger Balls with a healthy diet can help you indulge without the guilt!
Keep in mind that moderation is key, and enjoying these treats occasionally can be part of a balanced lifestyle. Got your running shoes on for a stroll after? Sounds like a plan!
FAQs about Butterfinger Balls
Can I use different candies in this recipe?
Absolutely! While our Butterfinger Balls recipe showcases the nostalgic crunch of Butterfinger candy, you can easily swap in other candy bars to diversify flavors. Think about using Snickers for a caramel twist or Milky Way for a creamy texture. If you’re feeling adventurous, try incorporating some chopped nuts or dried fruits for an interesting crunch. Explore your favorites and personalize your Butterfinger Balls!
How long will they stay fresh?
When stored properly, your Butterfinger Balls can last up to a week in the fridge and can even be frozen for longer storage. Just know that the texture might change slightly after freezing, so if you’re looking for that perfect crunch, it’s best enjoyed fresh.
What’s the best way to store them?
To keep your Butterfinger Balls fresh, store them in an airtight container in the refrigerator. If you’ve made a large batch, consider separating layers with parchment paper to prevent sticking. For a longer shelf-life, wrap them tightly in plastic wrap and seal them in a freezer bag. This way, you can enjoy your treats anytime you need a sweet pick-me-up.
If you want more tips and tricks on storing homemade sweets, check out this helpful article on candy storage.
Experimenting with flavors, ensuring proper storage, and planning ahead to maintain freshness will elevate your candy-making game. So get ready to indulge in some delicious Butterfinger Balls without any worries!
Conclusion on Butterfinger Balls
Recap the joy of homemade treats
Making Butterfinger Balls is more than just whipping up a sweet snack; it’s crafting a little piece of joy to share with friends and family. This treat perfectly captures the bliss of chocolate and peanut butter, creating an irresistibly delicious bite. Not only are they easy to prepare, but they also provide a nostalgic reminder of childhood favorites. By opting for homemade, you have the power to control the ingredients and tailor them to your taste.
So, why not embrace the joy of creating these delightful treats? Check out this article on the benefits of homemade snacks for some extra inspiration!
Print
Butterfinger Balls: The Easy Indulgent Treat You’ll Love
A decadent and easy treat perfect for any occasion!
- Total Time: 25 minutes
- Yield: 24 balls 1x
Ingredients
- 1 cup crushed Butterfingers
- 1 cup peanut butter
- 2 cups powdered sugar
- 1 cup chocolate chips
- 1 tablespoon coconut oil
Instructions
- In a mixing bowl, combine crushed Butterfingers, peanut butter, and powdered sugar until well blended.
- Form the mixture into small balls and place them on a baking sheet.
- In a microwave-safe bowl, melt chocolate chips and coconut oil together, stirring until smooth.
- Dip each ball in the chocolate mixture and return to the baking sheet.
- Chill in the refrigerator until set.
Notes
- For added flavor, consider mixing in some chopped nuts.
- Make sure the chocolate is tempered properly for a good coating.
- Prep Time: 15 minutes
- Cook Time: 10 minutes
- Category: Dessert
- Method: No-bake
- Cuisine: American
- Diet: Vegetarian
Nutrition
- Serving Size: 1 ball
- Calories: 150
- Sugar: 10g
- Sodium: 50mg
- Fat: 8g
- Saturated Fat: 4g
- Unsaturated Fat: 3g
- Trans Fat: 0g
- Carbohydrates: 18g
- Fiber: 1g
- Protein: 3g
- Cholesterol: 0mg
Keywords: Butterfinger Balls, Dessert, Treats