Introduction to Artisan Bread
Why You Should Make Artisan Bread at Home
Making artisan bread at home might sound like a daunting task, but it can lead to some of the most rewarding kitchen experiences. Not only is it a source of great satisfaction when you pull that golden loaf out of the oven, but it also invites you into a world rich with tradition and flavors. According to the Bread Bakers Guild of America, artisan bread emphasizes skill and high-quality ingredients, making it a perfect opportunity for young professionals looking to hone their culinary prowess.
Imagine coming home after a long day, the scent of warm bread seeping through your front door. This isn’t just about sustenance; it’s about creating something nourishing and delightful. You have the flexibility to play with flavors, incorporate various ingredients, and let your creativity flow. You can even customize your loaf with seeds, herbs, or even a hint of honey to match your personal taste.
So, why not give it a shot? With just a few basic ingredients—flour, water, salt, and yeast—you can embark on an exciting baking adventure. You don’t need specialized equipment; your hands, a mixing bowl, and a baking stone will suffice. For great tips and techniques, check out King Arthur Baking Company’s resources for baking how-tos and inspiration.
Now, you might be wondering, “Will it really turn out?” Rest assured, bread-making is as much about the journey as the destination. The bubbling of the dough during fermentation, the moment you shape it, and the thrill of seeing how beautifully it rises all contribute to a unique, fulfilling experience.
Making your own artisan bread not only saves money compared to premium store-bought options, but it also encourages mindfulness and patience. Plus, it’s a fantastic way to impress your friends—the perfect excuse to host a small gathering. Whether you enjoy a slice with your morning coffee or pair it with a warm bowl of soup, the artisan bread recipe you’ll discover here will elevate your meals and your kitchen skills.
Get ready to roll up your sleeves and dive into a baking experience that’s as rewarding as it is delicious!
Ingredients for Artisan Bread
Simple Ingredients for a Flavorful Loaf
Creating a rustic, mouthwatering artisan bread recipe at home requires just a handful of ingredients, yet each plays a pivotal role in the final creation. Don’t worry; you won’t need anything fancy or hard to find!
- High-Quality Flour: The backbone of your bread. Look for bread flour or all-purpose flour with a higher protein content, as this contributes to better gluten formation.
- Water: Preferably filtered or spring water at room temperature. Hydration is essential for the dough to develop!
- Salt: Sea salt or kosher salt enhances flavor and strengthens the dough structure.
- Yeast: Active dry yeast or instant yeast will give your bread the perfect rise—just be mindful of its freshness!
- Optional Add-ins: Think herbs, seeds, or even roasted garlic to elevate the flavor profile. Adding ingredients like these opens the door to creativity!
Curious about the science of bread-making? Check out King Arthur Baking for more expert insights on how the ingredients work together!
Not only will this artisan bread recipe look beautiful, but it will also impress your friends and family with your baking prowess. So, are you ready to get your hands floury?
Step-by-Step Preparation for Artisan Bread
Making artisan bread at home is not just a culinary task; it’s an experience that transforms your kitchen into a warm, inviting space filled with the aroma and anticipation of freshly baked bread. Ready to embark on this delicious journey? Let’s go through the steps together.
Gather Your Ingredients
Before you start, it’s essential to have all your ingredients ready. Here’s what you’ll need for your artisan bread recipe:
- 3 cups all-purpose flour
- 1 ½ teaspoons salt
- ½ teaspoon instant yeast
- 1 ½ cups warm water (around 100°F)
Pro Tip: Use filtered or bottled water if your tap water has a strong chlorine odor; it can affect the taste of your bread.
Mix the Dry Ingredients
In a large mixing bowl, combine the flour, salt, and instant yeast. Mix these dry ingredients thoroughly using a whisk to ensure they’re evenly distributed. Why is this step crucial? Because proper mixing ensures that the yeast will activate fully when introduced to the water. It could make or break your loaf!
Did you know? The type of flour you choose can influence the texture of your bread. Bread flour has higher protein content and will produce a chewier crumb compared to all-purpose flour.
Add Water and Combine
Now, it’s time to add the warm water. Pour the water into the flour mixture gradually while stirring with a wooden spoon or spatula. You want to achieve a shaggy dough that’s slightly sticky. Don’t be shy about using your hands if necessary; sometimes, it’s the best tool you have!
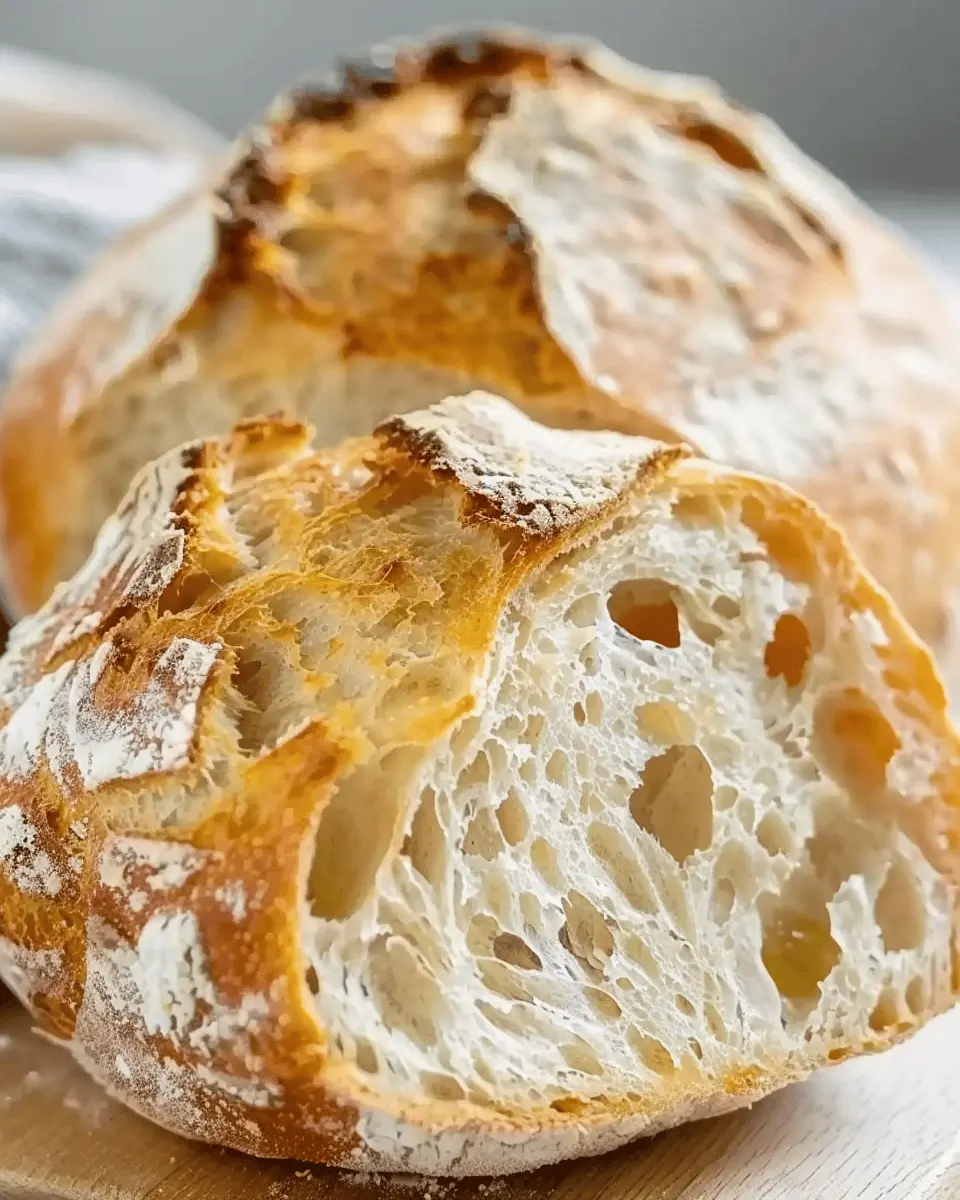
Curious about hydration? A wetter dough often results in higher crusts and airier interiors, which are hallmarks of perfect artisan bread.
Let the Dough Rise
Cover your bowl with a damp towel or plastic wrap, and let it rise in a warm, draft-free area for about 12 to 18 hours. This long fermentation time is what develops deep flavors and a lovely texture.
Pro Tip: Plan your baking around the dough’s rising schedule. You could start preparing it in the evening for a perfect brunch or dinner centerpiece!
Shape the Dough
After your dough has risen, it’s time to shape it. Lightly flour your work surface, then gently turn the dough out without deflating it too much. Fold it over itself a few times and shape it into a round loaf. Place it on a floured surface or in a floured proofing basket, seam side up.
Tip for success: Make sure to use enough flour on your surface to prevent sticking, but don’t go overboard; too much can toughen the crust.
Preheat the Oven
About 30 minutes before you plan to bake, preheat your oven to 450°F. If you have a Dutch oven or a baking stone, place it inside to heat up. This heavy-duty equipment will help create the steam necessary for a crisp, artisan crust.
Why preheat? A hot oven ensures you start baking with the right temperature, giving your bread the lift it needs.
Bake the Bread
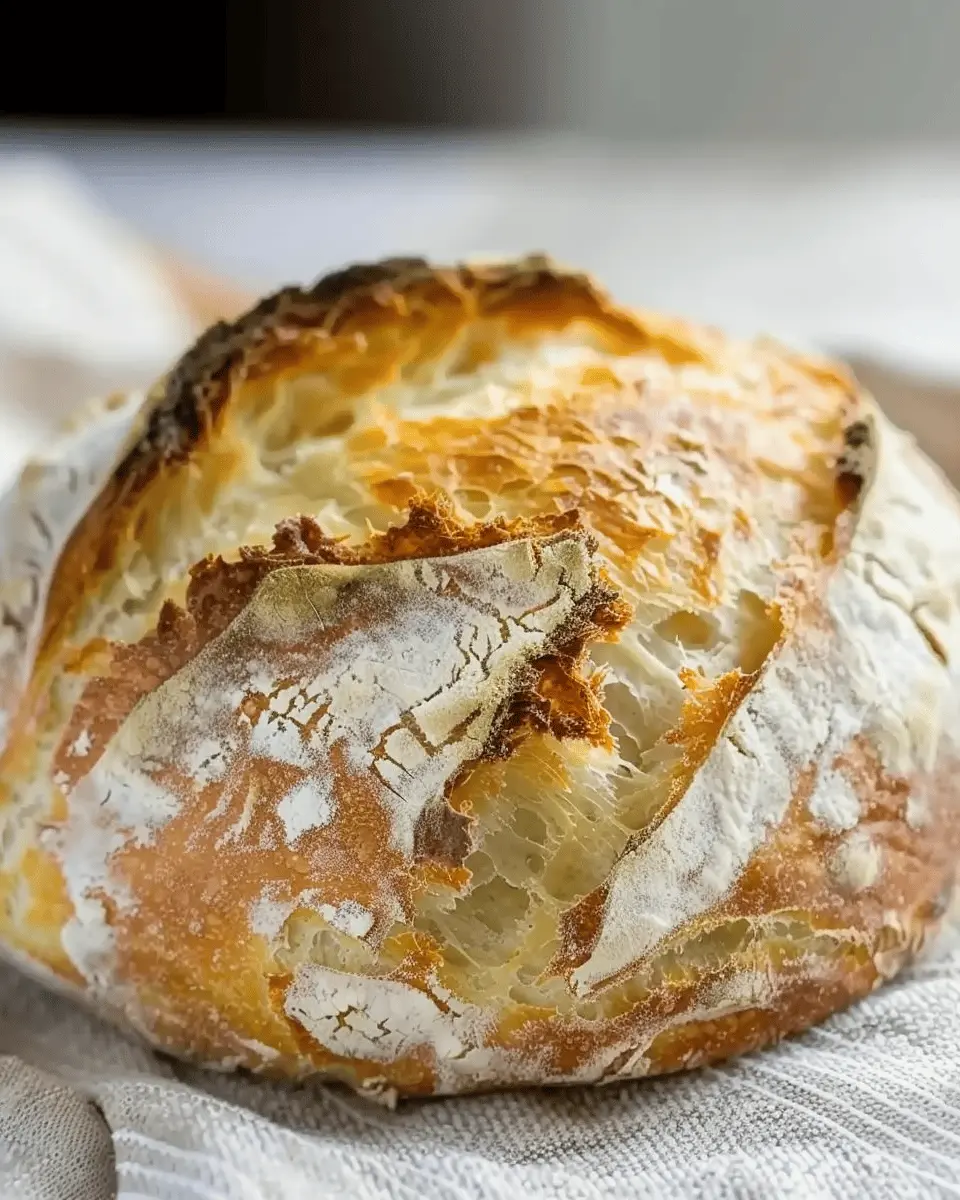
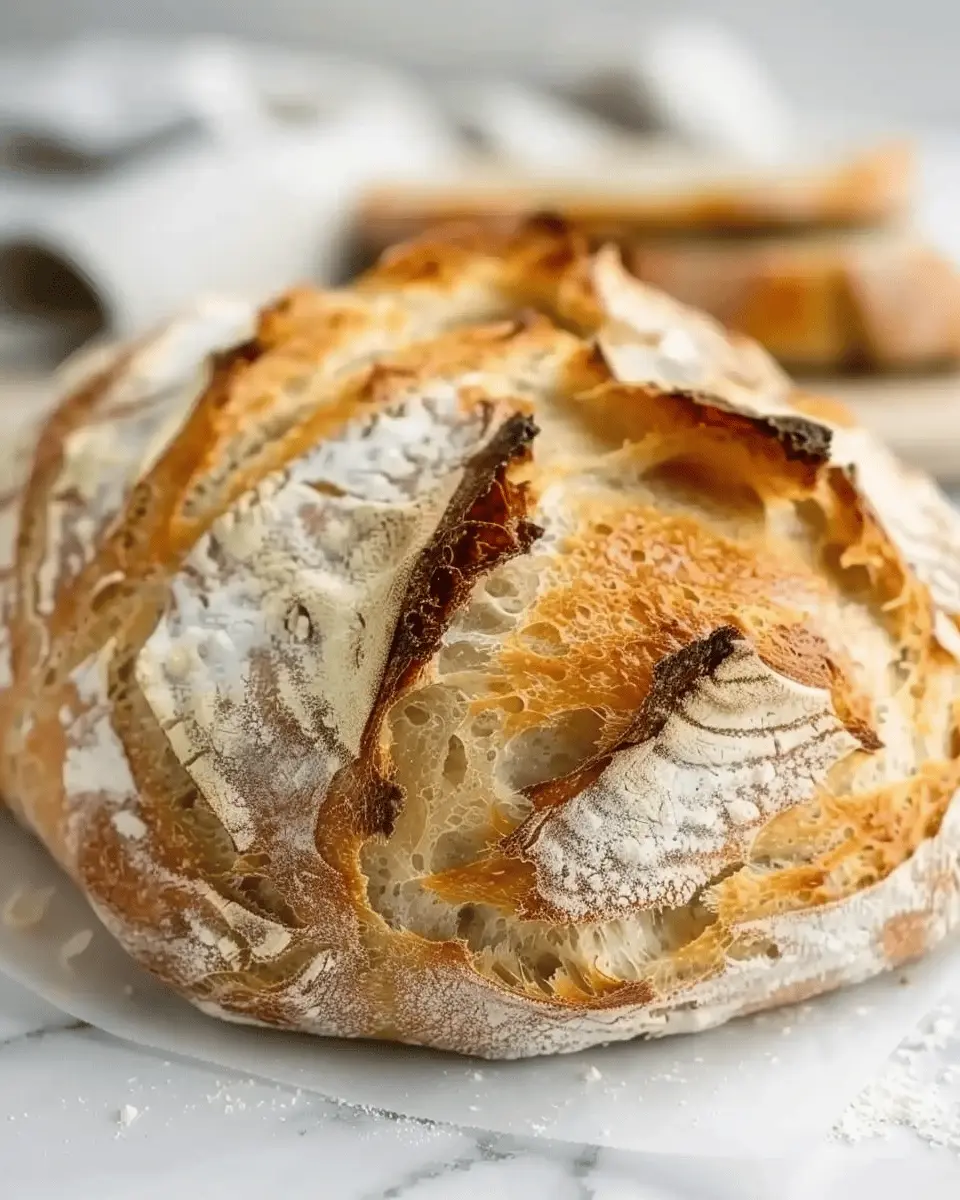
When your oven is hot and ready, carefully transfer the dough into the Dutch oven or onto the baking stone. If you love that classic artisan look, make a few shallow slashes on the top of the dough with a sharp knife to allow the steam to escape freely.
Bake for about 30 minutes with the lid on (if using a Dutch oven), then remove the lid and bake for an additional 15-20 minutes until golden brown.
Cool Before Slicing
Once baked, transfer your bread to a wire rack and let it cool completely before slicing. This step is crucial—slicing too soon can result in a gummy texture.
Personal tip: Enjoy the wait by brewing a cup of your favorite herbal tea or coffee to pair with your freshly baked artisan bread.
By following these simple yet effective steps, you’ll create a stunning artisan loaf that’s perfect for sandwiches, toasts, or just enjoying with a bit of butter. Happy baking!
Variations on Artisan Bread
Artisan bread is incredibly versatile, allowing you to experiment with flavors and textures. Let’s dive into a few delightful variations that will elevate your baking game.
Whole Wheat Artisan Bread
For those who love the nutty flavor and health benefits of whole grains, try crafting a whole wheat artisan bread. Simply replace half of the all-purpose flour in your base recipe with whole wheat flour. This small adjustment not only enhances the nutritional profile, but it also adds a slightly denser texture. Whole wheat flour is rich in fiber, which is essential for supporting digestion. You can also add a tablespoon of honey for a touch of sweetness that perfectly complements the earthy flavors.
Herb and Cheese Artisan Bread
Imagine biting into warm, freshly baked artisan bread infused with savory herbs and melted cheese. To create this variation, fold in your favorite herbs—like rosemary, thyme, or basil—into the dough along with shredded cheese such as cheddar or mozzarella. The combination not only adds a burst of flavor but also makes your kitchen smell amazing. Perfect for a cozy dinner or a picnic spread, this herb and cheese artisan bread pairs wonderfully with soups or salads.
Olive and Nut Artisan Bread
If you’re looking to impress, try an olive and nut artisan bread. Incorporate a mixture of chopped olives—Kalamata or green—and toasted nuts, like walnuts or almonds, into your dough. This delightful blend not only adds unique flavors and textures but also offers healthy fats, making your bread both delicious and nutritious. This variation pairs nicely with Mediterranean dishes and can be a stellar addition to your cheese boards or charcuterie spreads.
These variations not only allow you to customize your artisan bread recipe but also provide a great excuse to get creative in the kitchen. Happy baking! For more inspiration, check out resources like The Bread Lab and King Arthur Baking.
Tips and Notes for Artisan Bread
Perfecting the No-Knead Technique
To achieve a beautifully airy loaf, mastering the no-knead technique is essential. Begin by ensuring your ingredients are properly measured—precision is key in baking! The dough should be wet and sticky; don’t be shy about using plenty of flour when handling. Allow the dough to rest for a full 12-18 hours at room temperature, which develops its flavor and texture beautifully. If you’re new to this method, check out this insightful guide on the science of bread making for extra tips!
How to Store Your Bread
Once your artisan bread has cooled, store it properly to maintain freshness. Ideally, keep it wrapped in a clean kitchen towel to allow it to breathe while preventing it from drying out. For longer storage, consider slicing and freezing portions. It’s also a good idea to use a bread box to keep your loaf at its best. Remember, homemade bread tends to lose its freshness more quickly than store-bought options—use it up or share with friends who will appreciate your baking skills!
Serving Suggestions for Artisan Bread
Pairing with Dips and Spreads
One of the most delightful ways to enjoy your artisan bread recipe is by pairing it with delicious dips and spreads. Consider:
- Hummus: Its creamy texture and savory flavor blend perfectly with the crusty exterior of artisan bread.
- Baba Ganoush: This smoky eggplant dip will elevate your taste experience to new heights.
- Olive Tapenade: A rich combination of olives and herbs provides a vibrant contrast to your bread.
These options not only enhance the eating experience but also add nutritional value to your snack. For more pairing ideas, check out This Healthy Table.
Using Artisan Bread for Sandwiches
Artisan bread is a game-changer for sandwich lovers! Whether you’re preparing a quick lunch or a gourmet dinner, its hearty structure can hold up to generous fillings. Consider these combinations:
- Turkey Bacon with Avocado: Crispy turkey bacon layered with ripe avocado makes for a flavorful classic.
- Chicken Ham and Cheese: Try a warm sandwich with melted cheese and savory chicken ham for a filling meal.
- Vegetable Medley: Load your artisan bread with grilled veggies and a spread of pesto for a satisfying vegetarian option.
These delicious choices showcase just how versatile artisan bread can be, making every meal special. Happy cooking!
Time Breakdown for Artisan Bread
Preparation Time
When diving into this artisan bread recipe, you’ll want to set aside about 20-30 minutes for preparation. This includes measuring ingredients, mixing, and giving the dough its first rise. Don’t worry; this isn’t a race! Enjoy the tactile experience of kneading the dough, which is key to developing that lovely gluten structure.
Baking Time
The actual baking time is relatively short, around 25-30 minutes. You’ll want to keep a close eye on the bread towards the end, so you can achieve that beautiful golden crust. If you’re like me, the aroma alone will have you counting down the minutes!
Total Time
All in all, expect a total time commitment of approximately 4-6 hours. Keep in mind that much of this is hands-off, allowing the dough to rise and develop flavor. It’s a great opportunity to relax or prepare a delicious meal to accompany your fresh bread.
For a deep dive into the science of bread making, check out resources from the Bread Lab or King Arthur Baking.
Nutritional Facts for Artisan Bread
When indulging in a delicious artisan bread recipe, it’s good to be aware of its nutritional value. Here are the key facts to consider:
Serving Size
Typically, a serving size of artisan bread is about one slice, which can vary depending on how thickly you slice it.
Calories
A single slice of artisan bread averages around 70-80 calories. This makes it a relatively light option compared to other types of bread, enabling you to enjoy your meal without derailing your nutritional goals.
Fiber and Protein
You’ll find that each slice contains approximately 2 grams of fiber and 3 grams of protein. Whole grain versions often incorporate more fiber, enhancing digestive health. For a deeper dive into the benefits of fiber, check out sources like Harvard Health.
Artisan bread not only delights your taste buds but also supports a balanced diet when enjoyed in moderation. Happy baking!
FAQs about Artisan Bread
Can I use different types of flour?
Absolutely! One of the joys of making an artisan bread recipe is that you can experiment with various flours. While bread flour is highly recommended for its higher protein content, you can certainly mix in others like whole wheat, rye, or even spelt. Each type of flour will impart a unique flavor and texture to your bread, so don’t hesitate to try new combinations! For a hearty loaf, consider incorporating a bit of whole wheat flour; just remember that it may require adjustments in hydration since whole grains tend to absorb more water.
What if my dough is too sticky?
Sticky dough can be a common issue, especially for beginner bakers. If your dough feels more like a pancake batter than a bread mixture, you can dust it with a small amount of flour while kneading. A little flour goes a long way, so sprinkle a bit at a time until the dough is manageable. However, avoid dumping in excessive flour, as it could negate that lovely texture you’re aiming for. If you’re interested in a deeper dive on dough consistency, check out resources like King Arthur Baking.
How can I increase crustiness?
To achieve that beautiful, crunchy crust everyone loves, consider a few techniques. First, preheat your oven with a baking stone or cast iron pan inside—both help distribute heat evenly. When baking, introduce steam into the oven by placing a pan of hot water on the bottom shelf or spritzing water onto the oven walls. This creates a humid environment that enhances crust formation. Lastly, don’t be shy about extending the baking time a little; just keep a close watch to prevent burning! For detailed baking tips, Breadtopia has fantastic resources to elevate your bread-making journey.
Happy baking! Your journey into the world of artisan bread continues.
Conclusion on Artisan Bread
Embracing Homemade Goodness
There’s something undeniably special about baking your own bread. This artisan bread recipe not only allows you to embrace homemade goodness, but it also fills your kitchen with an irresistible aroma that store-bought loaves simply can’t compete with. Remember, the beauty of artisan bread lies in its simplicity and authenticity; each loaf reflects your personal touch and creativity.
When you take the time to knead, shape, and bake, you’re not just making food; you’re crafting a wholesome experience for yourself and loved ones. So gather your ingredients, savor each step, and enjoy the art of bread-making. After all, there’s nothing quite like sharing a slice of freshly baked artisan bread with family or friends. For more insights on baking essentials, check out King Arthur Baking.
Print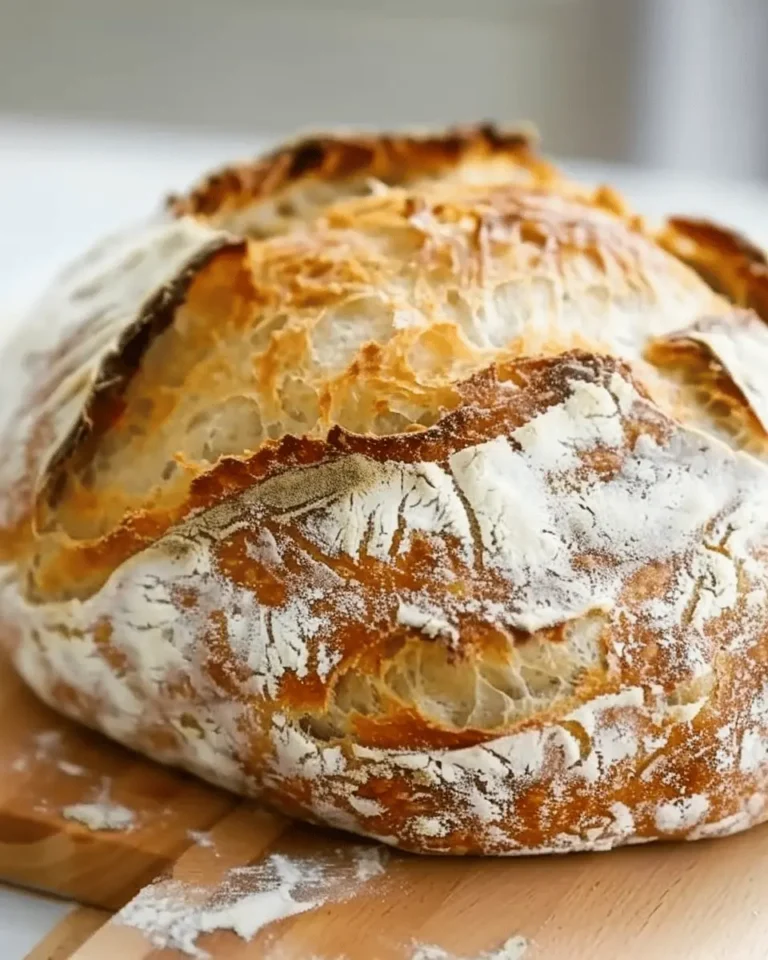
Artisan Bread Recipe: Easy Steps for Beginners to Indulge
Learn how to make artisan bread with easy steps designed for beginners.
- Total Time: 2 hours 10 minutes
- Yield: 1 loaf 1x
Ingredients
- 3 cups all-purpose flour
- 1 1/2 teaspoons salt
- 1 teaspoon sugar
- 1 packet active dry yeast
- 1 1/2 cups warm water
Instructions
- In a large bowl, combine warm water, sugar, and yeast. Let it sit for 5-10 minutes until frothy.
- Add flour and salt to the yeast mixture and stir until a rough dough forms.
- Knead the dough on a floured surface for about 10 minutes until smooth.
- Place the dough in a lightly greased bowl, cover, and let it rise for 1-2 hours until doubled in size.
- Preheat the oven to 450°F (232°C). Place a Dutch oven inside to heat up.
- Shape the dough into a round loaf and place it on parchment paper.
- Once heated, carefully transfer the dough into the Dutch oven. Cover and bake for 30 minutes.
- Remove the lid and bake for an additional 15-20 minutes until golden brown.
- Let the bread cool on a wire rack before slicing.
Notes
- For a crustier bread, use steam in the oven by adding a pan of water.
- Experiment with different types of flour for unique flavors.
- Prep Time: 20 minutes
- Cook Time: 50 minutes
- Category: Breads
- Method: Baking
- Cuisine: American
- Diet: Vegetarian
Nutrition
- Serving Size: 1 slice
- Calories: 120
- Sugar: 1g
- Sodium: 200mg
- Fat: 1g
- Saturated Fat: 0g
- Unsaturated Fat: 0g
- Trans Fat: 0g
- Carbohydrates: 24g
- Fiber: 1g
- Protein: 3g
- Cholesterol: 0mg
Keywords: artisan bread, bread recipe, easy bread recipe