No Knead Dutch Oven Bread Recipe Outline
If you’ve ever been tempted by the aroma of freshly baked bread wafting through your neighborhood, you’re not alone. Home baking is gaining renewed popularity, and for many young professionals, it’s a gratifying skill to master. This no knead dutch oven bread recipe is your ticket to easily creating a warm, crusty loaf that’s perfect for any occasion. You don’t need to be an expert baker to pull this off—all you need is a few basic ingredients and some time.
Understanding the Ingredients
Before diving into the actual baking, let’s take a quick look at what you’ll need. Here’s a succinct list of ingredients that support your no knead dutch oven bread journey:
- All-purpose flour: This is the star of your loaf, providing the necessary structure.
- Active dry yeast: This will give your bread its rise—make sure it’s fresh for the best results.
- Salt: Essential for flavor; it also helps control yeast activity.
- Warm water: Helps activate the yeast and brings your dough together.
You might want to check out King Arthur Baking for flour options that might suit your recipe perfectly.
The Magic of No Knead Dough
What makes this no knead dutch oven bread so special? The secret is in the long fermentation process that allows the gluten to develop naturally without the need for traditional kneading. It is also quite fascinating to learn how the fermentation time enhances the flavor profile of the bread. Unlike traditional techniques that require time-consuming kneading, this method only involves mixing, resting, and then baking. Perfect for busy lifestyles!
Steps to Create Your Perfect Loaf
Now, let’s outline the essential steps to create your no knead dutch oven bread:
-
Mix Ingredients: In a large bowl, combine flour, yeast, and salt. Gradually mix in warm water until all the flour is incorporated. You’ll want a shaggy and sticky dough.
-
Let it Rest: Cover the bowl with plastic wrap or a kitchen towel and let it sit at room temperature for 12 to 18 hours. The longer it rests, the better the flavor!
-
Shape the Dough: After the long rise, turn the dough out onto a floured surface and fold it a few times to shape it into a ball. Don’t worry about perfection; rustic is beautiful!
-
Preheat Your Dutch Oven: Place your empty Dutch oven in the oven while it preheats to 450°F. This helps create that crispy crust we all adore.
-
Bake: Carefully place the dough into the hot Dutch oven, cover it, and bake for about 30 minutes. Remove the lid and continue baking for another 15-20 minutes until golden brown.
Serving and Enjoying Your Bread
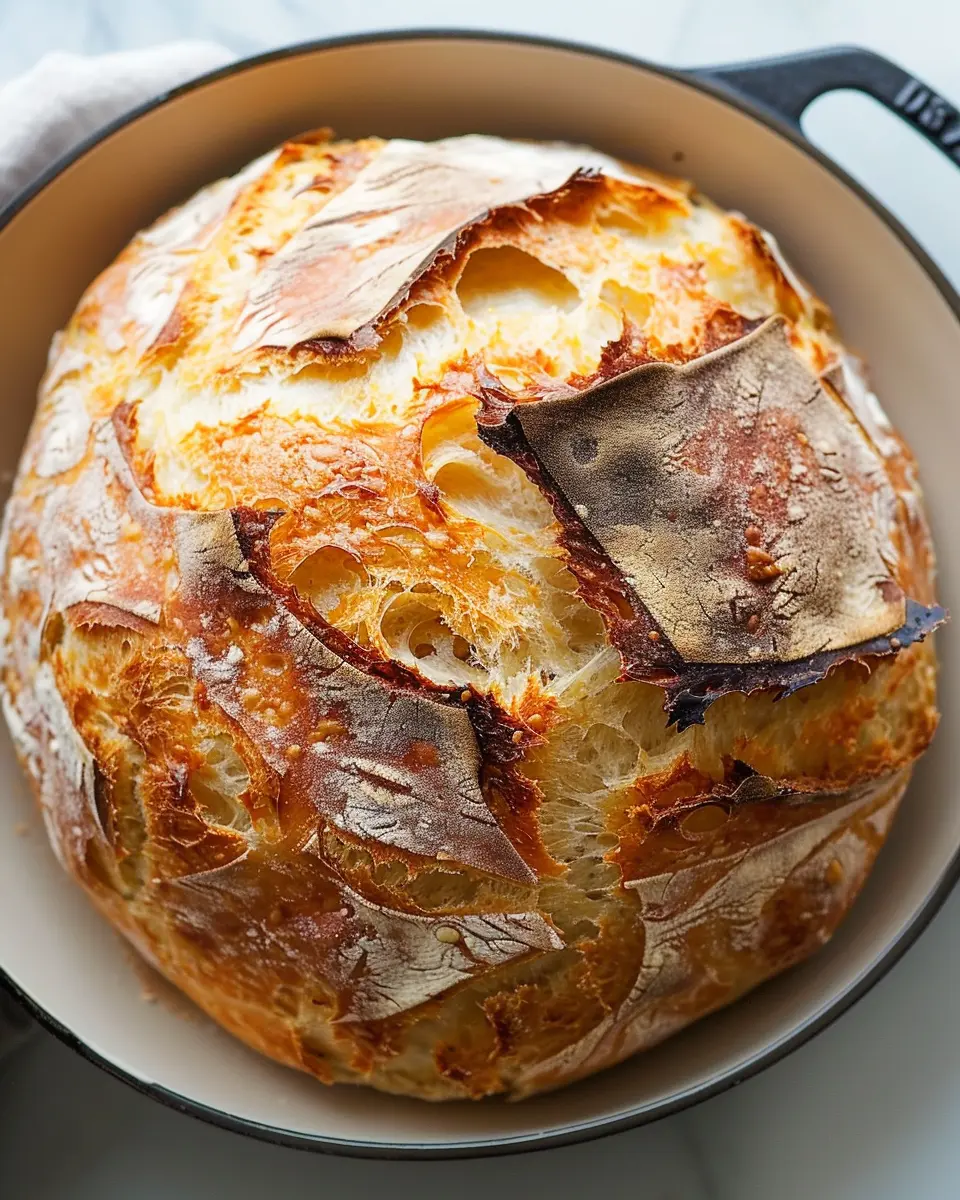
Once baked, let your no knead dutch oven bread cool on a wire rack before slicing. The crust should be perfectly crispy, while the inside remains fluffy. Serve it as a side for your favorite dishes or enjoy it with spreads such as butter or hummus.
What’s your favorite topping for fresh bread? Are you a classic butter person or do you fancy something a bit more adventurous, like avocado and turkey bacon?
Storing Your Bread
If you somehow resist devouring the entire loaf in one sitting, storing your bread correctly is crucial to keeping it fresh. Wrap it in a kitchen towel and store it in a bread box. Avoid using plastic, as it can lead to sogginess.
Curious about more bread tips? Check out professional bakers’ advice on how to keep your bread fresher for longer.
Conclusion: A Rewarding Baking Experience
Baking no knead dutch oven bread is both an art and a science, and it’s an incredibly rewarding experience. The delightful aroma that fills your kitchen, the satisfying crunch of the crust, and the tender interior make it all worthwhile. So why not gather your ingredients this weekend and give it a try? Your taste buds—and perhaps even your friends—will thank you for it!
Feel free to share your baking stories in the comments. Have you given this recipe a shot, or are you excited to try it for the first time? Your journey in bread-making might just start here!
Introduction to No Knead Dutch Oven Bread
Why Homemade Bread?
There’s something truly special about the aroma of homemade bread wafting through your home. Not only does it fill the space with warmth, but it also adds a sense of comfort and nostalgia, doesn’t it? According to a study by the NPD Group, 30% of Americans are baking more than they did pre-pandemic, reflecting a collective craving for homemade goods. Bread is easy, affordable, and allows for personal creativity, making it an excellent choice for anyone looking to impress friends or family—or just enjoy a good slice themselves. With a few simple ingredients, you can skip the store-bought breads and indulge in freshly baked loafs that taste infinitely better.
The Allure of No-Knead Recipes
Enter the delightful world of no-knead bread. The beauty of this method lies in its simplicity; no extensive hours of kneading involved! Instead, you mix flour, water, salt, and yeast, and let time do most of the work for you. This unique fermentation process develops complex flavors while producing a crusty, artisan-style loaf that rivals even the fanciest bakery creations. If you’re curious about science, there are fascinating articles on bread fermentation, like those from Serious Eats, that explore how this leisurely method enhances flavor, making your simple loaf extraordinary.
A Simple Solution for Busy Young Professionals
For many young professionals juggling tight schedules, convenience is key. You might be short on time during the week but still crave that fresh-baked goodness. That’s where no knead Dutch oven bread steps in to save the day. It requires minimal hands-on time, allowing you to mix the dough while preparing dinner, and then simply letting it rise overnight. The next day, you can pop it into a preheated Dutch oven for a fuss-free baking experience. You get all the satisfaction of homemade bread without the stress—perfect for your busy lifestyle!
Incorporating this no-knead method into your weekly routine not only saves time but also enhances your cooking skills. Imagine arriving home after a long day and having delicious, warm bread ready to enjoy with spreadable herb butter or as the base for a fantastic sandwich with turkey bacon or chicken ham. Now, doesn’t that sound like a nice reward for your hard work?
Ingredients for No Knead Dutch Oven Bread
Essential ingredients
Making the perfect no knead Dutch oven bread is surprisingly easy and requires just a few simple ingredients. Here’s what you’ll need:
- All-purpose flour: 3 cups, for that perfect rustic texture.
- Water: 1.5 cups, preferably warm, to activate the yeast.
- Salt: 1.5 teaspoons, enhancing the flavor of your bread.
- Yeast: 0.25 teaspoons of active dry yeast for that ideal rise.
Importance of quality ingredients
Using high-quality ingredients is crucial for the best outcome. Fresh, organic flour can elevate your loaf’s taste and texture significantly. Additionally, using filtered water ensures no unwanted chemicals subtly affect your bread’s flavor. Experts recommend this approach, as quality greatly influences the overall success of your baking endeavors. If you’re curious about the science behind baking ingredients, consider checking out resources like King Arthur Baking or Serious Eats for more tips.
Incorporating these quality ingredients will not only enhance your no knead Dutch oven bread but will also result in a more enjoyable baking experience! Why not gather your ingredients and start experimenting? You might find a new favorite kitchen routine!
Preparing No Knead Dutch Oven Bread
Making your own bread at home can be an incredibly rewarding experience. There’s something magical about the smell of freshly baked bread wafting through your kitchen. With no knead Dutch oven bread, you can enjoy a crusty, artisanal loaf that’s surprisingly simple to create. Let’s dive into the steps to prepare this delightful bread, ensuring you have everything you need for a successful baking adventure.
Gather Your Equipment
Before you start mixing ingredients, it’s crucial to gather your kitchen tools. Here’s what you’ll need:
- A large mixing bowl
- A Dutch oven with a lid (about 5-7 quarts)
- A wooden spoon or spatula
- Plastic wrap or a clean kitchen towel for covering
- Parchment paper (optional, but helps with transferring the dough)
Taking a moment to prepare your workspace can make the baking process smoother and more enjoyable. Plus, it allows you to focus on the magic of bread-making without running back and forth looking for tools!
Mix the Ingredients
Once your equipment is ready, it’s time to mix your ingredients. In your large mixing bowl, combine:
- 3 cups of all-purpose flour
- 1 ½ teaspoons of salt
- ½ teaspoon of instant yeast
- 1 ½ cups of warm water (not too hot, around 110°F is perfect)
Use your wooden spoon to mix until there are no dry spots and everything is combined. The dough will be sticky and shaggy—that’s perfectly fine! Cover the bowl with plastic wrap or a towel and let it rest for at least 12-18 hours at room temperature. This long fermentation process is what gives your no knead Dutch oven bread its incredible flavor and texture.
Let the Dough Rise
About 12-18 hours later, you’ll notice your dough has risen and bubbles have formed on the surface. This is a good sign! It’s showing that your yeast is alive and well. At this point, you can either continue with the recipe right away or let the dough sit for up to an additional 4 hours if needed. The key is to find that sweet spot of time that fits into your schedule.
Preheat Your Dutch Oven
Once you’re ready to bake, preheat your oven to 450°F (232°C) and place your empty Dutch oven inside. This helps achieve that perfect, crusty exterior. Let the Dutch oven heat for about 30-45 minutes. While this is happening, you can prepare your dough for baking.
Shape and Score the Dough
Carefully remove the hot Dutch oven from the oven (don’t forget to use oven mitts!). Turn your dough out onto a well-floured surface and, using floured hands, shape it into a ball. You don’t want to overwork it—just a gentle nudge to form it is perfect.
Next, place your dough onto a piece of parchment paper. Here’s where creativity kicks in: using a sharp knife or a bread lame, make a few shallow slashes across the top. This scoring technique not only adds a lovely aesthetic to the bread but also helps it expand properly while baking.
Bake to Perfection
Gently lift the parchment and place your dough into the hot Dutch oven. Cover it with the lid and bake for 30 minutes. After 30 minutes, remove the lid and bake for an additional 15-20 minutes until the bread is golden brown and that delightful crust forms.
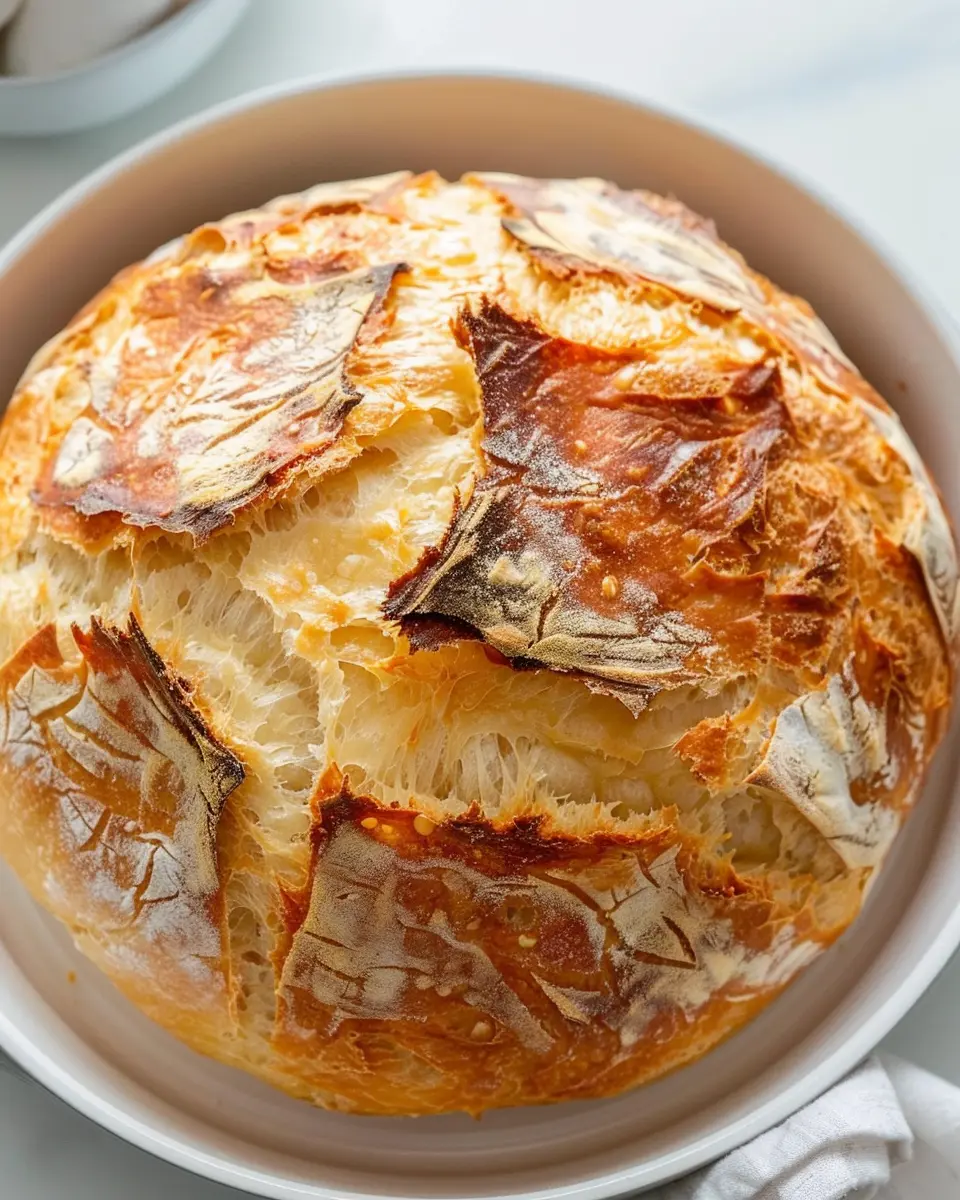
Once baked, allow your no knead Dutch oven bread to cool on a wire rack before slicing. This step is crucial—allowing the bread to cool enhances its flavor and texture.
Enjoy your fresh loaf with some olive oil for dipping or as the perfect accompaniment to your favorite soup!
For additional bread-making tips, check out the resources on King Arthur Baking or Serious Eats for inspiration and techniques to elevate your baking skills. Enjoy your journey into the world of homemade bread!
Variations on No Knead Dutch Oven Bread
Adding herbs and spices
One of the easiest ways to elevate your no knead Dutch oven bread is by incorporating fresh or dried herbs and spices. You could mix in fragrant rosemary, savory thyme, or even a pinch of smoked paprika for a hint of warmth. Consider adding garlic powder or onion flakes for some extra zing. It’s a fun way to customize your loaf! Start with one tablespoon of your chosen herbs or spices and adjust according to your taste. Check out sources like The Spruce Eats for more inspiration.
Incorporating whole grains
If you’re looking to boost the nutritional value of your no knead Dutch oven bread, think about swapping out some of the all-purpose flour for whole grains. Whole wheat flour lends a rich nutty flavor, while options like spelt or oat flour can add unique textures and tastes. Start with a 50/50 mix and adjust based on your preference. Research shows that whole grains can improve digestion and provide lasting energy, making for a worthwhile experiment!
Experimenting with different flours
Don’t hesitate to play around with different flours to see what works best for you and your palate. For instance, using bread flour can yield a chewier texture, while gluten-free flour blends offer an entirely different experience. If you’re curious about gluten-free options, brands like Bob’s Red Mill provide fantastic blends that make delicious bread. The possibilities are endless! How about trying almond flour for a more delicate crumb? It’s a delightful twist that many home bakers have come to adore.
Whether you’re adding spices or trying out new grains, your no knead Dutch oven bread journey can be as varied as your imagination. What will you try first?

Cooking Tips and Notes for No Knead Dutch Oven Bread
Common Mistakes to Avoid
Making no knead dutch oven bread can be a breeze, but a few pitfalls might trip you up:
- Not Enough Time to Rise: Patience is key. If your dough hasn’t fully risen, it won’t have that delightful airy texture.
- Ignoring Measurements: Baking is a science! Use a kitchen scale for precise flour measurements to achieve the best result.
- Skipping the Preheat: Failing to preheat your Dutch oven could lead to uneven baking. Aim for at least 30 minutes of preheating to get that perfect crust.
Adjusting for Altitude and Humidity
Baking at higher altitudes or in humid climates can be tricky. Here’s how to adjust:
- Altitude: If you’re above 3,000 feet, increase your liquid by about 1-2 tablespoons to compensate for drier air.
- Humidity: Damp environments may require reducing your water slightly; start with less, adding more as needed until the dough reaches the right consistency.
Baking bread can be a rewarding process; why not check out King Arthur Baking for further tips tailored to your specific conditions? Remember, each loaf is a learning experience!
Serving Suggestions for No Knead Dutch Oven Bread
Ideal pairings with spreads and dips
When it comes to enjoying your no knead dutch oven bread, the options for spreads are endless! A smear of herb-infused olive oil or a simple balsamic vinegar dip can elevate the bread’s crusty goodness. If you’re in the mood for something richer, try cream cheese combined with chives or roasted garlic. Adding a touch of honey or jam can add a sweet contrast to the toasted bread.
- Olive tapenade
- Hummus varieties (cilantro, beetroot, or classic)
- Pesto or sun-dried tomato spread
Perfect accompaniments for soups and salads
No knead dutch oven bread pairs beautifully with a warm, comforting bowl of soup or a fresh salad. Imagine dipping a rustic slice into a creamy tomato bisque or a hearty lentil soup. For salads, a classic Caesar or a refreshing Mediterranean mix complements the bread’s texture perfectly.
Consider these hearty pairings:
- Pumpkin or butternut squash soup
- Classic Caesar salad with turkey bacon
- Mediterranean salad with feta and olives
With these suggestions, you’ll enhance your no knead dutch oven bread experience, making every meal feel special. Check out more pairing ideas at Serious Eats or BBC Good Food.
Time Breakdown for No Knead Dutch Oven Bread
Making the perfect no knead Dutch oven bread is an exciting culinary journey! Here’s how your time will break down for this delightful loaf.
Preparation Time
You’ll need about 15 minutes to gather your ingredients and mix everything together. Keep it simple—just flour, water, salt, and yeast!
Rising Time
Patience is key! Allow your dough to rise for approximately 12 to 18 hours. Yes, it takes time, but this is where the magic happens as the flavor develops.
Baking Time
Once risen, it will take around 30 to 40 minutes to bake in the Dutch oven. The steam created inside helps create that crunchy crust we all love.
Total Time
In total, you’re looking at about 12 to 19 hours from start to finish, depending on how long you let the dough rise. Think of it as a slow, rewarding process that yields an irresistible homemade bread!
For more tips on enhancing your baking experience, check out resources like Serious Eats for expert advice!
Nutritional Facts for No Knead Dutch Oven Bread
Calories per slice
A slice of no knead dutch oven bread typically contains around 100 calories. This makes it a delightful yet guilt-free addition to your meals. For those aiming to enjoy some homemade bread without derailing their dietary goals, this is a great option.
Breakdown of nutrients
Let’s dive into the nutrient profile for each slice:
- Carbohydrates: Approximately 20 grams, providing a quick energy boost.
- Protein: Around 4 grams, essential for muscle repair and growth.
- Fat: Roughly 1 gram, depending on the use of oils during preparation.
- Fiber: About 1 gram, helpful for digestive health.
This no knead dutch oven bread is an excellent source of simple, wholesome ingredients, making it not just delicious but nutritious as well! For more details on the nutritional aspects of bread, check out sources like Healthline or American Heart Association.
In moderation, homemade bread can fit seamlessly into a balanced diet, offering both comfort and guilt-free enjoyment. Have you tried experimenting with different flours to enhance flavor and nutrition?
FAQs about No Knead Dutch Oven Bread
Can I make this recipe gluten-free?
Absolutely! While traditional no knead Dutch oven bread uses all-purpose flour, you can easily swap it with a gluten-free blend. Look for a high-quality all-purpose gluten-free flour that includes xanthan gum, which will help mimic the elasticity of gluten. Many home bakers have had success with brands like Bob’s Red Mill or King Arthur Flour. Just keep in mind that gluten-free bread may have slightly different textures and flavors, but experimenting can lead to delightful results!
How do I store leftover bread?
If you find yourself with extra no knead Dutch oven bread, it’s best to store it properly to maintain freshness. Here are some quick tips:
- Room Temperature: Place the bread in a paper bag or wrap it in a clean kitchen towel. Avoid plastic, as it can make the crust soft.
- Freezing: For longer storage, slice the bread and wrap it tightly in plastic wrap, then place it in a freezer bag. It can last for up to three months.
- Reheating: When you’re ready to enjoy it again, just pop it in the oven at 350°F for a few minutes to restore that lovely crust.
Why is my bread dense?
A dense loaf can be disheartening, but don’t worry, it happens to the best of us! Here are some common culprits to consider:
- Insufficient Rising Time: If the dough doesn’t have enough time to rise, it can lead to a denser loaf. Make sure to allow it to rest for at least 12-18 hours.
- Incorrect Measurements: An inaccurate flour-to-water ratio can also affect the texture. Use a kitchen scale for precision if possible.
- Old Yeast: Always check the freshness of your yeast; expired yeast won’t provide the right lift.
If you’re curious about the science of baking, consider checking out resources like King Arthur Baking for expert insights. Happy baking!
Conclusion on No Knead Dutch Oven Bread
The joy of homemade bread
There’s something truly magical about the aroma of freshly baked bread wafting through your home. No knead Dutch oven bread captures that joy effortlessly, bringing people together over warm slices and hearty flavors. According to a recent study, baking can even boost your mood, making the effort worth every bit.
Encouragement to try the recipe
I encourage you to dive into this recipe, regardless of your baking experience. The process is easy and immensely rewarding, plus you get to enjoy a loaf that you made yourself! Imagine sharing it with friends or having it as the centerpiece of a cozy dinner. So, grab your ingredients and embrace the art of bread-making—you might just discover your new favorite hobby! For helpful tips, check out resources like King Arthur Baking or Food52.
Print
No Knead Dutch Oven Bread: Easy, Fresh Loaf for Home Bakers
A simple and delicious recipe for making a crusty, artisan-style loaf of bread right in your own kitchen using a dutch oven.
- Total Time: 12 hours 60 minutes
- Yield: 1 loaf 1x
Ingredients
- 3 cups all-purpose flour
- 1.5 teaspoons salt
- 1 teaspoon instant yeast
- 1.5 cups warm water
Instructions
- In a large bowl, mix the flour, salt, and yeast together.
- Add the warm water and stir until a shaggy dough forms.
- Cover the bowl with plastic wrap and let it rise for 12 to 18 hours at room temperature.
- Preheat your oven to 450°F and place your dutch oven inside to heat up.
- Once the dough has risen, turn it out onto a floured surface and shape it into a ball.
- Carefully remove the hot dutch oven, place the dough inside, and cover it with the lid.
- Bake for 30 minutes covered, then remove the lid and bake for an additional 15 minutes until golden brown.
- Let it cool on a wire rack before slicing.
Notes
- For best results, use a kitchen scale for measuring flour.
- You can add herbs or cheese to the dough for extra flavor.
- Prep Time: 15 minutes
- Cook Time: 45 minutes
- Category: Breads
- Method: Baking
- Cuisine: American
- Diet: Vegetarian
Nutrition
- Serving Size: 1 slice
- Calories: 150
- Sugar: 0g
- Sodium: 400mg
- Fat: 1g
- Saturated Fat: 0g
- Unsaturated Fat: 0g
- Trans Fat: 0g
- Carbohydrates: 32g
- Fiber: 1g
- Protein: 4g
- Cholesterol: 0mg
Keywords: No Knead Dutch Oven Bread, Bread, Homemade Bread, Easy Bread Recipe