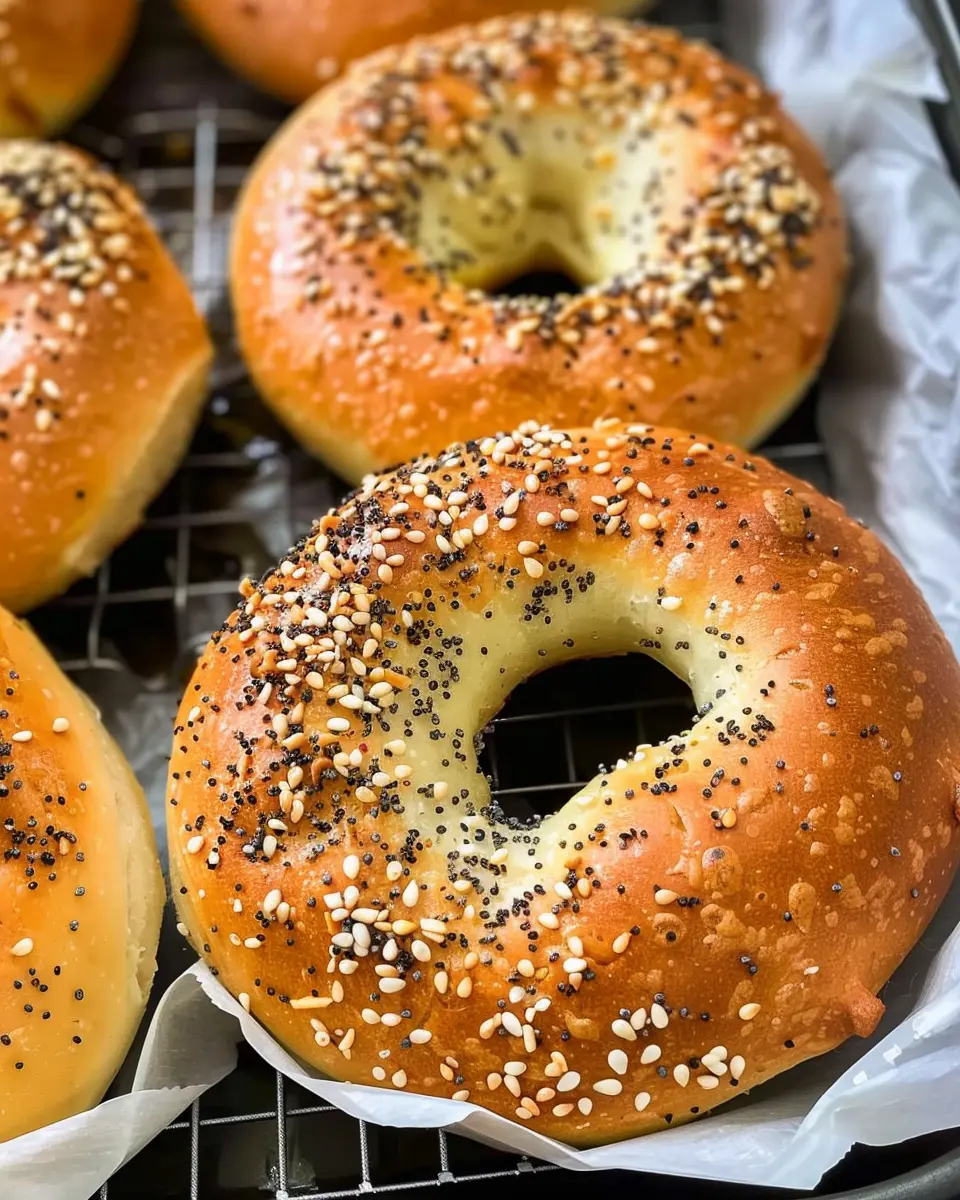
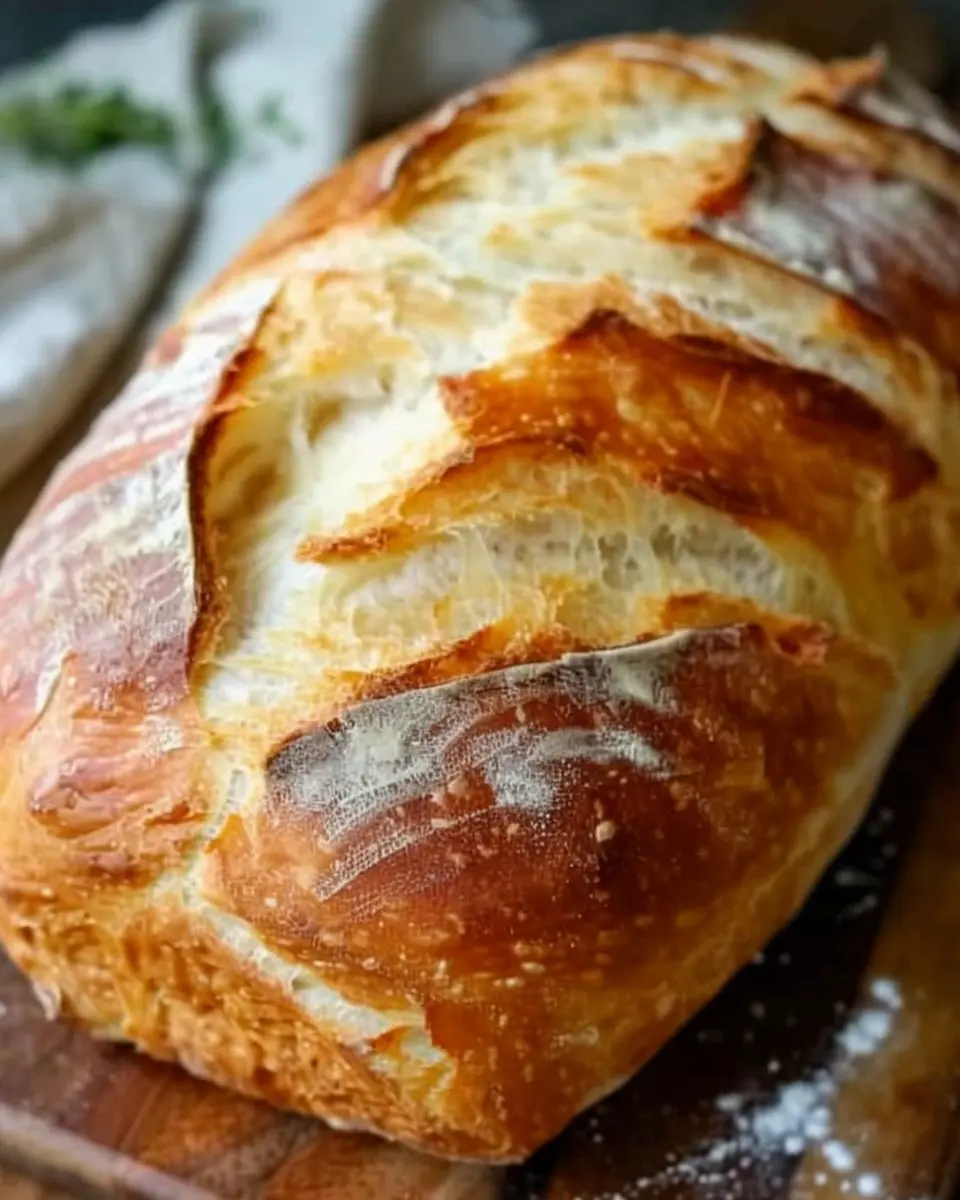
Introduction to Rustic French Bread Loaf
Great news for young professionals! Baking your own bread, specifically a Rustic French Bread Loaf, can transform your culinary experience. Why? Well, there’s something inherently satisfying about pulling a fresh loaf from the oven, its crusty exterior crackling gently as it cools. Plus, homemade bread allows you to take control of what goes into your food, bringing both health benefits and culinary creativity.
Why is homemade bread a game-changer for young professionals?
For many of us, life is a balancing act between career demands and personal life. Enter the Rustic French Bread Loaf as your culinary ally. Here are a few reasons why baking your own bread is a game-changer:
-
Cost-Effective: Store-bought artisan bread can get surprisingly pricey. With simple ingredients like flour, water, and yeast, making your own bread is not only budget-friendly but also allows you to wow your friends with your baking skills.
-
Healthier Options: Want to ditch the preservatives and additives? Homemade bread allows you to choose high-quality ingredients. You can experiment with whole grains or add seeds for extra nutrition.
-
Stress Relief: Kneading dough can be therapeutic. It’s a wonderful way to unwind after a long day at work. Plus, the aroma of fresh-baked bread wafting through your kitchen is bound to lift your spirits.
-
Versatility: A Rustic French Bread Loaf is perfect for a variety of meals. Use it for sandwiches filled with turkey bacon, or serve it alongside a comforting homemade soup. This adaptability means you’ll use it again and again.
The journey of baking bread may sound a bit daunting at first, but don’t worry! With a little patience and practice, you’ll find that it can quickly become one of your favorite kitchen escapades.
If you’re intrigued by the health benefits of homemade bread, check out resources from the Whole Grains Council or explore various baking techniques at King Arthur Baking to fuel your enthusiasm for baking.
Stay tuned! Let’s roll up our sleeves and dive into the delightful world of making your own Rustic French Bread Loaf.
Ingredients for Rustic French Bread Loaf
Essential ingredients for a perfect loaf
Creating a Rustic French Bread Loaf requires simplicity and quality in your ingredients. Let’s dive into what you’ll need to achieve that crusty exterior and soft, airy interior.
-
Flour: Start with bread flour for a perfect blend of strength and structure. It typically has a higher protein content than all-purpose flour, which helps develop gluten for that delightful chewiness.
-
Water: Use warm water—this helps to activate the yeast. Make sure it’s around 110°F (43°C) to create the ideal environment for fermentation.
-
Salt: Don’t underestimate salt! It enhances flavor and controls yeast activity. A good rule of thumb is 2% of the flour weight.
-
Yeast: Active dry yeast or instant yeast will do just fine. If you’re looking for a more pronounced flavor, a slow fermentation with a sourdough starter can add more depth.
-
Optional Extras: Consider adding a pinch of sugar or honey to nourish the yeast, or a splash of olive oil for a richer taste.
For a comprehensive guide to baking bread, check out resources from King Arthur Baking Company for more expert tips. Baking can be a rewarding journey, don’t you think?
Preparing Rustic French Bread Loaf
If you’re ready to elevate your baking game and impress your friends with a Rustic French Bread Loaf, you’ve landed in the right spot. This warm, crusty loaf isn’t just about the ingredients; it’s about the love and attention you give it during the preparation. Let’s embark on this satisfying baking journey together.
Activate the yeast
The magic of any bread begins with yeast. Start by warming 1 ½ cups of water to about 110°F (45°C). You don’t want it too hot, as that could kill the yeast. Sprinkle 2 ¼ teaspoons of active dry yeast and a pinch of sugar into the water and let it sit for about 5-10 minutes until it becomes frothy. This bubbly action shows the yeast is alive and ready to do its job. If you’re looking for more detailed guidance, check out resources like King Arthur Baking for expert advice on yeast activation.
Mix and knead the dough
Once your yeast is frothy, combine it in a large mixing bowl with 4 cups of all-purpose flour and 1 ½ teaspoons of salt. It’s best to add the salt to the flour before combining with the yeast mixture, as this keeps the salt from coming into direct contact with the yeast. Mix the ingredients until they form a rough dough. Now comes the fun part: kneading. On a lightly floured surface, turn the dough out and knead it for about 10 minutes. Your goal is a smooth, elastic texture—imagine a well-stretched rubber band. If you have a stand mixer, you can use the dough hook attachment for this step.
First rise – letting the dough rest
After kneading, place your dough in a lightly oiled bowl, covering it with a clean kitchen towel or plastic wrap. Let it rise in a warm spot for about 1 to 1.5 hours, or until it doubles in size. Looking to speed this up? Try placing it in an oven that’s turned off but with the light on. The gentle warmth creates a cozy atmosphere for rising. It’s like giving your dough a warm hug!
Shape the dough
Once your dough has risen beautifully, turn it out onto a floured surface again. Gently deflate it by pressing it down without being too rough. Form the dough into a round shape or an elongated loaf, depending on your preference. If you choose a round shape, you’ll get that classic artisanal look. Pinch the seams to seal and give it a nice surface tension by cupping it under your palm and rotating it slightly.
Second rise – the final touch
Transfer your shaped loaf onto a baking sheet lined with parchment paper or a floured proofing basket. Cover it again and let it rise for another 30 to 45 minutes. This second rise is crucial—it will directly affect the texture of your Rustic French Bread Loaf. While you’re waiting, why not take a moment to enjoy a good podcast or a quick yoga stretch? Make the most of this time!
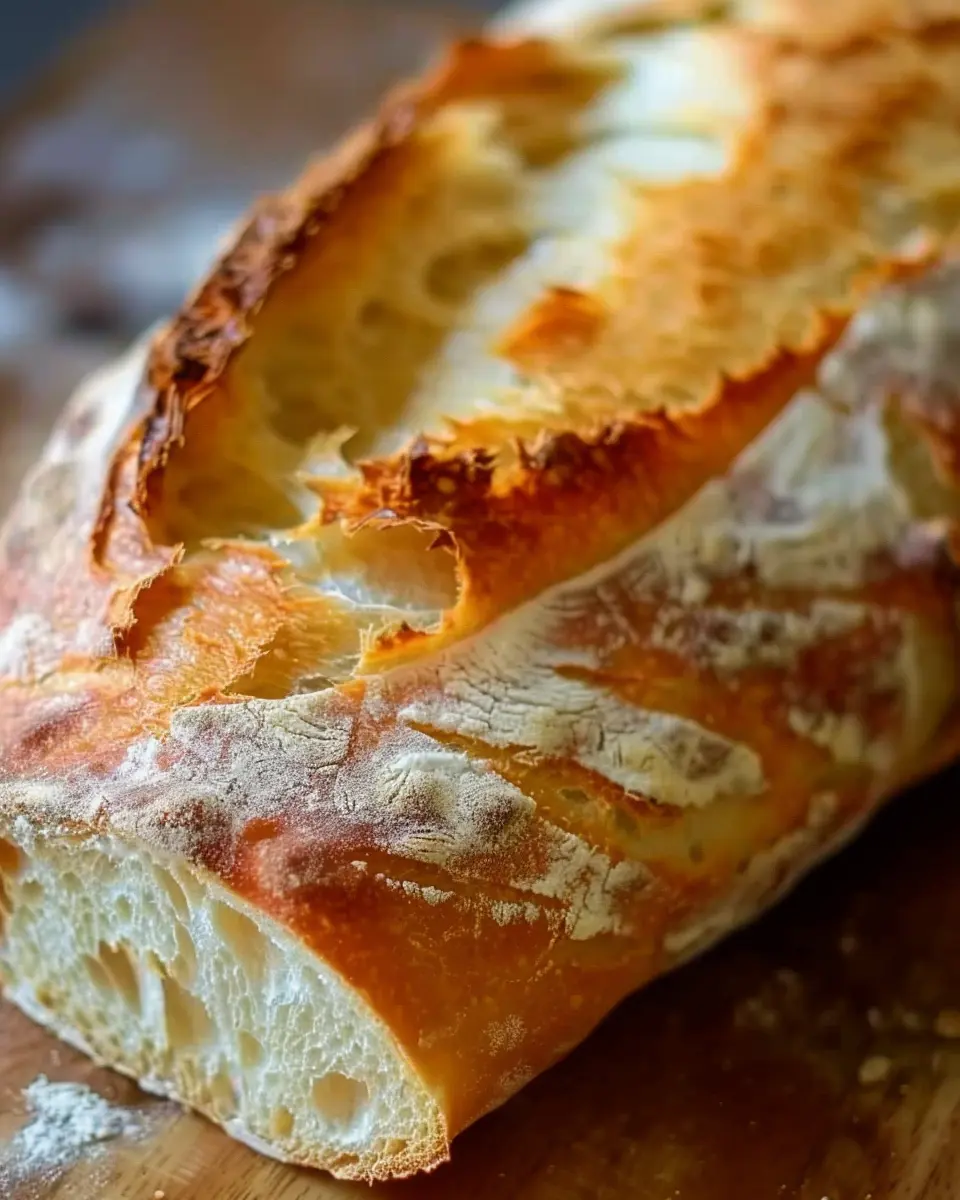
Baking your rustic loaf
Preheat your oven to 450°F (232°C). As it heats, make a few shallow slashes on top of your loaf with a sharp knife—this helps it expand while baking. For that extra crusty exterior, place a small pan of hot water on the bottom rack of the oven; the steam creates a perfect atmosphere. Bake your loaf for about 25-30 minutes or until it’s golden brown. Trust your senses—let the delicious aroma guide you! Once it’s done, place it on a wire rack to cool.
Baking your own Rustic French Bread Loaf may seem daunting at first, but with patience and a little practice, you’ll be whipping up loaves that make your kitchen the envy of your friends. Enjoy your freshly baked bread with all sorts of delightful toppings, from hearty Turkey Bacon and Chicken Ham sandwiches to simple spreads like butter or homemade jam. Happy baking!
Variations on Rustic French Bread Loaf
Adding herbs for flavor
Have you ever thought about how simple herbs can take your Rustic French Bread Loaf from ordinary to extraordinary? Infusing your dough with herbs can elevate the flavor profile to new heights. Try mixing in chopped fresh rosemary, thyme, or even a dash of basil. These can add a delightful aroma and a burst of flavor with every bite. If fresh herbs aren’t available, dried herbs work just fine. A general rule of thumb is to use about one tablespoon of fresh or one teaspoon of dried herbs for a standard loaf. Experimenting with combinations like oregano and garlic can also yield delicious results, making this brew of flavors versatile for countless meals. To learn about herb pairings, check out this Herb Gardening guide.
Crafting a whole grain version
Are you looking to pack your Rustic French Bread Loaf with more nutrients? A whole grain version is not only an option but also a beautiful way to incorporate additional health benefits into your baking. You can substitute half of the all-purpose flour with whole wheat flour for a heartier texture. This not only boosts the fiber content but also adds a nutty flavor that complements the crust beautifully. For even more texture, consider adding seeds like sunflower or flaxseed.
By making these adjustments, you’re not just creating a delicious loaf but also making choices that align with a healthier lifestyle. Plus, it gives you that fresh-from-the-bakery feel right in your kitchen! Making small tweaks like these can turn your bread-making into an exciting culinary adventure that aligns with your personal taste and health goals. Enjoy experimenting!
Cooking tips and notes for Rustic French Bread Loaf
Tips for crustier bread
Creating a Rustic French Bread Loaf with an irresistible crust is all about technique. Here are a few tips to achieve that perfect exterior:
- Steam it up: Introducing steam during the initial baking phase helps form a crispy crust. You can do this by placing a pan of hot water at the bottom of your oven.
- Use a baking stone: Preheating a baking stone mimics the effects of a traditional bakery oven, promoting an evenly baked loaf.
- High hydration dough: Keep your dough moisture level high. A wetter dough leads to more air bubbles, contributing to a chewier crust.
For more expert insights, check out King Arthur Baking’s tips.
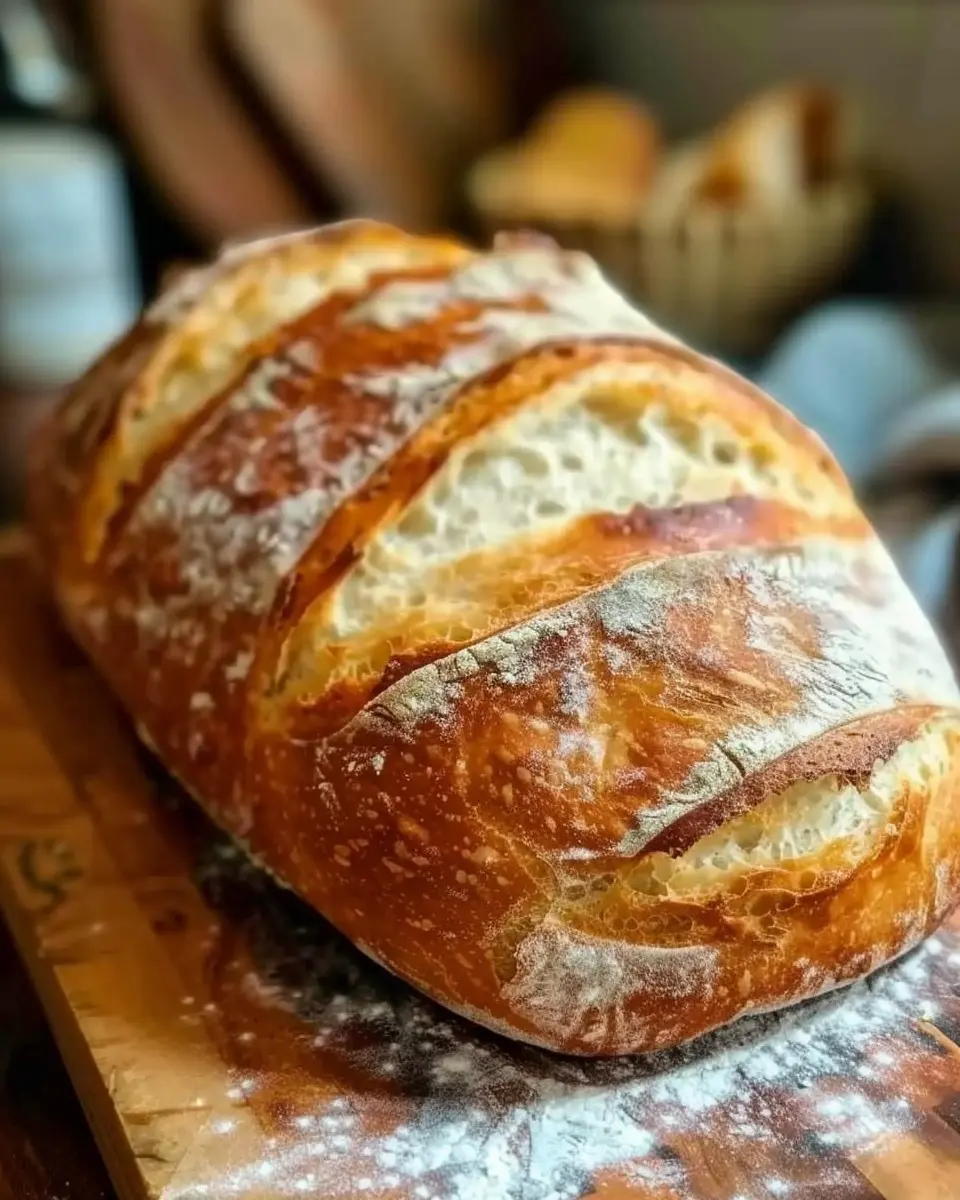
Importance of cooling
Once your Rustic French Bread Loaf is baked, resist the urge to slice it immediately. Cooling your loaf on a wire rack is crucial for proper texture. This simple step allows steam to escape, preventing the bread from becoming soggy. Allow your bread to rest for at least an hour — patience is definitely a virtue here! This is also the time when flavors deepen and enhance, making your bread even more memorable. So, grab a cup of coffee, kick back, and let that glorious aroma fill your kitchen.
Serving suggestions for Rustic French Bread Loaf
Pairing with spreads and toppings
Your Rustic French Bread Loaf serves as the perfect canvas for a variety of spreads and toppings. Consider slathering it with creamy butter or rich olive oil for a simple yet delicious start. If you’re in the mood for a more filling treat, try adding avocado and a sprinkle of sea salt or a generous layer of herbed cream cheese topped with slices of turkey bacon or chicken ham. For a lighter option, a drizzle of honey or a touch of fig jam can beautifully complement the crusty bread’s flavor.
Using leftover bread creatively
Don’t let any leftover Rustic French Bread Loaf go to waste! Think beyond the classic toast. Transform stale slices into crunchy croutons to elevate your salads or soups. Just cube the bread, toss with olive oil and herbs, and bake until golden. Alternatively, consider making a delicious bread pudding for a surprisingly comforting dessert. The options are endless, so let your creativity shine—check out more ideas on Food52 for inspiration on using stale bread!
Time breakdown for Rustic French Bread Loaf
Preparation Time
Creating a Rustic French Bread Loaf begins with a satisfying 20 minutes of hands-on preparation. This includes mixing your flour, water, salt, and yeast together. The tactile experience of kneading can be quite therapeutic—don’t rush it!
Baking Time
Once your dough has risen, the baking process takes about 30 minutes. Your kitchen will be filled with an irresistible aroma, enticing everyone nearby. You’ll want to keep an eye on your loaf to ensure it gets that beautiful golden crust.
Total Time
In total, plan for roughly 2 hours to make your Rustic French Bread Loaf, including rise time. It’s a great opportunity to whip up some homemade spreads or toppings! If you’re curious about some pairing ideas, check out this guide to delicious bread spreads for inspiration.
By breaking down the time, you can effortlessly incorporate this delightful bread into your routine. Happy baking!
Nutritional facts for Rustic French Bread Loaf
Calories per slice
A satisfying slice of Rustic French Bread Loaf contains approximately 80 calories. This puts it in a comfortable range for those who enjoy indulging in freshly baked bread without feeling guilty. Perfect for breakfast or a side during dinner, you can savor that warm crunch—just watch those servings!
Breakdown of macronutrients
When we break down the Rustic French Bread Loaf, you’ll find a harmonious balance of macronutrients:
- Carbohydrates: About 15 grams per slice, ideal for a quick energy boost.
- Protein: Roughly 2.5 grams, providing essential amino acids for muscle repair.
- Fat: Contains a minimal amount, around 1 gram, making it a heart-healthy choice if enjoyed in moderation.
It’s always good to remember that while bread can sometimes get a bad rap, it’s all about balance. Incorporating this loaf with protein-rich toppings like Turkey Bacon or Chicken Ham can create a delicious and satisfying meal. For more insights on healthy eating, consider checking resources like the USDA’s dietary guidelines to help you make informed choices.
FAQs about Rustic French Bread Loaf
Baking your own Rustic French Bread Loaf can be a rewarding experience, but you may have some lingering questions. Don’t worry; I’m here to help clear up any uncertainties you might have!
How do I store homemade bread?
To keep your Rustic French Bread Loaf fresh, store it at room temperature in a paper bag. This allows the bread to breathe without becoming soggy. If you prefer, you can also wrap it in a clean kitchen towel. Avoid plastic bags, as they can trap moisture and lead to a chewy crust!
If you’re looking for an extended shelf-life, consider slicing the loaf before storing it. This way, you can grab a slice whenever you need just a little without worrying about wasting the whole loaf.
Can I freeze my rustic loaf?
Absolutely! Freezing your Rustic French Bread Loaf is a fantastic way to prevent waste and enjoy that freshly baked taste later. Wrap the cooled loaf tightly in plastic wrap or aluminum foil and place it in a freezer-safe bag. When you’re ready to enjoy it, simply thaw it at room temperature or warm it in the oven.
What if my dough doesn’t rise?
If your dough isn’t rising, it could be related to the yeast. Ensure your yeast is fresh and stored correctly; expired yeast won’t do much! Also, the temperature of your environment plays a role. Make sure you are allowing the dough to rise in a warm spot—ideally, it should be around 75°F to 85°F. For more tips on yeast management, check out this great source on baking techniques.
With these tips in hand, you’re ready to bake a perfect Rustic French Bread Loaf! Enjoy your baking adventure!
Conclusion on Rustic French Bread Loaf
Recap of the joys of homemade bread
Creating your own Rustic French Bread Loaf is not just about baking; it’s an experience filled with warmth and comfort. The aroma of freshly baked bread wafting through your home is unparalleled, evoking feelings of nostalgia and satisfaction. Nothing compares to slicing into that crusty exterior and revealing the soft, airy interior.
Consider experimenting with flavors by adding herbs or garlic, as suggested by the Bread Baker’s Guild of America. With just a few simple ingredients, you can express your creativity and tailor your loaf to your family’s tastes. So, roll up your sleeves and embrace the art of bread-making—it’s not just food, it’s an adventure in your kitchen!
Print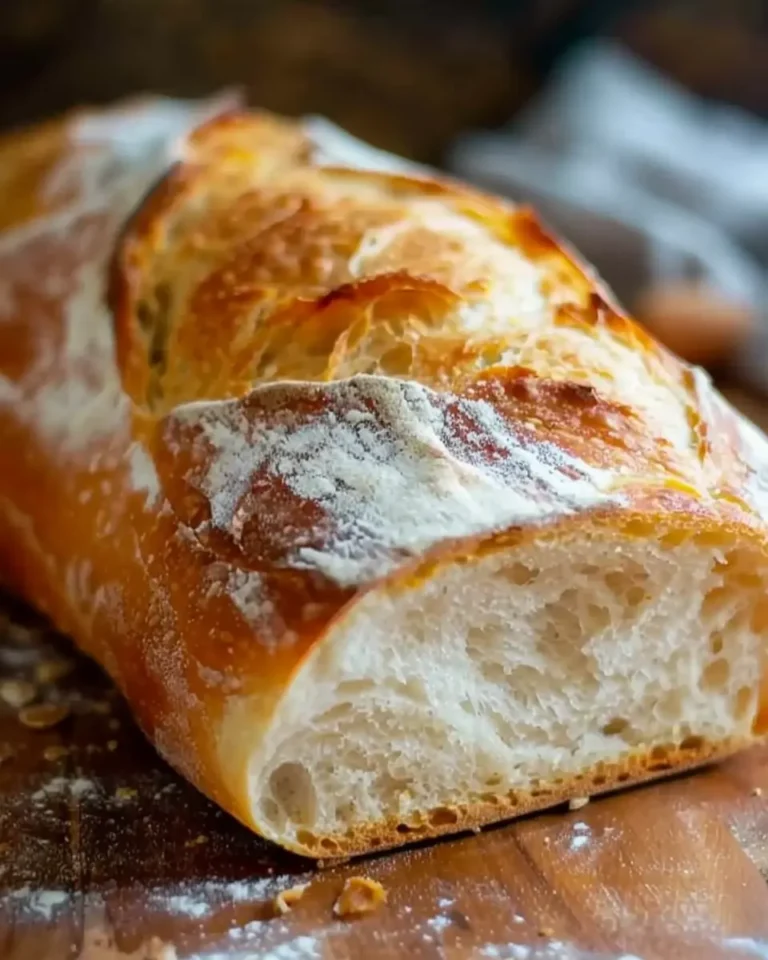
Rustic French Bread Loaf That’s Perfect for Every Home Chef
A delicious and crusty Rustic French Bread Loaf recipe that is easy to make at home.
- Total Time: 1 hour 45 minutes
- Yield: 1 loaf 1x
Ingredients
- 4 cups all-purpose flour
- 1 ½ cups warm water
- 2 teaspoons salt
- 1 packet active dry yeast
Instructions
- In a large bowl, combine warm water and yeast. Let it sit for 5 minutes until frothy.
- Add flour and salt to the yeast mixture and stir until a shaggy dough forms.
- Knead the dough on a floured surface for about 10 minutes until smooth.
- Place the dough in a greased bowl, cover, and let it rise for 1 hour.
- Preheat your oven to 450°F (232°C).
- Shape the dough into a loaf and place it on a baking sheet.
- Bake for 25-30 minutes until golden brown and hollow sounding when tapped.
- Cool on a wire rack before slicing.
Notes
- For a crustier loaf, place a pan of water in the oven while baking.
- You can add herbs or spices for extra flavor.
- Prep Time: 15 minutes
- Cook Time: 30 minutes
- Category: Bread
- Method: Baking
- Cuisine: French
- Diet: Vegetarian
Nutrition
- Serving Size: 1 slice
- Calories: 120
- Sugar: 0g
- Sodium: 1.5mg
- Fat: 1g
- Saturated Fat: 0g
- Unsaturated Fat: 1g
- Trans Fat: 0g
- Carbohydrates: 25g
- Fiber: 1g
- Protein: 4g
- Cholesterol: 0mg
Keywords: Rustic French Bread, homemade bread, baking bread