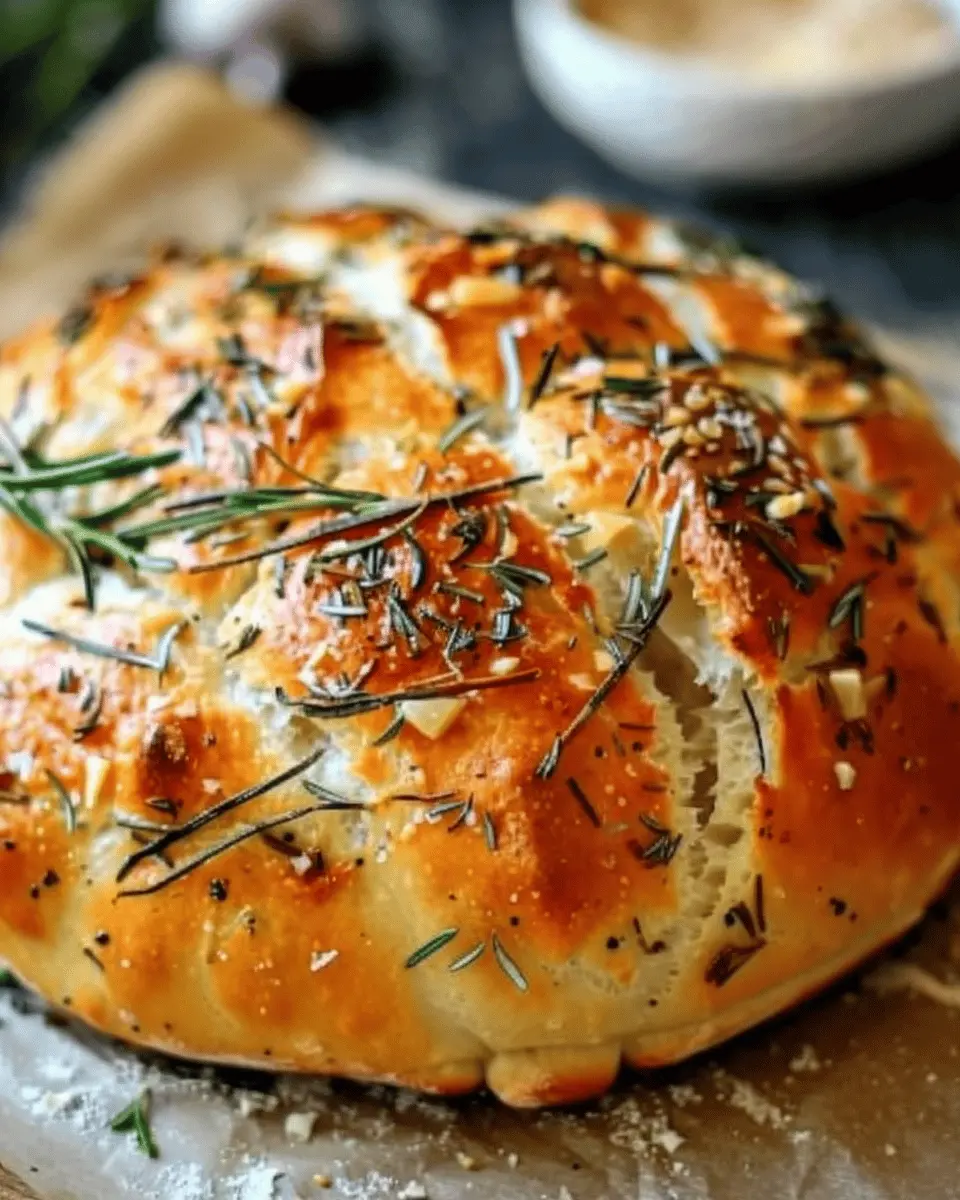
Introduction to Bake the Best Roasted Garlic Rosemary Artisan Bread
There’s something magical about the aroma of homemade bread wafting through your kitchen. If you’ve never attempted to bake your own, it’s time to roll up your sleeves and dive in. Trust me, there’s a sense of accomplishment that comes with creating your very own artisan bread, especially when it’s infused with roasted garlic and fresh rosemary. But why should you take the plunge into bread-making?
Why Homemade Bread Makes All the Difference
First and foremost, let’s talk about freshness. When you bake at home, you have complete control over the ingredients. You can choose organic flour, select high-quality olive oil, and opt for sea salt—all perfect for your health-conscious meals. According to a study by the Bread Lab, bread made at home is not only tastier but also free from preservatives and additives typically found in store-bought varieties.
Next, consider the joy of customizing your bread with wonderful flavors. The combination of roasted garlic and rosemary is a classic that brings warmth and aroma, elevating your baking experience to a whole new level. Imagine biting into a crusty loaf, savoring the subtle sweetness of roasted garlic alongside the earthy notes of rosemary. This is the kind of flavor that store-bought bread simply cannot replicate.
Moreover, baking your own bread is a fantastic way to impress dinner guests or family. There’s nothing quite like serving warm, freshly baked bread straight from the oven, possibly accompanied by some flavorful spreads! Imagine your friends at brunch, eyes lighting up as they break into a loaf you’ve just made; you’ll be the star of the gathering.
In short, baking your own artisan bread is not merely about food; it’s an experience. From the texture to the aroma and the taste, making your own bread allows for creativity and personalization. Ready to get started? Let’s dive into how to bake the best roasted garlic rosemary artisan bread that will captivate your taste buds and those of anyone lucky enough to share it with you!
Ingredients for Roasted Garlic Rosemary Artisan Bread
Essential ingredients for a flavorful loaf
When you want to bake the best roasted garlic rosemary artisan bread, starting with the right ingredients is essential. Here’s what you’ll need:
- Flour: Use high-quality bread flour for a chewy texture and good structure.
- Water: Filtered water is best to ensure purity and flavor.
- Yeast: Active dry yeast will help your bread rise beautifully.
- Salt: Sea salt enhances flavor without overwhelming your palate.
- Roasted Garlic: This is the star ingredient! Roasting garlic mellows its flavor and adds depth.
- Fresh Rosemary: Opt for fresh instead of dried to capture the aromatic oils for a vibrant taste.
What to look for in quality ingredients
Selecting high-quality ingredients can elevate your baking game. Look for:
- Organic flour: This often has a richer flavor and fewer additives.
- Fresh herbs: Always buy fresh rosemary; vibrant green, fragrant sprigs are essential.
- Local garlic: Locally sourced garlic tends to be fresher and more flavorful.
For more tips on ingredient selection, check reputable sources like King Arthur Baking or America’s Test Kitchen. Using these elements can transform a simple loaf into a gourmet experience!
Step-by-step Preparation of Roasted Garlic Rosemary Artisan Bread
Making your own bread at home is not just a labor of love but also a delightful adventure filled with comforting aromas and the satisfaction of creating something delicious from scratch. If you’ve ever thought, “I want to bake the best roasted garlic rosemary artisan bread,” you’re in the right place! Let’s break down the steps to guide you through this delightful culinary journey.
Roast the garlic for maximum flavor
Roasting garlic elevates its taste from sharp and pungent to sweet and buttery. To start, preheat your oven to 400°F (200°C). While it heats, take a head of garlic, slice off the top to expose the cloves, and drizzle with olive oil.
Wrap it in foil and place it in the oven. Roast for about 30-35 minutes, or until the cloves are golden and soft. The aroma that fills your kitchen is an invitation to celebrate! Once cool enough to handle, squeeze the roasted garlic into a bowl and mash it with a fork. This will be your secret ingredient—an absolute game changer for flavor in your artisan bread.
Mix together dry ingredients
In a large mixing bowl, start by whisking together your dry ingredients. Combine 4 cups of all-purpose flour, 2 teaspoons of sea salt, 1 teaspoon of sugar, and 2 teaspoons of active dry yeast. The sugar is critical for feeding the yeast, enhancing the bread’s taste and texture. Make sure to mix everything thoroughly to ensure even distribution of the ingredients.
As you mix, consider the science behind bread-making. Yeast loves to eat sugar, which creates that wonderful rise. If you’re curious about the chemical reactions involved, you might enjoy exploring resources on baking science such as this informative article.
Combine wet ingredients and form the dough
Next, in a separate bowl, mix together 1 ½ cups of warm water (around 110°F or 43°C) and the now-mashed roasted garlic. If you want an herbaceous kick, feel free to toss in a tablespoon of finely chopped fresh rosemary too. Slowly stir the wet mixture into your dry ingredients until they’re combined well into a shaggy dough.
Once it comes together, turn it out onto a floured surface and knead for about 10 minutes. You want the dough to be smooth and elastic, a texture that suggests it’s ready to rise.
Letting the dough rise — the magic of fermentation
Place your dough in a lightly oiled bowl and cover it with a damp cloth or plastic wrap. Now, this is where the magic happens! Let it rise in a warm spot for about 1-2 hours, or until it doubles in size. You could be watching your favorite show or getting a workout in during this time. Isn’t it fascinating how yeast ferments, producing gas that causes the dough to expand?
If you’re intrigued by the fermentation process, check out this guide on fermentation to deepen your understanding!
Shape the loaf and prepare for the final rise
After the dough has risen, gently punch it down and turn it onto a floured surface. Shape it into a round loaf or a baguette, depending on your preference. Once shaped, let it rest for another 30-60 minutes. Cover it with a cloth to ensure it retains moisture.
As it rises again, take a moment to imagine how warm and fragrant your kitchen will be in just a little while.
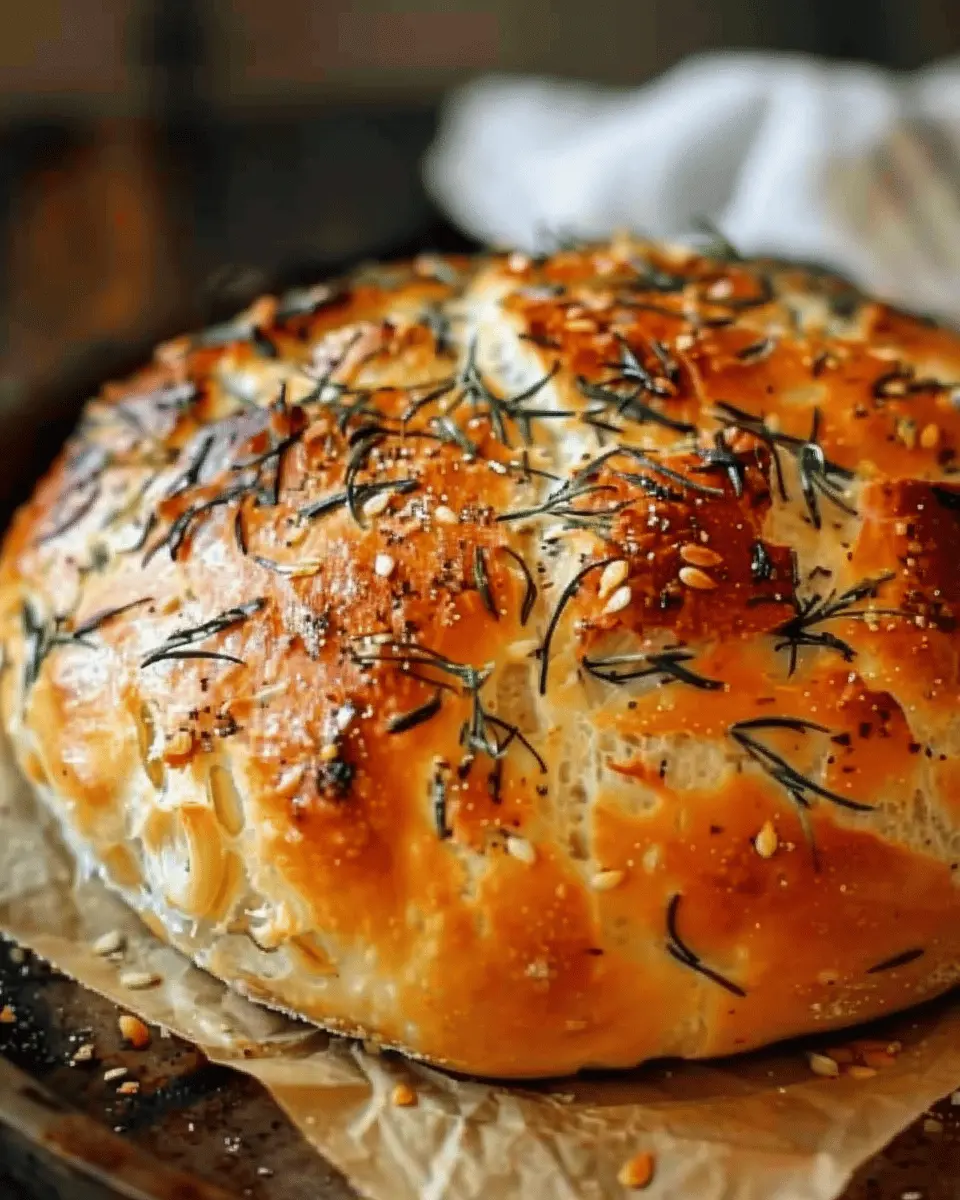
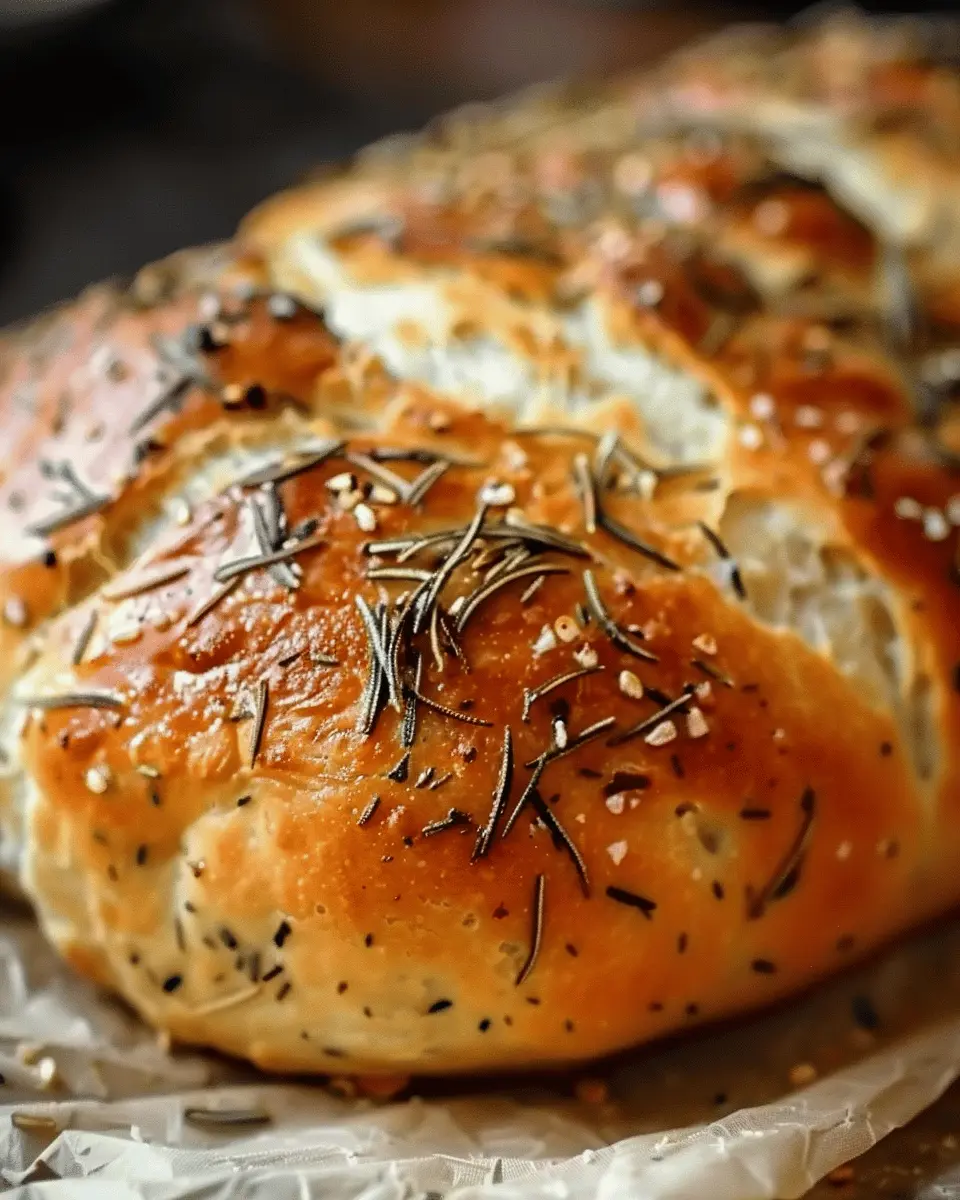
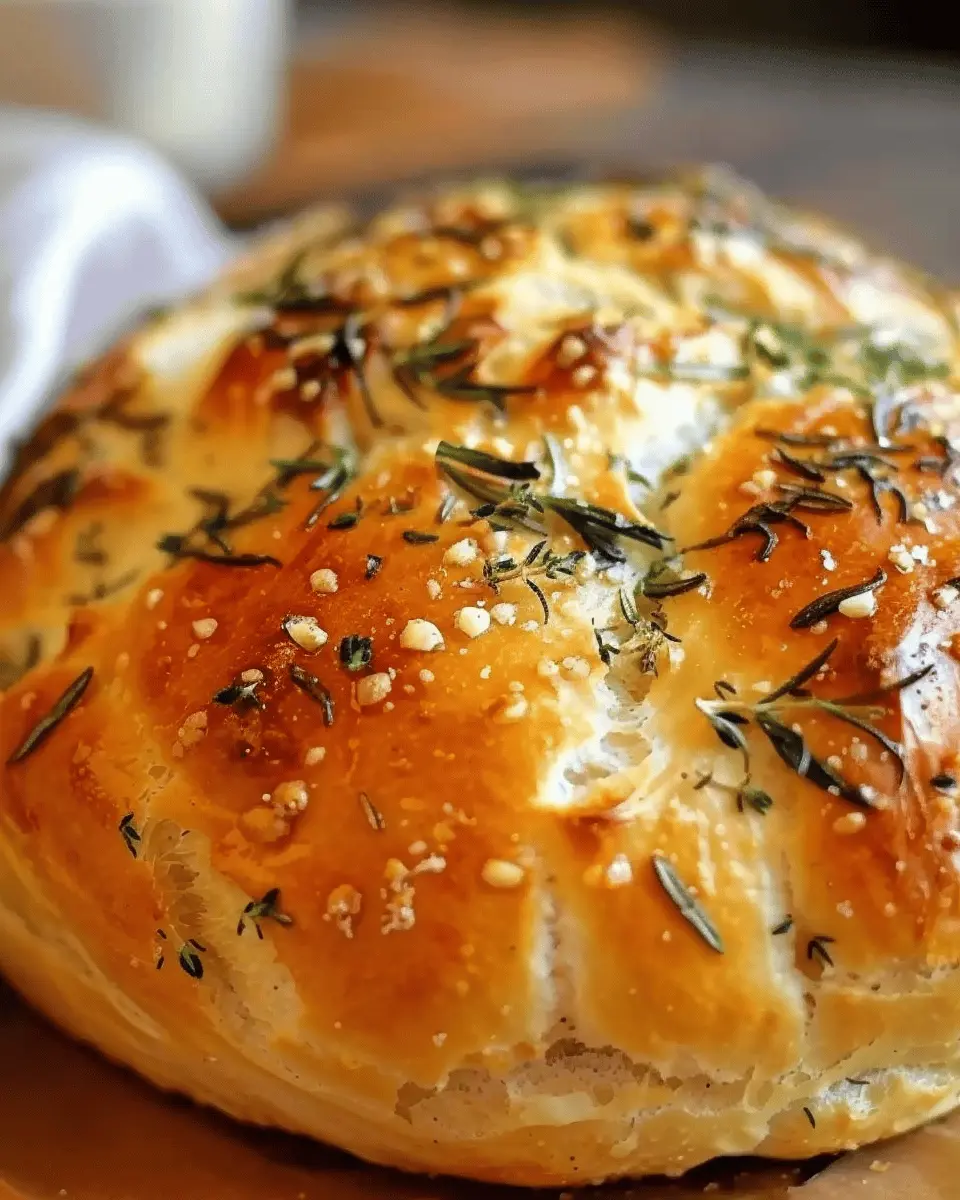
Bake to perfection in a Dutch oven
When you’re ready to bake, preheat your oven to 450°F (232°C) with a Dutch oven inside. This step creates an optimal baking environment—trapping steam to make a crust that’s crispy on the outside and soft inside. Carefully transfer your loaf into the hot Dutch oven, cover it with the lid, and bake for 30 minutes.
After 30 minutes, remove the lid to let the crust brown for an additional 15-20 minutes. The aroma will be irresistible! Once golden and crusty, remove the loaf and let it cool on a rack for at least 30 minutes before slicing.
Now that you’ve mastered the steps, you can confidently impress your friends and family with the best roasted garlic rosemary artisan bread they’ve ever tasted! Enjoy the process, and happy baking!
Variations on Roasted Garlic Rosemary Artisan Bread
When you decide to bake the best roasted garlic rosemary artisan bread, you’ll discover that the variations can take your loaf from delightful to extraordinary. Let’s explore how a few simple changes can make a big impact.
Adding Different Herbs for Unique Flavors
While rosemary brings a lovely aroma to your bread, don’t hesitate to experiment with other herbs. Try incorporating:
- Thyme: Adds a subtle earthiness that pairs beautifully with garlic.
- Oregano: Offers a Mediterranean twist that is fragrant and savory.
- Basil: Adds a fresh, slightly sweet note, perfect for summer loaves.
Using fresh herbs can elevate your bread to new heights, turning it into the highlight of a dinner party or a delightful snack. You can read more about the benefits of using fresh herbs in cooking here.
Incorporating Cheese or Olives for a Gourmet Twist
If you want to bring gourmet flair to your homemade bread, consider folding in cheese or olives. A few ideas include:
- Parmesan or feta cheese: Adds a rich, salty dimension that melts beautifully.
- Kalamata or green olives: Provides a briny contrast that complements the roasted garlic.
These additions not only enhance the flavor but also contribute to a heartier texture. Imagine biting into a slice of warm artisanal bread and discovering pockets of melty cheese or flavorful olives—pure bliss! For tips on pairing cheese with bread, check out this great resource here.
With these variations, every loaf you bake can be a unique treat. So, roll up your sleeves and let your creativity shine!
Cooking Tips and Notes for Roasted Garlic Rosemary Artisan Bread
Best practices for achieving a crusty exterior
To bake the best Roasted Garlic Rosemary Artisan Bread, achieving that precious crust is key. First, consider using a baking stone or a heavy-duty cast iron Dutch oven. Preheat your oven thoroughly, as a hot environment helps develop the crust. Introducing steam is another great tip—simply place a pan of hot water on the bottom rack during the first few minutes of baking to create a steamy atmosphere.
Essential tools for artisan bread-making
Having the right tools can make all the difference. Invest in:
- Digital thermometer: Ensures your bread reaches that perfect internal temperature of 190-200°F.
- Bench scraper: Helps in handling and shaping your dough without sticking.
- Proofing basket: A great asset for supporting the bread’s shape while it rises.
These essential tools will elevate your bread-baking experience, helping you create that irresistible loaf. If you’re curious about the benefits of steam and temperature, check out this bread baking guide for additional insights!
Serving Suggestions for Roasted Garlic Rosemary Artisan Bread
Perfect Pairings with Dips, Spreads, and Soups
When you bake the best roasted garlic rosemary artisan bread, its rich flavors truly come alive when paired with the right accompaniments. Consider these delightful options:
- Hummus: A smooth, chickpea-based spread adds creaminess that complements the bread perfectly.
- Olive oil and balsamic vinegar: A simple dip can elevate your bread experience — drizzle some high-quality olive oil and aged balsamic for a savory treat.
- Creamy soups: Try serving this bread alongside a warm bowl of tomato basil or butternut squash soup. The heartiness of the bread adds an extra layer to your meal.
Creative Serving Ideas for Gatherings
Hosting a gathering? Roasted garlic rosemary artisan bread is a showstopper!
- Bruschetta bar: Slice the bread and top it with fresh tomatoes, basil, and a drizzle of balsamic for a fresh appetizer.
- Sandwiches: Use it as a base for gourmet sandwiches with turkey bacon or chicken ham, layering with greens and your favorite condiments.
- Charcuterie board: Incorporate slices of your artisan bread into a charcuterie spread with cheeses, cured meats, and pickled veggies to please your guests.
With these creative ideas, your bread will shine in any setting, bringing everyone together around delicious flavors and delightful memories.
Time Breakdown for Roasted Garlic Rosemary Artisan Bread
Preparation time: Get started with ease
The beauty of baking lies in its simplicity. For this Roasted Garlic Rosemary Artisan Bread, you’ll need about 15-20 minutes to prep your ingredients. Chop that fragrant rosemary and roast your garlic while your yeast comes to life. Trust me, the aroma is worth it!
Baking time: A step you won’t forget
Once your dough has risen to perfection, baking it takes about 30-35 minutes. You’ll want to keep an eye on that golden crust as it develops, filling your kitchen with the most delightful scents. Perfect timing is crucial for that satisfying crunch.
Total time: Plan your baking schedule
For the ultimate enjoyment, plan for approximately 2 hours from start to finish. This includes both prep and baking time, plus the rising period. And remember, it’s a worthwhile investment for the taste you’ll get with every bite. So, why not bake the best roasted garlic rosemary artisan bread this weekend? Check out resources like King Arthur Baking for excellent tips to enhance your bread-making journey!
Nutritional Facts for Roasted Garlic Rosemary Artisan Bread
Calories per slice
A single slice of your freshly baked Roasted Garlic Rosemary Artisan Bread contains around 120 calories. This makes it a delightful addition to your meal without tipping the scale on your daily intake.
Protein and carbohydrate content
Each slice provides approximately 4 grams of protein and 24 grams of carbohydrates. The combination not only fuels your body but also keeps you feeling satisfied longer.
Highlights of health benefits
This artisan bread not only offers comforting flavors but also brings healthful benefits. The garlic used is known for its immune-boosting properties, while rosemary contains antioxidants that can improve digestion. To dive deeper, you might find studies on the benefits of garlic in publications like the Journal of Nutrition helpful.
Considering all these elements, it’s easy to see why you’d want to bake the best roasted garlic rosemary artisan bread for your next gathering or cozy evening in!
FAQ about Roasted Garlic Rosemary Artisan Bread
How can I best store my artisan bread?
Storing your Roasted Garlic Rosemary Artisan Bread properly can keep it fresh for longer. After your bread has cooled, wrap it in a clean kitchen towel to let it breathe and maintain a crusty exterior. If you plan to enjoy it over several days, place it in a paper bag at room temperature. For longer storage, you can slice the bread and freeze it in an airtight container. Just pop it in the toaster when you’re ready to eat!
What are the signs of perfect dough?
Achieving the right dough consistency is crucial for baking the best roasted garlic rosemary artisan bread. Look for a dough that is smooth and elastic, easily springs back when pressed lightly, and doesn’t stick excessively to your fingers. When kneading, it should form a cohesive ball that holds its shape. If it feels too sticky, a touch more flour can help, but be cautious not to overdo it!
Can I use different types of flour?
Absolutely! While the base recipe calls for all-purpose flour, you can experiment with a variety of flours like whole wheat, spelt, or even a gluten-free blend. Each flour type can give your Roasted Garlic Rosemary Artisan Bread a unique texture and flavor. Keep in mind that the hydration levels may vary, so adjust your water accordingly to achieve that perfect dough consistency.
For more baking tips, check out resources from The Bread Monk or King Arthur Baking. Happy baking!
Conclusion on Bake the Best Roasted Garlic Rosemary Artisan Bread
The joy of homemade bread in your kitchen
There’s something undeniably magical about the aroma of fresh bread wafting through your home, isn’t there? Baking the best roasted garlic rosemary artisan bread is not just about the recipe; it’s an experience that brings warmth and comfort to your kitchen. The satisfaction of pulling a golden loaf from the oven, with its crusty exterior and soft, flavorful interior, is a reward in itself.
Sharing this delicious bread with friends or family can transform any gathering into a cozy feast. So, why not take a moment today to embrace the joy of baking? For tips and techniques to elevate your baking game, check out resources from experts like King Arthur Baking or The Bread Lab. Every loaf tells a story—let yours be delicious!
Print
Bake the Best Roasted Garlic Rosemary Artisan Bread at Home
Learn how to bake the best roasted garlic rosemary artisan bread at home with this easy-to-follow recipe that will impress your family and friends.
- Total Time: 1 hour 50 minutes
- Yield: 1 loaf 1x
Ingredients
- 1 head garlic
- 2 tablespoons olive oil
- 3 cups all-purpose flour
- 1 tablespoon fresh rosemary, chopped
- 1 teaspoon salt
- 1 tablespoon sugar
- 1 packet active dry yeast
- 1 cup warm water
Instructions
- Preheat your oven to 375°F (190°C).
- Roast the garlic by wrapping it in aluminum foil with olive oil and baking for 30 minutes.
- In a large bowl, combine flour, salt, sugar, and chopped rosemary.
- In a separate bowl, dissolve yeast in warm water and let it sit for 5 minutes.
- Mix the yeast mixture into the flour mixture until a dough forms.
- Knead the dough for about 10 minutes, then let it rise in a warm place for 1 hour.
- Punch down the dough, add the roasted garlic, and shape it into a round loaf.
- Place the loaf on a baking sheet and let it rise for another 30 minutes.
- Bake in the preheated oven for 30-35 minutes or until golden brown.
Notes
- For a crispier crust, place a baking dish with water in the oven while baking.
- Experiment by adding different herbs or cheeses for a twist on the recipe.
- Prep Time: 15 minutes
- Cook Time: 35 minutes
- Category: Bread
- Method: Baking
- Cuisine: Italian
- Diet: Vegetarian
Nutrition
- Serving Size: 1 slice
- Calories: 200
- Sugar: 1g
- Sodium: 200mg
- Fat: 4g
- Saturated Fat: 1g
- Unsaturated Fat: 2g
- Trans Fat: 0g
- Carbohydrates: 36g
- Fiber: 1g
- Protein: 6g
- Cholesterol: 0mg
Keywords: roasted garlic bread, artisan bread, baking bread, homemade bread