Introduction to Garlic Herb Braided Bread
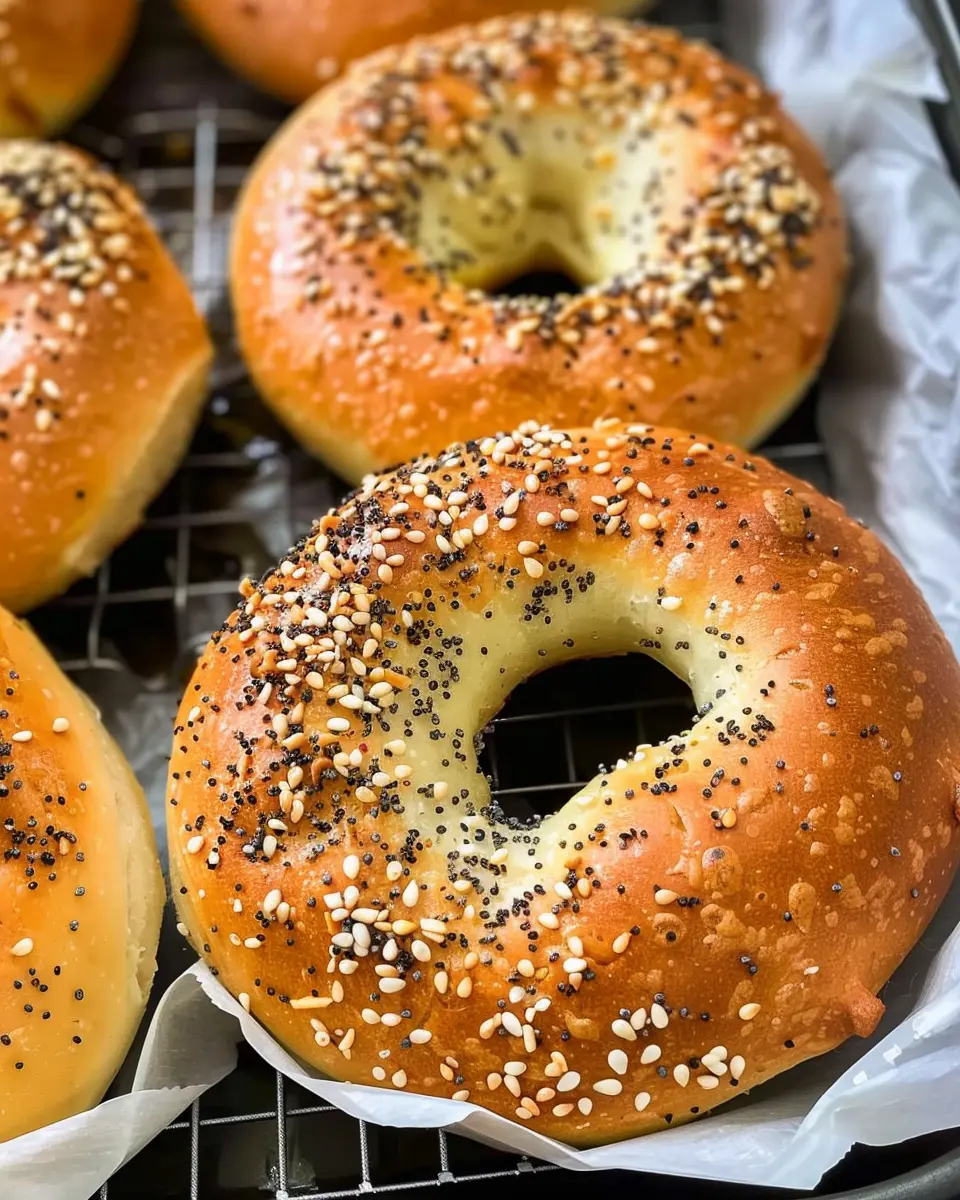
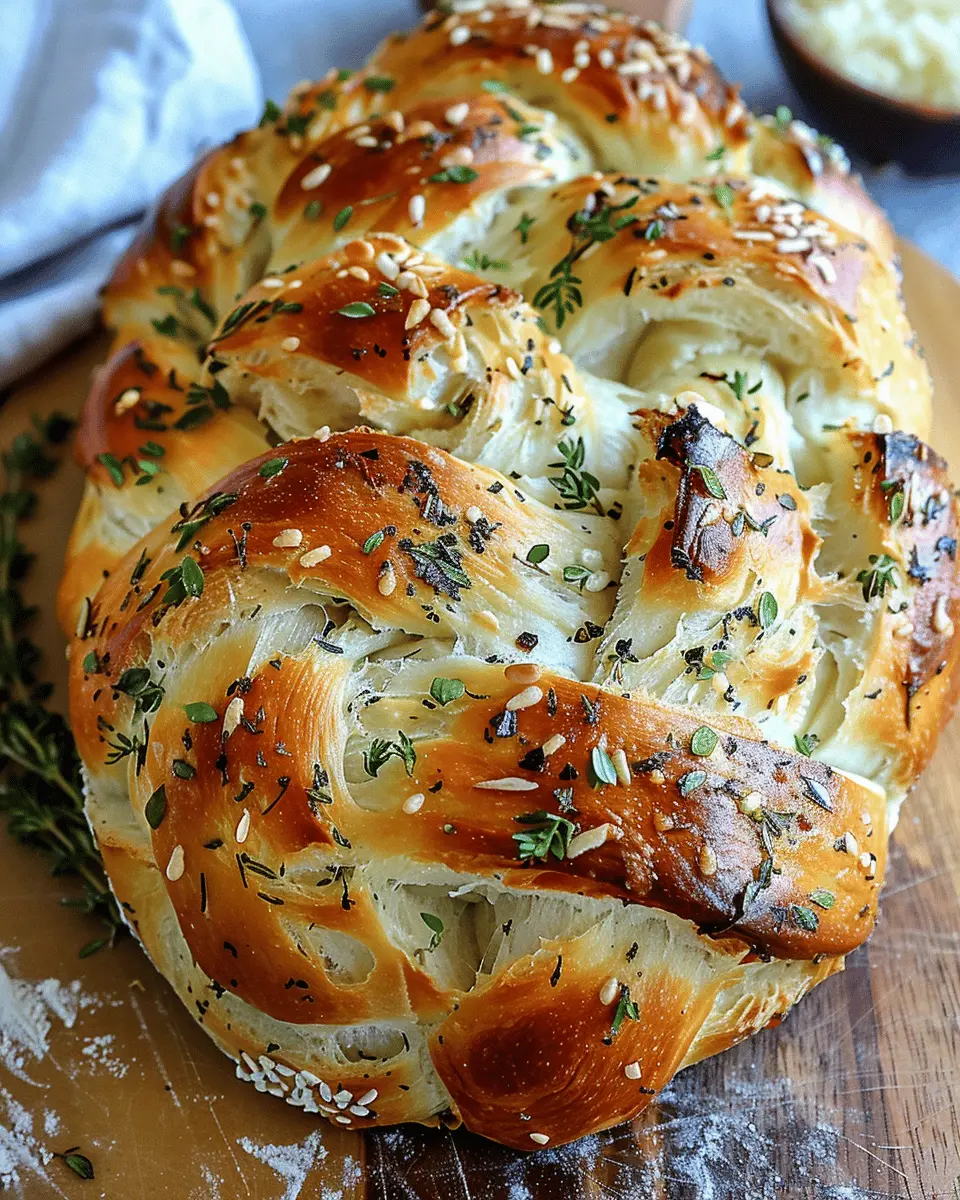
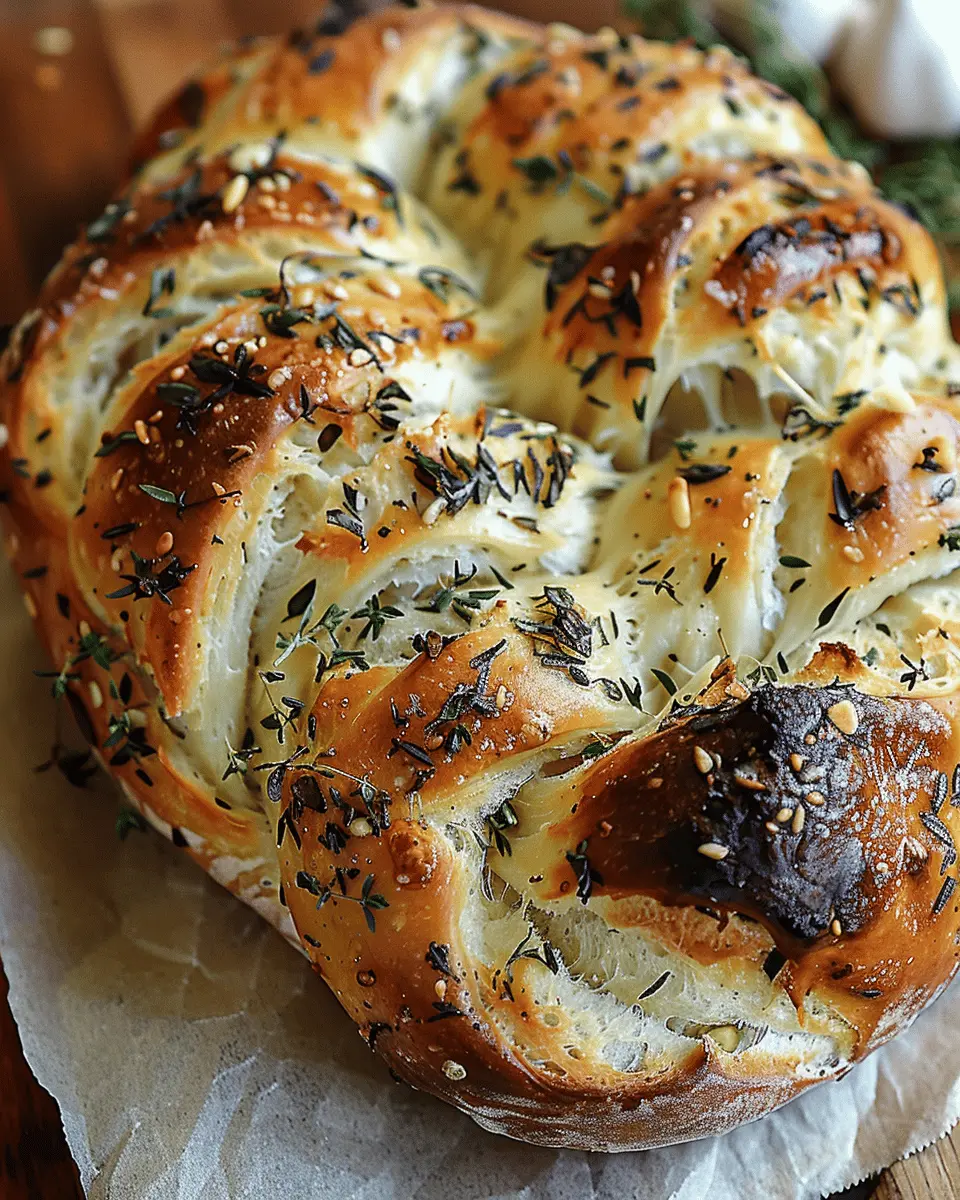
Garlic Herb Braided Bread is more than just a side dish; it’s a culinary experience that can elevate any meal. Imagine gathering around the dinner table, the aroma of freshly baked bread wafting through the air, and that first delicious bite bursting with savory garlic and aromatic herbs. It’s comfort food at its finest, and its stunning presentation is sure to impress anyone lucky enough to share this delicious treat with you.
Why Garlic Herb Braided Bread is a Must-Bake
First and foremost, this garlic herb braided bread is incredibly versatile. Whether you’re serving it with a rich pasta dish, enjoying it alongside a simple soup, or even nibbling on it as an afternoon snack, its flavorful kick will resonate with your taste buds. Plus, the beautiful braid adds an elegant touch that makes it perfect for gatherings or special occasions. This bread not only tastes amazing, but it will also have your friends asking for the recipe.
Did you know that garlic has been praised for its health benefits for centuries? It can boost your immune system and even help reduce blood pressure, making your delightful garlic herb braided bread a treat that’s not just delicious but also beneficial. Pairing it with herbs like rosemary and thyme can make it even more nutritious.
Making this bread can also be a relaxing activity after a long day. The kneading process allows you to unwind, and you may find that the act of braiding your dough can be quite therapeutic. Plus, it gives you a chance to work on a fun baking technique that might just impress your friends.
If you’re new to baking, don’t worry! This recipe is beginner-friendly and allows for creativity. Feel free to experiment with your favorite herbs or try integrating some cheese for an extra layer of flavor.
For tips on managing yeast and dough, you can check out King Arthur Baking’s guide.
In conclusion, this garlic herb braided bread is not just a recipe; it’s an invitation to gather with loved ones, indulge in deliciousness, and share the joy of baking. So, what are you waiting for? Let’s get those hands doughy and start creating something wonderful!
Ingredients for Garlic Herb Braided Bread
Essential ingredients for a flavorful loaf
Creating a delicious garlic herb braided bread is all about using the right ingredients. Let’s break down what you’ll need to make this aromatic and visually stunning loaf.
- All-purpose flour: This is the backbone of your bread. It provides the structure that holds everything together. You can also opt for bread flour for a chewier texture.
- Yeast: To bring your dough to life, active dry or instant yeast is necessary. Yeast is what will give your bread that lovely rise and airy texture.
- Warm water: The key to activating your yeast! Just make sure it’s warm, not hot, to avoid killing those little yeast particles.
- Olive oil: Adds moisture and a rich flavor to your bread. You can also try flavored olive oils for an extra kick.
- Garlic: Fresh minced garlic is essential for that punchy flavor, but garlic powder works in a pinch.
- Herbs: A mix of fresh herbs like rosemary, thyme, or parsley will lend your bread a wonderful aroma.
- Salt: Essential for flavor—don’t skip on this!
These ingredients combine effortlessly to create a mouthwatering garlic herb braided bread that’s perfect for sharing. Want tips for measuring flour? Check out this flour measurement guide. And remember, good bread-making is about patience and love—so take your time!
Preparing Garlic Herb Braided Bread
Creating your own Garlic Herb Braided Bread not only fills your kitchen with an irresistible aroma but also treats you to the satisfaction of homemade deliciousness. Let’s walk through each step to ensure you achieve that perfect golden loaf.
Activate the yeast
The journey begins with the yeast! This magical organism is what helps your bread rise and gives it that lovely texture. Start by measuring out 1 packet of active dry yeast. Combine it with 1 cup of warm water (about 110°F) and 1 tablespoon of sugar in a bowl. Stir it gently and let it sit for around 5-10 minutes until it becomes frothy. If it doesn’t foam up, your yeast might be dead, and it’s best to start over with a fresh packet. If you want a deeper dive into why yeast is so essential, check out King Arthur Baking’s yeast guide.
Make the dough
Once your yeast is activated, it’s time to mix the Garlic Herb Braided Bread dough. In a large mixing bowl, combine 4 cups of all-purpose flour, 1 teaspoon of salt, and 2 tablespoons of finely chopped fresh herbs (like rosemary, thyme, or parsley). Start adding the frothy yeast mixture into the flour gradually. For an added flavor twist, you’ll want to incorporate 3 cloves of minced garlic as you mix. Feel free to add a bit of olive oil for moisture.
Knead it to perfection
Now that your ingredients are combined, turn the mixture out onto a lightly floured surface. It’s time to knead! Knead the dough for about 8-10 minutes until it feels smooth and elastic. Don’t rush this step—… Think of it as a mini workout! Your dough will reward your efforts by being airy and light. If you haven’t kneaded dough before, you can find helpful videos on platforms like YouTube that demonstrate proper techniques.
Let it rise
After kneading, place your dough into a greased bowl and cover it with a clean kitchen towel. Let it rise in a warm place for about 1 hour, or until it has doubled in size. This is where the magic happens—giving your Garlic Herb Braided Bread that fluffy texture we all adore.
Shape and braid the dough
Once your dough has risen, gently punch it down to release the air. Then, divide it into three equal pieces. Roll each piece into long strands, about 12 inches each. Now the fun part—braiding! Braid the three strands together, tucking the ends underneath. This not only looks impressive but allows for better baking too!
Second rise
Place your braided bread on a greased baking sheet or a parchment-lined one. Cover it again with that kitchen towel and allow it to rise for another 30-45 minutes. This second rise enhances the texture and flavor, making it even more delightful.
Bake the bread
Preheat your oven to 375°F while your bread does its final rise. Once it’s ready, brush it with an egg wash (one egg mixed with a tablespoon of water) for a shiny crust. Bake for 20-25 minutes or until it’s golden brown and sounds hollow when tapped on the bottom. Enjoy the aroma wafting through your kitchen!
Enjoying the Fruits of Your Labor
Once your Garlic Herb Braided Bread is done, let it cool slightly before slicing. Pair it with a side of olive oil for dipping, or serve it alongside your favorite dishes. Whether you’re hosting a cozy dinner or enjoying a quiet night in, this homemade bread will undoubtedly be a star on your table.
This detailed guide should help make your experience a breeze—happy baking!
Variations on Garlic Herb Braided Bread
When it comes to the delightful garlic herb braided bread, the possibilities for customization are endless. Let’s dive into a few fantastic variations that can elevate your baking game and cater to your taste buds.
Adding Cheese for Extra Flavor
Incorporating cheese into your garlic herb braided bread brings a whole new dimension to its flavor profile. Try adding shredded mozzarella or Gouda within the layers of dough before braiding. For a bolder flavor, consider crumbled feta or sharp cheddar. Not only does cheese contribute creaminess, but it also creates an appealing texture contrast. Plus, both adults and kids will love the gooey surprises inside!
Infusing with Different Herbs
While garlic is the star of the show, why not share the spotlight with other herbs? Fresh basil, rosemary, or thyme can be mixed into your dough or sprinkled on top before baking. Each herb embodies its own distinct character, providing a unique twist to your garlic herb braided bread. If you’re looking for inspiration, check out resources like The Herb Society of America for herb combinations that pair beautifully with garlic.
Customizing with Additional Toppings
The final touches can truly enhance your garlic herb braided bread. Think of sprinkling sesame seeds, chopped nuts, or a drizzle of olive oil right before baking. You can even brush the top with garlic-infused olive oil for an aromatic finish. Want to add a savory crunch? Crumbled Turkey Bacon or Chicken Ham makes a delicious topping as well. The beauty of this bread is that you can make it uniquely yours with just a few tweaks!
Feel free to experiment, and don’t hesitate to share your own variations. Happy baking!
Cooking tips for Garlic Herb Braided Bread
Troubleshooting common issues
Making garlic herb braided bread can be a delightful yet tricky experience. If your bread turns out too dense, it could be due to over-kneading or not allowing enough rise time. Make sure to check your yeast’s freshness; expired yeast can lead to unsatisfactory results. If the bread is too dry, consider adding a touch more water to achieve the ideal dough consistency. And if your garlic flavor isn’t as strong as you hoped, feel free to adjust the amount of garlic or herbs next time—it’s all about finding that perfect balance for your palate!
Storing and reheating your bread
To keep your garlic herb braided bread fresh, store it in an airtight container at room temperature for up to three days. If you have leftovers (good luck with that!), slice them and freeze them to prolong their life. Reheating in a preheated oven for about 10 minutes will bring back that mouthwatering aroma, making your kitchen feel cozy all over again. For innovative serving suggestions, consider pairing your bread with roasted veggies or a simple dipping oil, as recommended by experts from the Bread Bakers Guild of America. Enjoy your delicious creation!

Serving Suggestions for Garlic Herb Braided Bread
Pairing with Soups or Salads
There’s something incredibly comforting about dipping warm garlic herb braided bread into a bowl of hearty soup or savoring it alongside a vibrant salad. Imagine a creamy tomato basil soup with the bread soaking up every flavorful bite, or a fresh garden salad topped with your favorite dressing, where the rich garlic and herb notes of the bread enhance your meal. Consider pairing it with a minestrone soup or a classic Caesar salad for a delightful dining experience.
Perfect for Sandwiches or as a Snack
If you’re in the mood for something quick yet satisfying, garlic herb braided bread makes an excellent base for sandwiches. Layer it with turkey bacon, fresh veggies, and a smear of avocado for a delicious lunch. Alternatively, cut the bread into thick slices and toast it lightly for a mouthwatering snack. Spread a bit of hummus or your favorite creamy dip on top, and you have an irresistible treat for those snack-attacks or game nights. This versatile bread also works beautifully for breakfast—think a savory breakfast sandwich with chicken ham and a poached egg. The possibilities are endless!
Time breakdown for Garlic Herb Braided Bread
Preparation time
Getting started with your garlic herb braided bread is simple! You’ll need about 15 minutes to gather your ingredients, mix the dough, and prepare for the first rise.
Rising time
Patience is key here. Allow the dough to rise for about 1 hour. During this time, you can enjoy a quick snack or prep other dishes.
Baking time
Once your dough is beautifully risen, it will need about 25-30 minutes in the oven. Just enough time for the aroma to fill your kitchen!
Total time
In total, expect to spend approximately 1 hour and 45 minutes from start to finish—not too shabby for such an impressive loaf! For tips on kneading techniques, check out resources like King Arthur Baking. Enjoy your baking journey!
Nutritional facts for Garlic Herb Braided Bread
When enjoying garlic herb braided bread, it’s great to consider its nutritional profile. Here’s a quick glimpse at what you can expect per serving:
Calories per serving
Each slice of this delicious bread contains approximately 150-180 calories, making it a great choice for a side dish or a tasty snack. You can feel good knowing it’s not overly heavy on the calorie front.
Key nutrients
This garlic herb braided bread boasts a variety of essential nutrients, including:
- Carbohydrates: the primary energy source.
- Protein: provides muscle support.
- Fiber: aids digestion and helps keep you full.
- Vitamins: particularly B vitamins, which are crucial for energy metabolism.
Using fresh herbs like parsley and thyme not only enhances flavor but also adds vitamins and antioxidants. Interested in more about the health benefits of garlic? Check out Healthline’s insights.
By keeping these nutritional facts in mind, you can enjoy your garlic herb braided bread while also maintaining a balanced diet. Who knew being indulgent could be this informed?
FAQs about Garlic Herb Braided Bread
Can I freeze the bread?
Absolutely! Freezing your garlic herb braided bread is a fantastic way to extend its shelf life. Once the bread has completely cooled, wrap it tightly in plastic wrap or aluminum foil, then place it in an airtight container or freezer bag. It can last in the freezer for up to three months. When you’re ready to enjoy it, simply thaw the bread at room temperature or pop it in the oven for a few minutes to revive that fresh-baked flavor.
What can I substitute for parmesan cheese?
If you’re looking for alternatives to parmesan, you have quite a few options! Nutritional yeast is a popular choice for a dairy-free option, providing a cheesy flavor without the cheese. You could also use pecorino romano for a similar sharp taste. For a nutty flavor, consider grated cashews or almond flour mixed with a touch of salt. These substitutions will still keep your garlic herb braided bread tasty and satisfying.
How do I store leftover bread?
Keeping your leftover garlic herb braided bread fresh is simple. To store, wrap it in a clean kitchen towel to maintain its crust, then place it in a paper bag or bread box. If you prefer, a resealable plastic bag will work as well, but be cautious of trapping too much moisture, which can make the bread soggy. Typically, your bread will stay delicious at room temperature for up to three days. If you want to go longer, the freezer is your best bet!
For more tips on bread storage, check out The Bread Lab for expert insights.
Conclusion on Garlic Herb Braided Bread
Final thoughts on baking this delightful loaf
Baking your own garlic herb braided bread is a rewarding experience that brings joy to both your kitchen and your taste buds. The delightful aroma of fresh herbs and garlic wafting through your home creates an inviting ambiance, ideal for impressing friends and family.
This bread pairs beautifully with a variety of dishes, from soups to salads, making it a versatile staple. Remember, practice makes perfect! Feel free to experiment with different herbs and cheeses for a unique twist. For more about the art of bread-making, check out resources on bread baking techniques and herb combinations to enhance your culinary journey. Enjoy the process, and savor every slice!
Print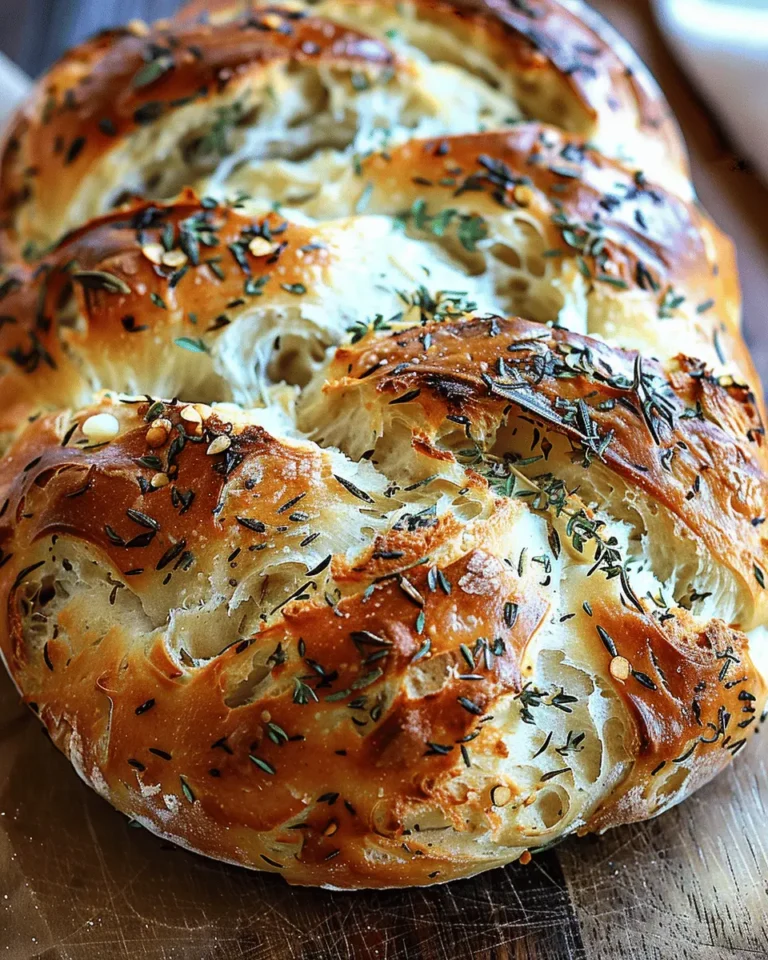
Garlic Herb Braided Bread: The Best Homemade Delight for All
Experience the delightful taste of Garlic Herb Braided Bread, a homemade treat sure to impress your friends and family.
- Total Time: 50 minutes
- Yield: 1 loaf 1x
Ingredients
- 3 cups all-purpose flour
- 1 tablespoon sugar
- 1 packet instant yeast
- 1 teaspoon salt
- 1 cup warm water
- 2 tablespoons olive oil
- 3 cloves garlic, minced
- 1 tablespoon fresh rosemary, chopped
- 1 tablespoon fresh parsley, chopped
Instructions
- In a bowl, combine warm water, sugar, and yeast. Let it sit for 5 minutes until foamy.
- Add flour, salt, olive oil, garlic, rosemary, and parsley to the mixture. Knead until smooth.
- Cover the dough and let it rise in a warm place for about 1 hour.
- Preheat the oven to 375°F (190°C).
- Punch down the risen dough and divide it into three equal parts. Roll each part into a long rope.
- Braid the three ropes together and place on a baking sheet.
- Let the braided dough rest for 15 minutes.
- Bake for 25-30 minutes or until golden brown.
Notes
- Serve warm with butter for an extra treat.
- Store leftovers in an airtight container.
- Prep Time: 20 minutes
- Cook Time: 30 minutes
- Category: Bread
- Method: Baking
- Cuisine: American
Nutrition
- Serving Size: 1 slice
- Calories: 150
- Sugar: 1g
- Sodium: 250mg
- Fat: 5g
- Saturated Fat: 1g
- Unsaturated Fat: 4g
- Trans Fat: 0g
- Carbohydrates: 24g
- Fiber: 1g
- Protein: 4g
- Cholesterol: 0mg
Keywords: Garlic Herb Braided Bread, homemade bread, braided bread, garlic bread