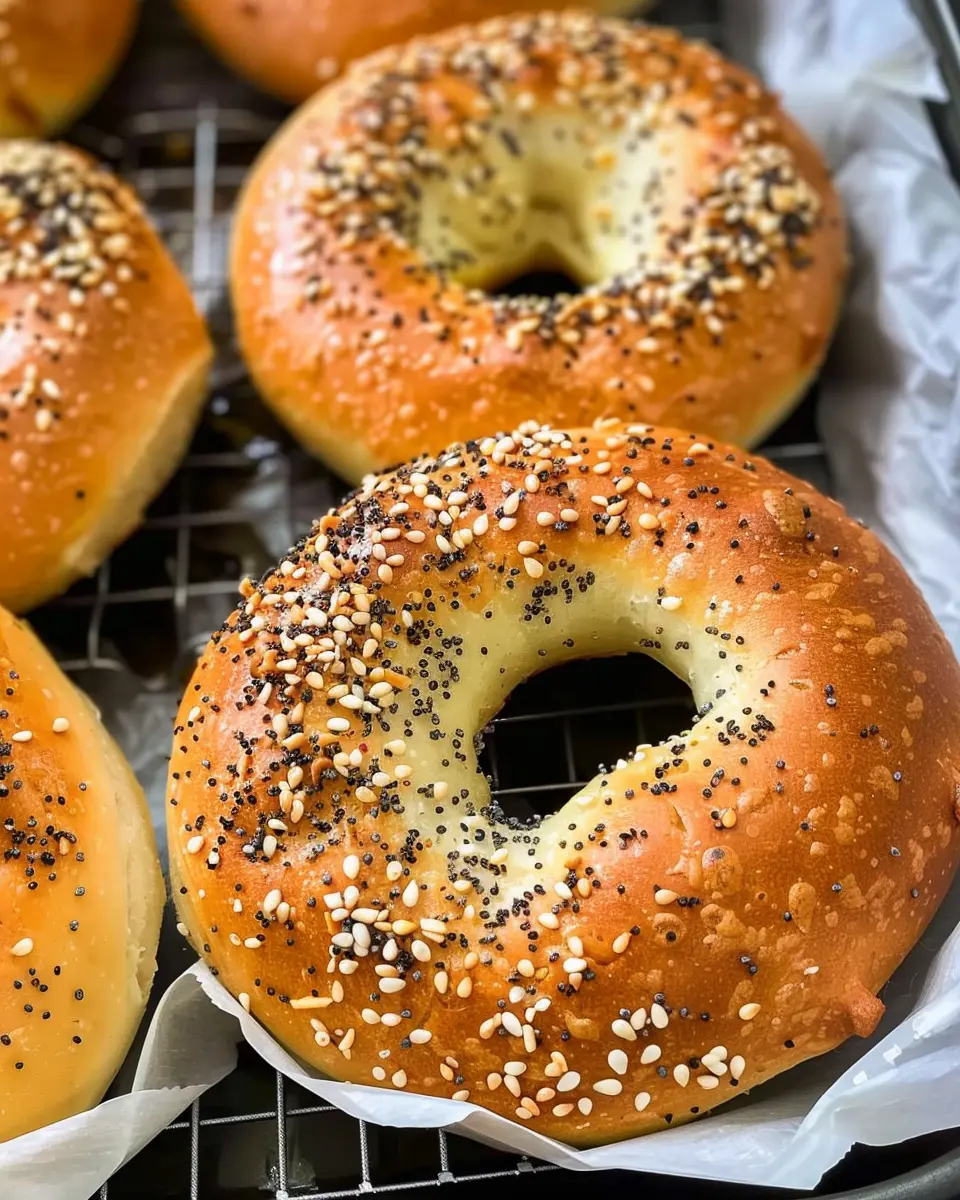
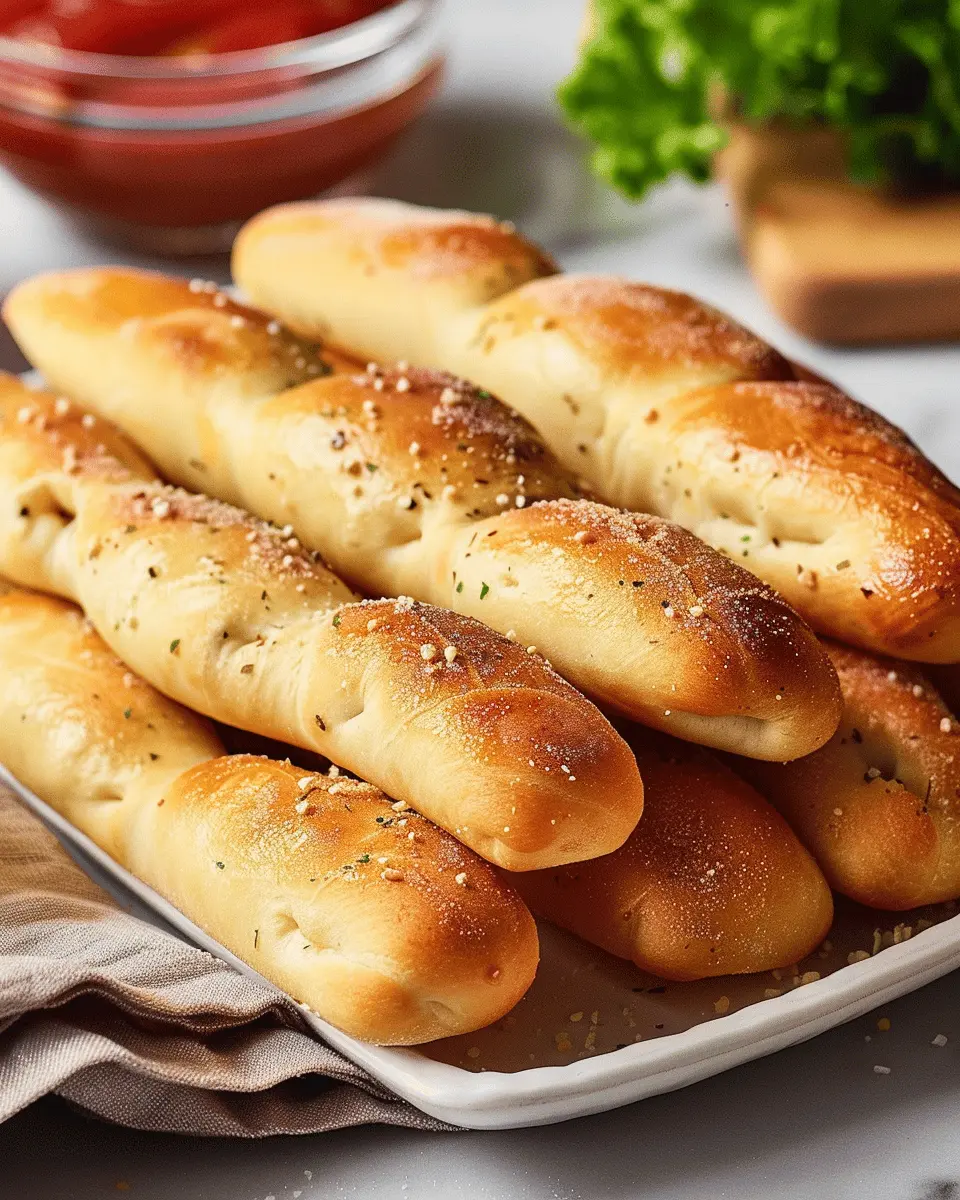
Introduction to Olive Garden Breadsticks
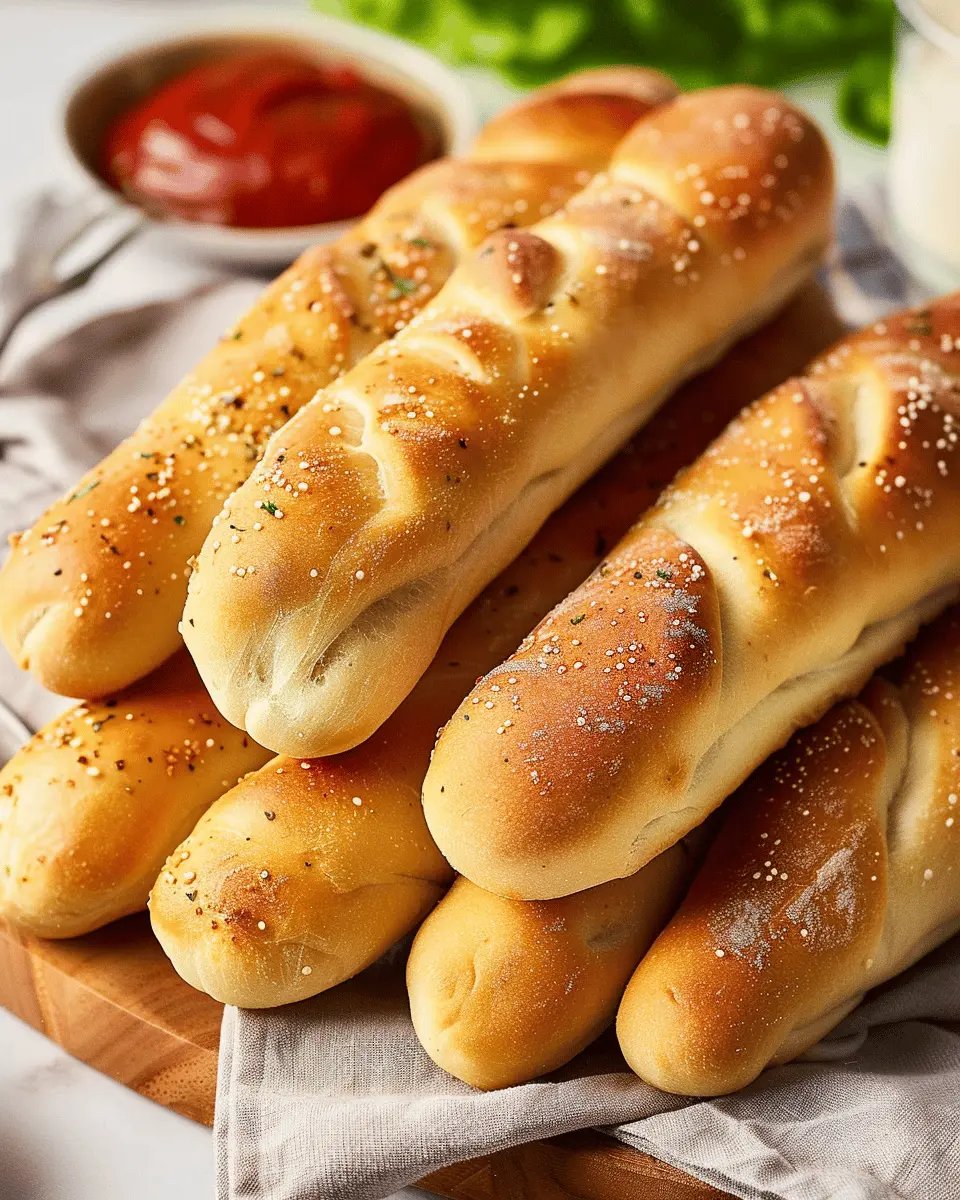
When it comes to comfort food, few things can compete with Olive Garden breadsticks. These warm, buttery delights have earned a special place in the hearts (and stomachs) of diners everywhere. So, what is it about these breadsticks that keeps people coming back for more? It’s the perfect blend of freshness, flavor, and nostalgia that makes each bite irresistible.
One of the standout features of Olive Garden breadsticks is their unique texture. Soft on the inside with a slightly crisp exterior, they are the quintessential accompaniment to any meal. Each breadstick is brushed with a signature garlic butter blend, which adds an aromatic touch that energizes the senses. In fact, according to a survey by the Food Network, 70% of people rated garlic bread as their all-time favorite type of bread. Eating a warm breadstick at Olive Garden not only satisfies hunger but can also evoke sweet memories of shared meals with family and friends.
In addition to their delightful taste, the breadsticks are the perfect canvas for dipping into various sauces. Whether it’s marinara, alfredo, or even a little olive oil, it’s hard to resist the opportunity to dip. This versatility makes them a crowd-pleaser for all palates. Plus, they’re unlimited! This means you can keep enjoying them as you savor your favorite pasta or salad — what’s not to love?
If you’ve ever wondered how to replicate that Olive Garden experience at home, you’re in for a treat. With a few simple ingredients and some time, you can whip up your very own batch of Olive Garden breadsticks. Numerous fans have taken to the Internet, sharing their tips and tricks for a homemade version, making it easier than ever to indulge in this classic comfort food right in your kitchen.
So, grab your apron and let’s dive into the delicious world of Olive Garden breadsticks, where each bite is a reminder of shared moments and the joy of good food. For more on Italian bread recipes, you can check out this Chefs’ Bread Cookbook.
Now, let’s get baking!
Ingredients for Olive Garden Breadsticks
Essential ingredients needed for perfect breadsticks
Making delicious olive garden breadsticks at home starts with some simple, yet essential ingredients. Here’s what you’ll need:
- All-purpose flour: This is the backbone of your breadsticks. It gives them structure and chew.
- Active dry yeast: Fresh yeast is key to getting that airy texture. Make sure it’s still active for best results!
- Warm water: This helps activate the yeast. Aim for a temperature of around 110°F.
- Sugar: A little sweetness not only balances the flavor but also feeds the yeast.
- Salt: Essential for enhancing the overall taste and controlling yeast fermentation.
- Olive oil: Adds richness and moisture, making your breadsticks soft.
Optional ingredients for variations
Feeling adventurous? You can easily customize your olive garden breadsticks with these optional ingredients:
- Garlic powder: For that classic garlic flavor, sprinkle some in the dough or brush on top after baking.
- Parmesan cheese: Adding it to the dough or as a topping brings a delightful savory note.
- Italian herbs: Oregano, basil, or even rosemary can elevate the flavor to new heights.
Creating these amazing breadsticks at home is not just about following a recipe; it’s about experimenting and making them your own! If you’re curious about various bread techniques, check out this resource on bread baking for expert tips. Enjoy the process!
Step-by-Step Preparation of Olive Garden Breadsticks
Creating delicious Olive Garden breadsticks at home isn’t just about the end product; it’s a delightful experience that fills your kitchen with the comforting aroma of freshly baked bread. Let’s walk through this step-by-step process together, ensuring your breadsticks are hot, fluffy, and the perfect accompaniment to any meal.
Gather and Prepare Your Ingredients
Before diving into making those delicious Olive Garden breadsticks, it’s crucial to gather all your ingredients. Having everything on hand not only speeds up the process but makes it more enjoyable.
Here’s what you’ll need:
- 2 cups warm water (about 110°F)
- 2 teaspoons sugar
- 1 packet (2 ¼ teaspoons) active dry yeast
- 5 tablespoons butter, melted
- 5 cups all-purpose flour
- 2 teaspoons kosher salt
- 1 tablespoon garlic powder (for extra flavor)
- Additional butter for brushing
- Coarse salt for topping
Taking a moment to measure everything out will save you hassle later on!
Create the Dough
In a large mixing bowl, combine the warm water and sugar, then sprinkle the yeast over the top. Let it sit for about 5 minutes until it becomes frothy. This process activates the yeast, ensuring your breadsticks rise perfectly.
Once the yeast is active, add the melted butter, flour, and kosher salt. Stir until a shaggy dough forms. Eventually, you’ll want to knead it on a lightly floured surface for about 5-10 minutes. Kneading encourages gluten development, giving your breadsticks that soft and chewy texture we all love.
If you want expert tips on kneading dough, check out resources from culinary institutions like Le Cordon Bleu.
Dough Rising Process
After kneading, place your dough in a greased bowl, cover it with a damp cloth or plastic wrap, and let it rise in a warm area. This process typically takes about 1-2 hours until the dough has doubled in size.
A warm, draft-free area works wonders! You can even turn your oven on to its lowest setting for a few minutes, then turn it off and place the dough inside. This gentle warmth encourages the yeast, contributing to superbly fluffy breadsticks.
Shape the Breadsticks
Once the dough has risen beautifully, punch it down gently to release any air. Divide the dough into approximately 12 equal pieces and roll each piece into a long, thin stick (about 6-8 inches).
Place the shaped sticks on a baking sheet lined with parchment paper, leaving enough space between them for rising. Cover them again and let them rest for about 30 minutes. This second rise ensures your Olive Garden breadsticks will be light and airy.
Preparing the Buttery Garlic Topping
While waiting, let’s whip up that iconic buttery garlic topping. In a small bowl, melt about ¼ cup of unsalted butter and mix in 2 teaspoons of garlic powder and a pinch of salt. Adjust the garlic to your taste—some love it garlicky, while others prefer a milder touch.
This mixture is what takes your breadsticks from good to irresistibly great.
Bake the Breadsticks to Golden Perfection
Preheat your oven to 375°F. Once it’s heated, pop in your breadsticks and bake for about 12-15 minutes or until they’re golden brown.
As soon as they come out of the oven, brush them generously with your buttery garlic topping. Sprinkle with coarse salt for that final touch of flavor.
Let them cool slightly, then dig in! Serve warm and enjoy alongside your favorite pasta or salad. Trust me, every bite of these homemade Olive Garden breadsticks will remind you of that delicious restaurant experience.
Incorporating these steps into your cooking can not only enhance your culinary skills but also provide a delightful takeaway to share with friends and family. Happy baking!
Variations on Olive Garden Breadsticks
If you’re looking to elevate your homemade Olive Garden breadsticks, you’ve come to the right place! These variations add a delightful twist to the classic recipe, making them perfect for every occasion.
Seasoned Breadsticks with Herbs
For a fresh take on the traditional Olive Garden breadsticks, consider incorporating herbs into your dough. Adding a blend of dried herbs—like oregano, thyme, or even rosemary—will infuse your breadsticks with robust flavors. Here’s how to do it:
- Dough Preparation: Mix 1-2 teaspoons of your favorite dried herbs into the flour before kneading.
- Topping: After baking, brush with melted butter and sprinkle with a mix of garlic powder, parsley, and a pinch of sea salt. This herbaceous upgrade is not only fragrant but also gives your breadsticks a gourmet feel.
These rosemary-infused breadsticks pair beautifully with homemade marinara dipping sauce or a hearty soup. For more tips on flavoring bread, check out this article from The Bread Bakers Guild.
Cheesy Breadsticks for an Indulgent Twist
Why not add cheese for an indulgent twist on Olive Garden breadsticks? Cheese breadsticks are a crowd-pleaser, whether you’re hosting friends or enjoying a cozy night in. Here’s how to make them cheesy:
- Cheese Blend: Sprinkle shredded mozzarella or a mix of Italian cheeses directly into the dough or on top before baking.
- Gooey Center: For a molten center, add a cube of cheese in the middle of each stick before sealing the dough around it.
These cheesy delights are perfect for pairing with a rich Alfredo sauce or a simple marinara. Just imagine pulling apart a warm, cheesy breadstick—heavenly, right?
Experimenting with variations of Olive Garden breadsticks opens a world of flavor possibilities. Whether you go for the herb option or the cheesy delight, you’re sure to impress your friends and family!
Cooking Tips and Notes for Olive Garden Breadsticks
Common pitfalls to avoid
When it comes to olive garden breadsticks, there are a few common mistakes that can throw off your perfect batch. Overmixing your dough can result in tough breadsticks, so be sure to knead gently. Additionally, keep an eye on the rising time; letting the dough rise too long may lead to overly airy breadsticks that lose their structure. Lastly, don’t skimp on the garlic topping—this is what sets these breadsticks apart!
Tips for achieving the perfect texture
For that signature soft and slightly chewy texture, consider the following:
- Use bread flour: It has a higher protein content, which helps achieve a chewy consistency.
- Temperature matters: Ensure your water is warm but not hot—aim for about 110°F to activate the yeast effectively.
- Oven preheating: A properly preheated oven will help your breadsticks rise beautifully in the first few minutes of baking.
By incorporating these tips, you’ll be well on your way to mastering these delicious breadsticks. Want more insights? Check out resources on dough theory and baking techniques from King Arthur Baking. Happy baking!

Serving Suggestions for Olive Garden Breadsticks
Pairing with Soup and Salads
When it comes to enjoying Olive Garden breadsticks, the classic duo of soup and salad allows these warm, buttery delights to shine even brighter. The soft, pillowy texture of the breadsticks complements hearty choices like minestrone or creamy chicken gnocchi soup perfectly. Their subtly garlicky flavor brings an extra depth to your favorite salads too. Consider a fresh garden salad drizzled with balsamic vinaigrette for a light yet satisfying meal.
You can elevate this combination by making a homemade soup, like this creamy tomato bisque, which pairs beautifully with the breadsticks.
Creative Uses for Leftover Breadsticks
Have some Olive Garden breadsticks left over? Don’t toss them out! There are several delicious ways to repurpose them:
- Breadstick Croutons: Cut them into cubes, toss with olive oil and Italian herbs, and toast in the oven for perfect croutons.
- Garlic Bread: Spread some butter and garlic on them, bake briefly, and you’ve got an easy upgrade.
- Mini Pizza: Slice in half, add marinara and cheese, then bake for a quick personal-sized pizza.
With these various serving suggestions, you’ll keep the love for those breadsticks alive in your kitchen long after your meal is finished!
Time Breakdown for Olive Garden Breadsticks
When it comes to whipping up delicious Olive Garden breadsticks, timing plays a crucial role in getting that perfect flavor and texture. Here’s a simple breakdown to keep you on track:
Preparation Time
Devote about 15 minutes to gather your ingredients and mix the dough. It’s all about setting the right pace—make sure to measure everything carefully for the best results.
Rising Time
Allow the dough to rise for about 1 hour. This is when the magic happens; yeast ferments, and the dough gets fluffy. A warm spot in your kitchen will help speed up this process.
Baking Time
Pop those breadsticks in the oven for around 10-12 minutes. You’ll want to keep an eye on them—golden brown is the goal!
Total Time
In total, you’re looking at roughly 1 hour and 30 minutes from start to finish. Not too shabby for homemade Olive Garden breadsticks! Enjoy them fresh out of the oven, ideally with a side of marinara sauce or garlic butter for dipping.
For a deeper understanding of yeast activation, check out this article from King Arthur Baking. If you’re interested in variations or nutritional insights, Healthline has some fantastic resources as well.
Nutritional Facts for Olive Garden Breadsticks
Calories and Serving Size
When indulging in Olive Garden breadsticks, it’s essential to know what you’re consuming. Each breadstick contains approximately 140 calories, making it a tasty yet modest addition to your meal. Typically, a serving consists of two breadsticks, totaling around 280 calories. For a full meal experience, consider how this pairs with your favorite dipping sauces or entrees.
Key Nutrients and Dietary Considerations
Olive Garden breadsticks are not just fluffy delights; they carry some key nutrients. Here’s a quick breakdown:
- Carbohydrates: Each breadstick has about 30 grams, providing energy for your day.
- Protein: With around 5 grams per stick, they offer a modest boost for muscle maintenance.
- Sodium: They do contain about 500 mg of sodium, so if you’re watching your salt intake, keep that in mind.
While they are vegetarian-friendly, those looking for gluten-free options might want to explore alternatives. If you’re curious about how they fit into a balanced diet, check out resources from the Mayo Clinic and Harvard Health.
Feeling inspired to recreate this delicious dish at home? Stay tuned for the upcoming recipe, and let’s enjoy these breadsticks responsibly!
FAQs about Olive Garden Breadsticks
How can I make my breadsticks soft and chewy?
If you’ve ever tasted Olive Garden breadsticks, you know they’re famous for being irresistibly soft and chewy. To achieve that perfect texture at home, consider these tips:
- Knead the dough properly: Don’t rush this step. Kneading allows gluten to develop, giving the breadsticks that sought-after chewiness.
- Control the temperature: Keep your water warm (about 110°F). This helps the yeast activate without compromising its potency.
- Let them rise: Allow the dough ample time to rise. A longer rise enhances flavors and contributes to a soft texture.
For a deeper understanding of bread baking, check out resources from King Arthur Baking Company.
Can I freeze leftover breadsticks?
Absolutely! Freezing olive garden breadsticks is a great way to preserve their deliciousness for later. Here’s how:
- Cool them completely: Ensure your breadsticks are entirely cooled before storing them to prevent ice crystals from forming.
- Wrap them tightly: Use plastic wrap or aluminum foil to wrap the breadsticks individually. Place them in a freezer-safe bag or container.
- Reheating: When you’re ready to enjoy them again, thaw in the refrigerator, then reheat in a 350°F oven for about 10 minutes.
Are there any gluten-free options for this recipe?
Yes! For those who need gluten-free options, you can easily adapt this recipe. Use a high-quality gluten-free all-purpose flour blend that contains xanthan gum. Additionally, be mindful of any cross-contamination. A reliable source for gluten-free baking is America’s Test Kitchen.
Incorporating these tips will help you master the art of making delightful Olive Garden breadsticks right at home. Whether enjoying straight out of the oven or reheating frozen leftovers, you’ll find they remain a comforting staple!
Conclusion on Olive Garden Breadsticks
The joy of homemade breadsticks and sharing with loved ones
There’s something undeniably delightful about making olive garden breadsticks at home. The aroma fills your kitchen, inviting loved ones to join in the experience. These breadsticks are not just a side dish; they can spark conversations and create memories around the dinner table.
Imagine serving warm, buttery breadsticks to family or friends after a long day. It’s a small gesture that can turn an ordinary evening into something special. Did you know that sharing meals can enhance relationships? A study by Psychology Today highlights how cooking together can foster deeper connections.
So go ahead, gather your favorite people, and enjoy the warm, comforting pleasure of homemade breadsticks that bring everyone together. For inspiration and variations on this classic recipe, check out Serious Eats to elevate your next gathering!
Print
Olive Garden Breadsticks: The Best Homemade Recipe Ever!
Learn how to make the iconic Olive Garden breadsticks with this easy homemade recipe.
- Total Time: 1 hour 35 minutes
- Yield: 12 breadsticks 1x
Ingredients
- 2 cups all-purpose flour
- 1 cup warm water
- 1 tablespoon sugar
- 1 teaspoon salt
- 2 tablespoons olive oil
- 1 packet instant yeast
- 1/4 cup butter, melted
- 1 teaspoon garlic powder
- 1 teaspoon dried parsley
Instructions
- In a bowl, combine warm water, sugar, and yeast. Let it sit until frothy.
- Add salt, olive oil, and flour to the yeast mixture. Mix until a dough forms.
- Knead the dough for about 5 minutes, then let it rise in a warm area for 1 hour.
- Preheat oven to 400°F (200°C).
- Roll the dough into sticks and place them on a baking sheet.
- Brush melted butter over the breadsticks, then sprinkle with garlic powder and parsley.
- Bake for 15-20 minutes or until golden brown.
Notes
- For extra flavor, add more garlic powder to the butter.
- Serve with marinara sauce for dipping.
- Prep Time: 15 minutes
- Cook Time: 20 minutes
- Category: Bread
- Method: Baking
- Cuisine: Italian
- Diet: Vegetarian
Nutrition
- Serving Size: 1 breadstick
- Calories: 150
- Sugar: 1g
- Sodium: 200mg
- Fat: 7g
- Saturated Fat: 2g
- Unsaturated Fat: 5g
- Trans Fat: 0g
- Carbohydrates: 20g
- Fiber: 1g
- Protein: 3g
- Cholesterol: 5mg
Keywords: olive garden breadsticks, homemade breadsticks, easy bread recipes